An easy, joyful project that fits in a coffee break and still looks adorable. Let’s dive into why these tiny bunnies steal the show and how you can make your own in minutes. FYI, you might become the group’s go-to gift-giver.
What Makes Mini Easter Bunny Clay Charms So Charming
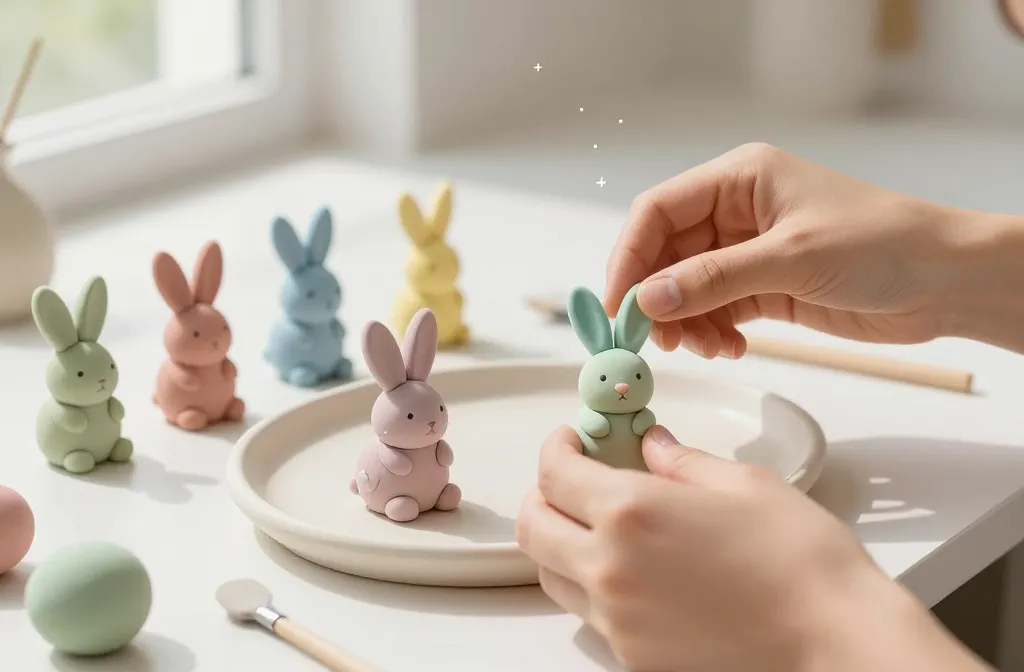
They’re tiny, they’re cute, and they’re incredibly customizable. You can switch up colors, add little sparkles, or give each bunny a tiny personality. The best part? You don’t need a fancy studio to start. Just a ball of clay and a splash of imagination.
Why clay over other materials?
– It’s forgiving for beginners. Press, roll, and adjust until you’re happy.
– You can bake or air-dry, depending on your clay choice.
– Finishing touches are simple—paints, glaze, or metallic pens bring these bunnies to life.
Choosing the Right Clay for Beginners
Diving into clay isn’t scary once you pick the right stuff. For tiny charms, you want something pliable and forgiving.
- Air-dry clay: No oven required, just patience for drying time.
- Polymer clay: Fast bake, strong finish, and super color-fast when cured.
- Modeling clay: Great for practice runs, but may require sealing.
Tips for soft clay success
– Knead well until smooth to avoid cracks.
– Work in small batches to keep the dough manageable.
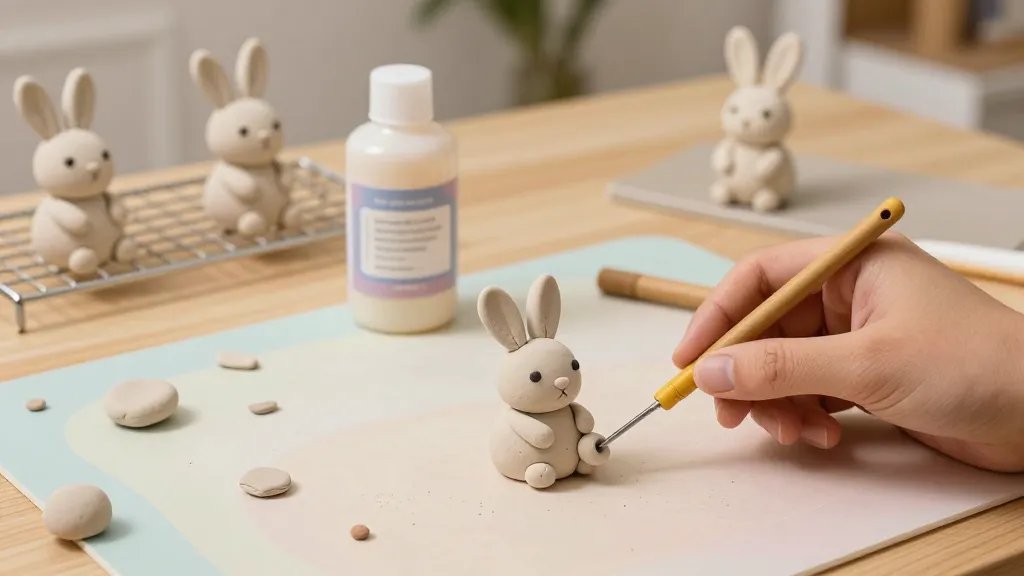
– Use a smooth tool to smooth seams so the finish looks professional.
Step-by-Step: Sculpting Your First Bunny
Follow these simple steps and you’ll have a ready-to-haggle-for-the-desk-end gift in no time.
- Shape a tiny ball for the head and a slightly larger ball for the body.
- Attach ears with a little slip of clay; pointy tips look super cute.
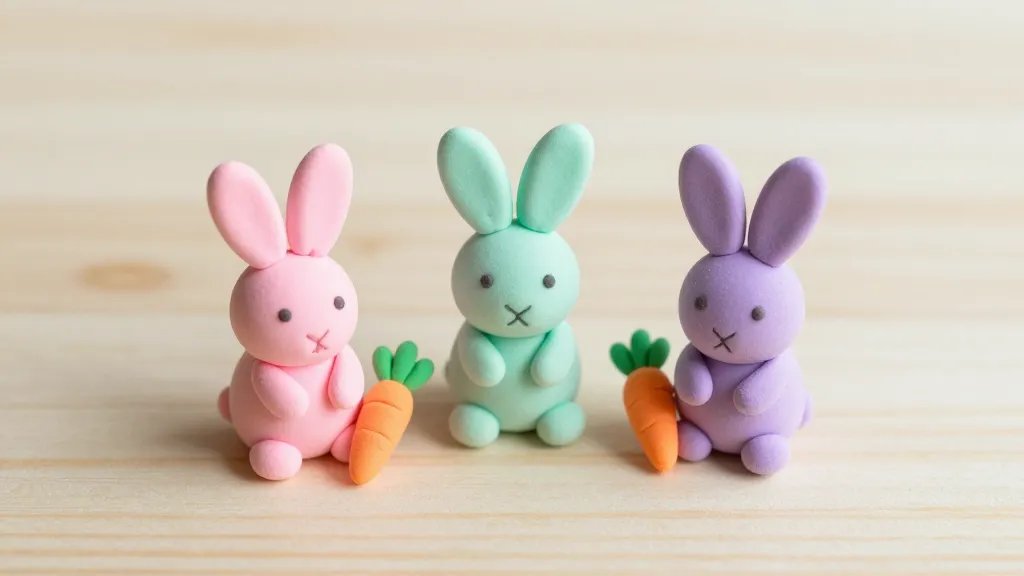
- Add tiny paws and a fluffy tail; a dab of white clay gives a classic bunny vibe.
- Feel free to add eyes with a fine-tipped pen or tiny beads.
- Let it dry or bake according to your clay’s instructions.
Decoration Ideas That Elevate Your Charms
Basic bunnies are adorable, but a few thoughtful touches take them to next-level cuteness.
- Pastel glaze: Soft pinks, blues, and yellows scream spring vibes.
- Mini accessories: Ribbon bows, tiny carrots carved from clay, or a tiny bell.
- Texture play: Stamp a tiny pattern onto the belly or ears for character.
Color palettes that pop
Try pairing a creamy bunny with mint accessories, or go bold with lilac and sunny yellow. IMO, contrast makes the charm pop on a bag or keychain.
Practical Uses for Your Mini Bunny Charms
These little guys aren’t just pretty to look at; they’re versatile.
- Birthday gifts: A tiny keepsake that’s thoughtful and inexpensive.
- Gift toppers: Attach to gift wrap for an extra smile.
- Keychains or bag charms: Durable finishes let them travel with you.
How to seal and protect your charms
– If you’re using air-dry clay, seal with a clear acrylic spray to prevent chipping.
– Polymer clay benefits from a proper bake and a shine glaze.
– Store in a dry place to avoid moisture damage.
Creative Variations to Try
Feeling inspired? Here are some playful twists to keep things fresh.
- Fluffy tail mini snow bunnies for winter charm sets.
- Garden-bunny duo with a carrot buddy—cute and whimsical.
- Monochrome chic: One color family with tiny metallic accents.
Seasonal spins you can implement fast
– Spring baby-bun models with flower crowns.
– Easter egg accents painted on the belly for a fun motif.
– Petite Easter-themed scenes on a small loop to wear as a pendant.
Tools and Supplies You’ll Want on Hand
You don’t need a full workshop to get started, but a few basics help a lot.
- Clay: Pick your preferred type (air-dry or polymer).
- Cutting tools: A simple clay knife and a needle tool work wonders.
- Sandpaper or a fine file: Smooths rough edges after curing.
- Finishes: Acrylic paints, glaze, and a sealing spray.
Storage and workspace setup
– Clear containers keep colors organized and ready to go.
– A non-stick mat or parchment makes cleanup a breeze.
– Work in a well-lit area so tiny details don’t vanish in the shadows.
FAQs
What type of clay is best for tiny charms?
Air-dry clay is easiest for beginners, while polymer clay gives you a quicker bake and a stronger, durable finish. If you want to keep things simple, start with air-dry and upgrade later.
Do I need special tools to make these charms?
Not really. A few basics do the trick: a small knife, a needle tool, and something to smooth surfaces. Optional but helpful: a silicone absorbent pad, a rolling pin, and fine-tipped brushes for painting details.
How long do these charms last?
If you seal them properly, they last a long time. Air-dry clay holds up with a spray sealant; polymer clay holds up well after baking and glazing. They’re durable enough for daily use as accessories.
Can I customize these for kids?
Absolutely. Keep the clay soft and safe, avoid small detachable parts, and use larger loops for keychains. Supervised playtime helps; these make great kid-friendly crafts.
What’s the best way to attach a charm to a bracelet or necklace?
Use a jump ring or a small metal bail threaded through a pre-made hole in the charm. Tie or wire in a loop to connect to your jewelry findings. It’s basically metal jewelry 101, but adorable.
Any quick tips to speed up the process?
– Roll out evenly to avoid thick spots that bake unevenly.
– Bake or dry in small batches to stay organized.
– Prep several color palettes in advance to keep momentum.
Conclusion
Mini Easter bunny clay charms are the kind of project you can start on a whim and end with a tiny army of cute. They’re perfect for gifting, decorating, or simply curating a cheerful collection that makes you smile every time you reach for your keys. IMO, the limit is your imagination—let the bunnies hop into your next craft session. If you’re feeling extra ambitious, turn a batch into a little Easter tree ornament set and watch friends swoon. Happy crafting, friends!


