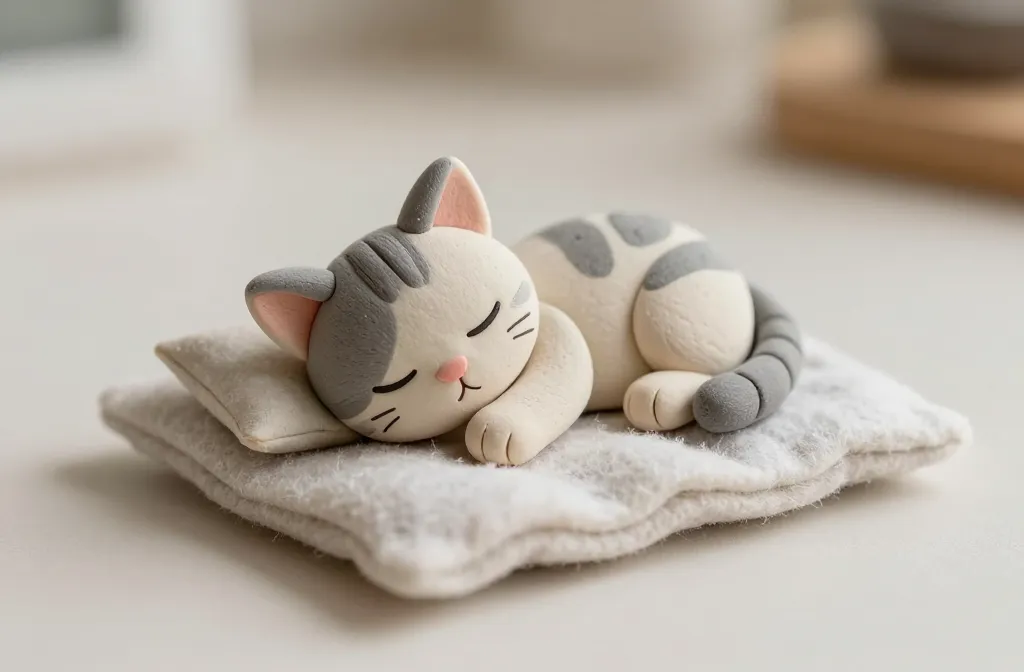
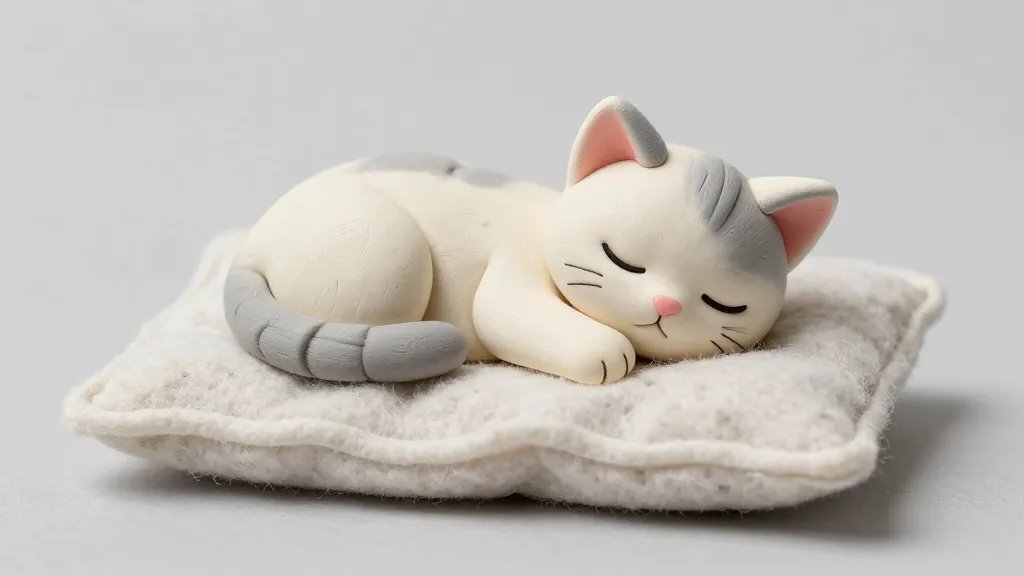
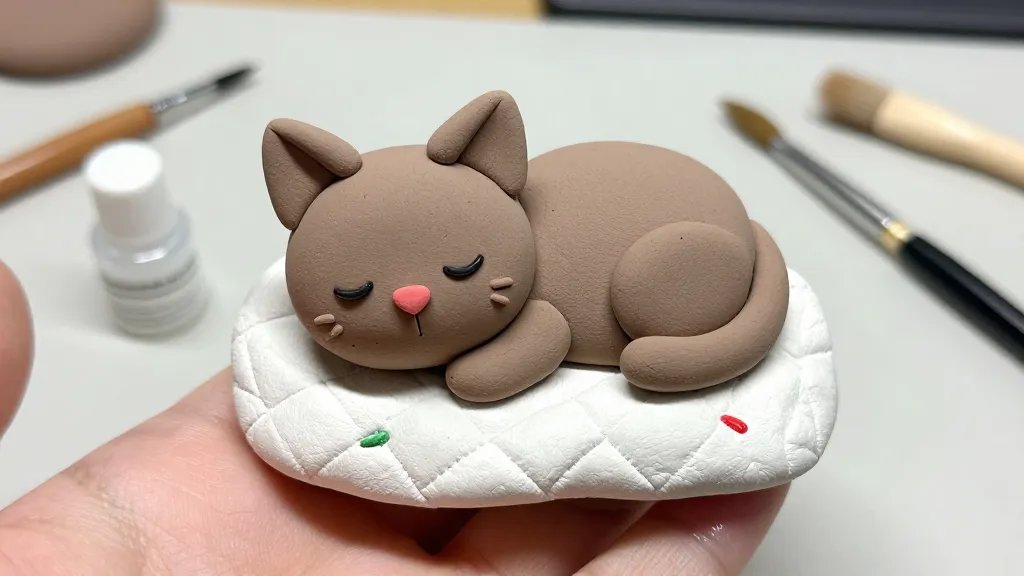
An adorable bundle of clay, a whisker-twitching nap, and a tiny masterpiece you can cradle in your hand. If you’ve ever wished your desk had a pocket-sized stress-reliever, this tiny sleeping kitten project is it. Let’s dive into a craft that’s easy, oddly soothing, and wildly shareable.
What You’ll Need to Get Cozy with Clay
Before you even rescue your first chunk of clay from the drawer, gather these essentials. You’ll thank yourself later when you’re not hunting around for a needle or a tool.
- Air-dry polymer clay in soft colors: cream, gray, pink for the nose, and a dab of black for whisker dots
- Clay cutting tools or a sharp pin for fine details
- White glue or craft glue for seams, a small paintbrush, and a tiny acrylic brush for shading
- Fine sandpaper or a nail file (gentle, please) to smooth surfaces
- Clear gloss varnish or sealant to give that plush-kitten glow
- Optional: a tiny felt blanket or clay pillow for extra cuteness
Shape Your Kitten: The Basic Pose
The magic of a tiny sleeping kitten lies in the pose. Think curled paws, a tucked tail, and a dreamy little face.
- Body: Roll a smooth oval for the torso. Add a slightly smaller ball for the head and pinch in the cheeks a bit for instant character.
- Paws: Create two tiny ovals for front paws and a couple of little wedges for back paws. Place them tucked under the body if you want that snuggly nap look.
- Tail: A thin cylinder coiled around the side adds coziness without stealing the show.
- Face: Use a tiny dot of black for eyes, a subtle v-shaped nose, and a soft smile. Pro tip: tiny dot eyelashes can make it look extra dreamy.
Pro Tip: Keep it Soft
If you press too hard, you’ll flatten the kitten into a pancake. Light, fluffy touches will keep the figure looking plush, like a real tiny plush toy.
Details That Make It Mine
The little details are what make a sleeping kitten feel alive. Don’t rush—these micro-touchups are worth the extra minutes.
- Whiskers: Use a fine pin or thin wire to lay three whiskers on each side. Space them evenly and keep them dainty.
- Nose and Mouth: A tiny triangle nose and a curved mouth convey serenity after a grand yawn. You can add a soft blush with a bit of pink clay or paint.
- Shading: A touch of gray or light brown along the edges gives depth. Don’t overdo it—gentle shading reads better on such a small sculpture.
Texture Tricks: How to Make It Look Plush
– Lightly buff with a soft cloth to give a velvet-sheened finish.
– A tiny dab of matte varnish makes it feel squishy rather than plasticky.
Stability and Finish: Keeping Your Tiny Kitty Standing Tall
Nothing kills the vibe like a wobbly kitten. Here’s how to keep your sculpture stable and smugly proud on a shelf.
- Core support: Insert a thin wire or a toothpick into the base while the clay is still soft to help it stand.
- Drying patience: Let it dry fully before handling—overnight is a safe bet. Humidity? It can complicate the bake and the glaze.
- Seal it: A light coat of clear glaze adds shine and protects the tiny details from fingerprints.
Display Ideas: Tiny Nap, Big Impact
Now that your kitten is sculpted, how do you show it off? Here are some playful options.
- Display diorama: A miniature blanket made from scrap felt or clay gives a cozy bed vibe. You can create little pillows too.
- Desk buddy: Set it on a stack of books or a wooden coaster; it’s a conversation starter and a reminder to slow down and breathe.
- Giftable : A tiny sleeping kitten makes a perfect handmade gift. Include a note about a moment of calm in a busy day.
Variations: Remix the Cute
If you’re addicted to tiny critters, here are easy twists to keep the joy going without reinventing the wheel.
- Different poses: Try a curled-up ball or a stretched-out nap to change the silhouette.
- Mom and kitten duo: Create a tiny mother cat and her kitten for a heartwarming pair.
- Seasonal flair: Add a miniature scarf for winter or a leaf blanket for autumn to shift the vibe without much extra work.
Palette Play: Color Combinations That Pop
– Classic cream and gray gives a gentle, timeless kitten.
– Fun pastel pairing (mint, blush, lilac) creates a whimsical vibe.
– A bold charcoal with a pop of pink nose stands out in a busy workspace.
Tips for the Beginner: Do’s and Don’ts
New to clay? You’ll still want to avoid common missteps that can derail your tiny masterpiece.
- Do: Work on a clean, smooth surface and keep your hands dry to avoid fingerprints.
- Don’t: Forcing joints to bend when the clay isn’t ready; patience matters here.
- Do: Keep a tiny spray bottle nearby to keep clay workable if it starts to dry out on you.
- Don’t: Over-warnish with gloss—gloss can wash out the soft look you’re going for.
FAQ
How long does it take to complete a tiny sleeping kitten?
It usually takes about 1–2 hours, depending on how detailed you want to be. If you’re new, add another half hour or so for the first project.
What kind of clay is best for a durable finish?
Air-dry polymer clay is forgiving and dries hard enough to hold details. If you want extra durability, bake polymer clay according to the package instructions and finish with a sealant.
Can I paint the eyes instead of using clay for them?
Yes! You can paint tiny eyes with a fine brush after the clay dries. Acrylic paints work great, and a tiny white dot can add a lively sparkle.
How do I fix a seam between head and body?
Gently blend with a small amount of fresh clay or apply a tiny dab of glue along the seam and smooth it. If it feels fragile, patch with a thin strip of clay and blend.
What if my kitten tips over after drying?
If it’s light, you can reattach with a dab of glue and a pinch of fresh clay around the base. Let it set fully before moving it again.
Conclusion
Tiny sleeping kitten clay craft is more than a cute object. It’s a pocket-sized reminder to slow down, breathe, and have a little fun with your hands. The process is forgiving, the results are shareable, and the joy is contagious. FYI, once you start, you’ll probably want to remix these little furballs forever. So grab your clay, pick a pose, and craft a cuddle-worthy centerpiece that fits in the palm of your hand.


