An easy, upbeat guide to creative Easter crafts that turn simple eggs into tiny works of art. If you’re tired of boring dye jobs, this article will spark ideas, supplies, and a few DIY tricks you’ll actually want to try. Let’s dive in and have fun with color, texture, and a bit of holiday whimsy.
Why Colorful Easter Crafts Matter
Color lifts a room, mood, and maybe even the weather. Easter crafts aren’t just for kids; adults crave the same joy and a chance to show off something unique. FYI, creativity is contagious—hand an egg to a friend and watch the compliments roll in.
Get Ready: Tools, Materials, and Quick Prep
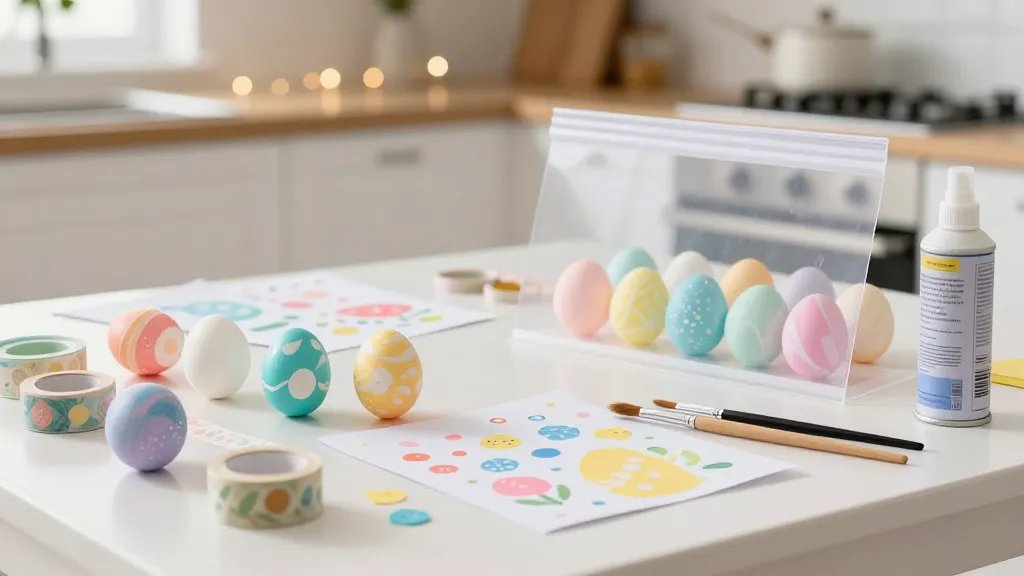
– Basic supplies: eggs (real or plastic), paints, markers, brushes, and a good sealant.
– Easy-on-the-wallet options: washi tape, stencils, craft glue, and glitter (sparingly, please).
– Safety first: if you’re using real eggs, keep them cool and dispose of shells responsibly.
– Quick prep tip: lay out a “workspace shield” with scrap paper or a plastic mat to prevent color chaos.
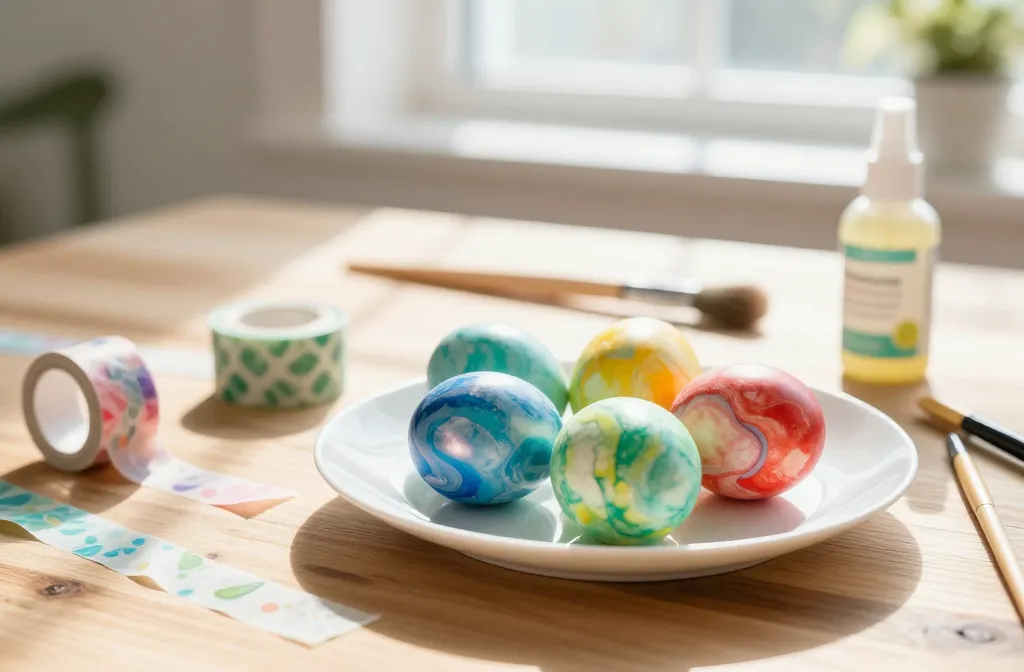
1. Dazzling Marble Eggs Without Special Dyes
You don’t need fancy dye kits to get marble vibes. Here’s a simple method:
– Dab a few colors on a paper plate.
– Lightly swirl with a cotton swab, then roll the egg through the swirls.
– Let dry, then seal with a clear spray for shine.
Tip: rotate the egg as you roll to keep patterns balanced. Do you want a subtle look or loud, peacock-bright marbling? Your call.
Subtle Shimmer Marble
– Use metallic paints in gold, silver, and rose gold.
– After marbling, brush a thin glaze to add depth.
– Finish with a matte spray for less glare.
Bold Kaleidoscope Marble
– Try three bright colors—turquoise, coral, lemon.
– Tween effect: flick extra color on one side for a burst pattern.
2. Stamped Patterns That Pack a Punch
Stamps aren’t just for paper—your eggs can wear them too.
– Use rubber stamps with kid-friendly designs or DIY your own stamps from erasers.
– Ink pads work, but paint works even better on curved surfaces.
– Repeat patterns around the egg in a consistent rhythm for a polished look.
Geometric Stamp Fun
– Create triangles, diamonds, and lines with a single stamp shape.
– Alternate colors every couple of stamps to keep it dynamic.
Floral Touches
– Simple petal stamps around the middle of the egg create a fresh garden vibe.
3. Nature-Inspired Egg Art
Mother Nature already gave us the color wheel; let’s use it.
– Leaf prints: press colored leaves onto the egg for delicate silhouettes.
– Flower petals: place a few petals on the egg, then brush with a thin glaze to transfer shapes.
– Bark textures: press a rubber stamp carved to resemble wood grain for a rustic look.
Leaf Imprint Deep Dive
– Choose leaves with strong veins for crisp lines.
– Use a medium-thick paint to ensure the leaf leaf’s details transfer cleanly.
– Seal to protect the delicate patterns.
4. Mixed-Media Magic: Yarn, Glitter, and Glitter Glue

Mix different textures for a tactile Easter delight.
– Yarn wraps: wrap a portion of the egg with colored yarn and secure with glue for a cozy look.
– Glitter glue accents: apply sparingly to outlines or small shapes so the sparkle pops without getting out of hand.
– Paper scrapes: tiny torn paper pieces form mosaic patterns.
Textured Terrific Tots (and Adults) Guide
– Use a light spray of glue before adding textures to prevent cracking.
– Start with a base color, then add layers for depth.
– Finish with a clear sealant to keep textures in place.
5. Stained-Glass Inspired Eggs
Think stained glass, but sooner to Easter brunch.
– Draw lead-lines with a black marker to create the “frames.”
– Fill sections with translucent paint, colored tissue, or coloured window clings.
– For extra shine, seal and then reapply a gloss layer on top.
6. Minimalist Modern Eggs for a Chic Table
Sometimes less is more.
– Solid pastel blocks: use painter’s tape to section off areas, paint, then peel away tape for crisp lines.
– Monochrome with a twist: pick one color family and vary shades around the egg.
– Add a tiny metallic dot at the top or bottom for a buzz of glam.
When to Stop: Balancing Busy vs. Beautiful
– If an egg feels crowded, back away and let a single detail sing.
– Bold color? Pair with a simple outline or dot to prevent overload.
7. Upcycling and Eco-Friendly Crafts
– Use broken crayons to melt and create marble swirls—no waste, just color.
– Reuse fabric scraps for tiny coats on eggs, or wrap with twine for a rustic vibe.
– Choose non-toxic paints and sealants to keep the fun safe for kids and pets.
FAQ
What’s the best way to seal Easter eggs for display?
Paraphrased: A clear spray sealant or acrylic varnish provides a protective, glossy finish. Apply thin, even coats in a well-ventilated space and let each coat dry fully before the next.
Can I use real eggs for all these ideas?
Yes, but handle them gently. If you plan to eat them later, dye them; otherwise, artificial eggs are a great reusable option that won’t spoil.
How long do these crafts take?
Most projects take 20–60 minutes per egg, depending on complexity. If you’re crafting with kids, build in a few extra minutes for drying time.
Which colors are best for a spring vibe?
Pastels are timeless—soft pinks, mint greens, pale blues, and sunny yellows. Add a POP of metallic for drama.
Any tips for creating a cohesive Easter display?
Choose a color scheme and stick to it across eggs, baskets, and decor. Moderation is key—let a few standout eggs anchor the display.
Conclusion
Easter colouring craft projects aren’t just about pretty eggs; they’re about the joy of making something with your own hands. Whether you’re chasing a gallery-worthy aesthetic or a playful family activity, these ideas offer a spectrum of styles. FYI, the best part is the process—experiment, laugh at your own gluey mistakes, and celebrate the tiny masterpieces you end up with. So grab your paints, roll up your sleeves, and get ready to turn ordinary eggs into conversation-worthy art.


