An invasion of adorable, squishy specters is coming to your decor shelf. If you want something festive, kid-friendly, and totally instagrammable, clay ghosts are your new best friends. FYI, they’re easier to make than you think and endlessly customizable.
Why Clay Ghosts Make the Best Seasonal Decor
Clay ghosts are the DIY unicorn of holiday decorations: affordable, lightweight, and endlessly charming. They don’t require special skill, and you can tailor them to any vibe—from spooky chic to candy-colored cute. Want a quick win? A handful of ghosties on a string instantly elevates a mantel or windowsill.
Getting Your Tools Ready Without Drama
Before you start, gather the essentials so you don’t spill your creative juice mid-project.
- Air-dry clay or polymer clay (choose based on how long you want them to last).
- Black and white acrylic paints, plus a fine-tipped brush for eyes.
- Soft beads or googly eyes for extra personality (optional but fun).
- A rolling pin or bottle to smooth surfaces.
- Wax paper or parchment to prevent sticking.
- A simple rhythm: a few shapes, a few eyes, a few smiles—boom, ghosts!
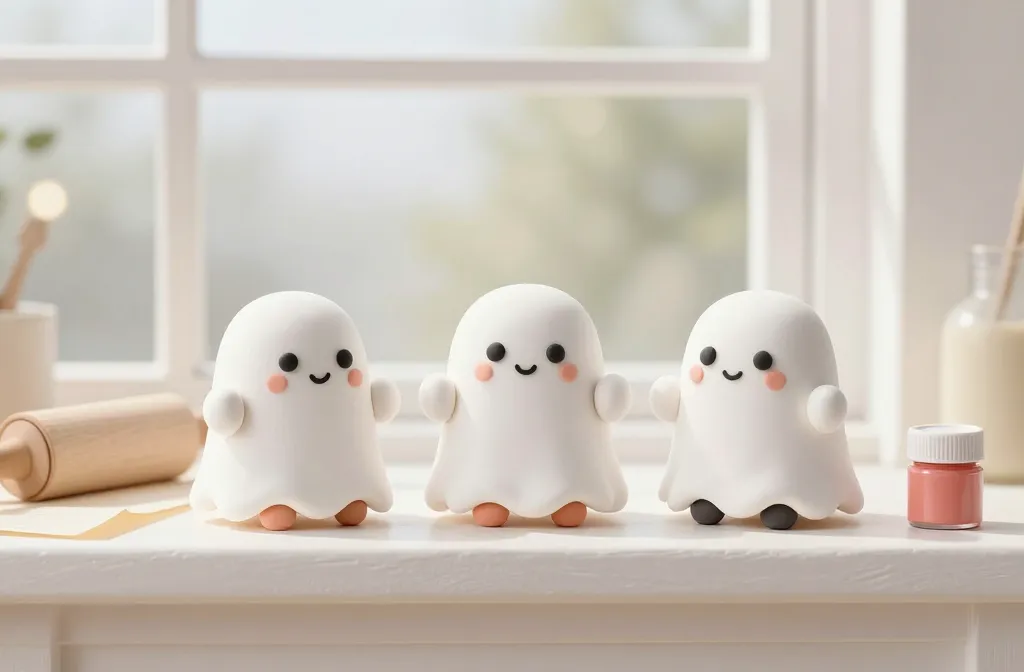
Shapes That Scream Cute, Not Spooky
The secret sauce is the silhouette. Round, chubby ghosts with tiny feet feel friendlier than tall, lean specters. Try these shapes:
- Classic round blob with little feet
- Fluffy teardrop with a wavy edge
- Mini marshmallow-like spheres for add-ons
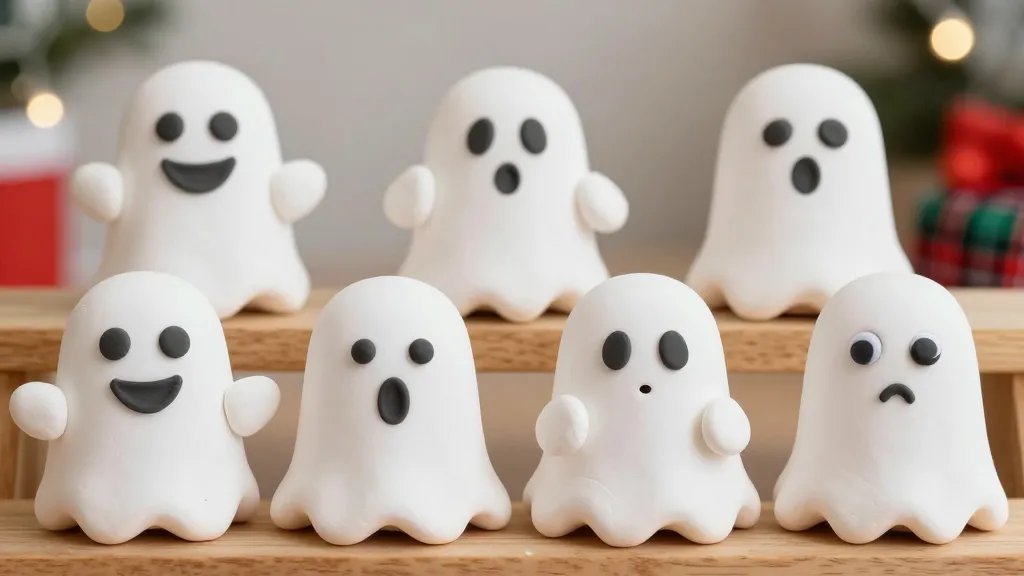
Optional Pro-Tip: Add Gentle Features
Give each ghost a little personality with simple features:
- Two dot eyes and a small smile
- Blush cheeks for extra cuteness
- Tiny hands or looping arms for whimsy
Painting and Detailing Without Tears
If you want your ghosts to pop, a dash of paint goes a long way. Use a light hand and dry brush techniques to keep the look airy.
- Paint the whole ghost white first, then add black eyes and a smile.
- Keep the background light; ghosts should feel luminous, not muddy.
- Seal with a spray sealer if you’re using polymer clay.
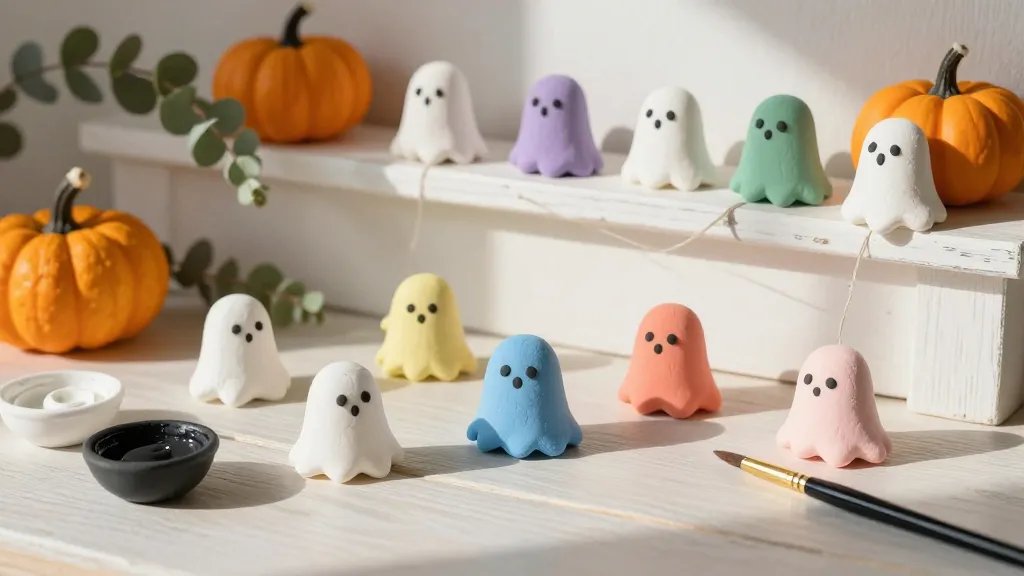
Palette Ideas for Different Vibes
– Classic: crisp white ghosts with black eyes.
– Sunset: pale gold or peach ghosts for a warm glow.
– Halloween chic: charcoal gray ghosts with bright eyes for contrast.
Display Ideas That Make Them Pop
Decor should be eye-catching but not chaotic. Here are easy ways to showcase your ghosts.
- Line a mantel with a string of ghost ornaments, evenly spaced.
- Arrange a ghost scene in a glass hurricane with cobweb accents.
- Use a chalkboard sign nearby with a cute ghost pun.
- Stand a few ghosts on tiny wooden posts to create a spooky forest vibe.
Mantel Magic
Create levels with stacked boxes and place ghosts at varying heights. This adds depth and makes your display feel curated rather than slapped together.
Kid- and Pet-Friendly Decor Tips
Clay ghosts are perfect for households with little ones or fluffy companions. They’re lightweight, non-toxic when used as intended, and easy to move.
- Let kids help with eyes and smiles to foster creativity.
- Keep ghosts out of reach of curious pets or secure on a thin twine.
- Choose air-dry clay for safer handling and quick fixes.
Safety Quick Wins
– Use non-toxic paints and finishes.
– Bake polymer clay only if the package instructs; otherwise, air-dry is a safer bet for homes with kids.
– Store finished ghosts in a dry, cool place to avoid warping.
Seasonal Variations: Beyond Halloween
Cute clay ghosts aren’t limited to October. They fit Christmas, spring, or any time you want a soft, playful vibe.
- Snowy ghosts with glitter accents for a festive winter scene.
- Pastel ghosts with tiny scarves for a cozy holiday look.
- Glow-in-the-dark eyes for a magical midnight display.
DIY Quick-Change Ideas
– Swap out scarves and hats to match the season.
– Add mini felt accessories to give each ghost a unique personality.
FAQs
Are clay ghosts durable enough for year-round display?
Clay ghosts can be durable if you seal or bake them properly and keep them in a sheltered spot. Air-dry clay is flexible and good for light indoor use, while polymer clay, when baked as directed, is sturdier. If you’re outdoors, bring them in when weather shifts blastily. FYI, don’t force them into rough surfaces where they can crack.
What’s the easiest way to attach ghosts to a string or garland?
Attach with clear fishing line or thin satin ribbon. Space them evenly and knot the ends. You can also poke a tiny hole and thread them onto a sun-soaked branch or a decorative wire frame. Simpler is often better here, so start with a basic garland and upgrade later if you’re feeling fancy.
Can I use polymer clay for beginners?
Yes! Polymer clay is forgiving and comes in lots of colors. The key is following the bake temperatures exactly and letting pieces cool completely before handling. It’s not a race, so take your time shaping eyes and smiles. A quick tip: bake multiple pieces at once to save time.
How long do the ghosts last without discoloring?
With proper sealing, air-dry ghosts can last several seasons, particularly if kept indoors away from direct sunlight. Polymer clay ghosts can last for many years if you avoid moisture and exposure to harsh conditions. FYI, repainting small details every season can refresh their look.
What are some budget-friendly embellishments?
Use what you have: scrap fabric for scarves, baking glitter, beads for eyes, and buttons for noses. Mismatched textures add charm. You don’t need a big shopping spree to make them adorable.
Conclusion
Clay ghosts are a delightful, low-stress way to inject whimsy into your seasonal decor. They’re kid-friendly, pet-friendly with care, and endlessly customizable. So grab some clay, channel your inner crafts nerd, and start shaping little ghostly pals that brighten up every corner. Ready to give your space a cute, cozy haunting? IMO, you’ll want to make a whole parade of them.


