An explosion of color, charm, and tiny clay wonders—that’s what seasonal decor cravings look like when they meet crafty hands. If you’ve got a soft spot for adorable shapes and pinchable textures, you’re in the right corner of the internet. Let’s dive into why these little clay cuties deserve prime real estate on your shelves.
Why Clay Ornaments Make Seasonal Decor Way More Fun
Clay ornaments aren’t just cute to look at; they’re a tiny project you can finish in a rainy afternoon or while binge-watching your favorite show. They’re lightweight, customizable, and forgiving for beginners. FYI, the joy of adding a handmade touch to a holiday tablescape is unmatched.
Starter Pack: Essential Supplies for Clay Ornament Magic
- Air-dry clay or polymer clay depending on your vibe
- Clay tools: roller, cutter, needle, and a tiny brush
- A baking sheet, parchment paper, and a safe sealant
- Colorful acrylic paints and fine-tip markers
- Mini punch-outs, ribbons, and little tassels for flair
Don’t overthink it. Start with a few shapes you love and build from there. The goal is cute, not complicated.
Shapes That Sip the Spotlight
Clay loves shapes, and seasonal decor loves shapes that tell a story. Here are some crowd-pleasers you can whip up fast.
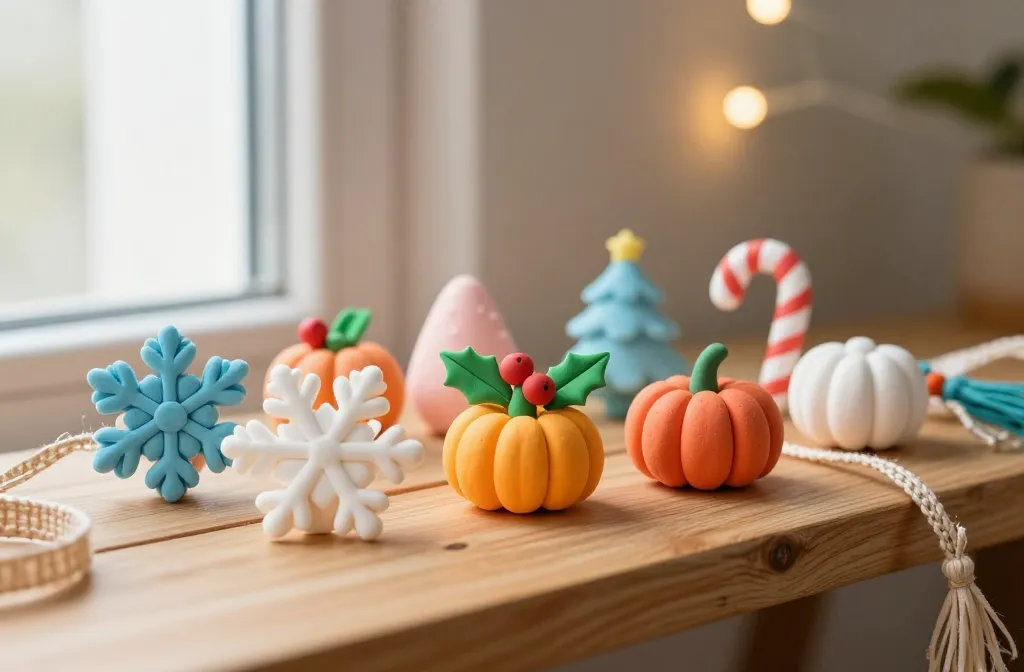
Seasonal Favorites
Snowflakes, pumpkins, holly berries, and candy canes—these staples are perfect for quick projects. Make a tiny snowflake with delicate arms, or a plump pumpkin with a curly stem. Simple lines can look stunning when the paint job is bold.
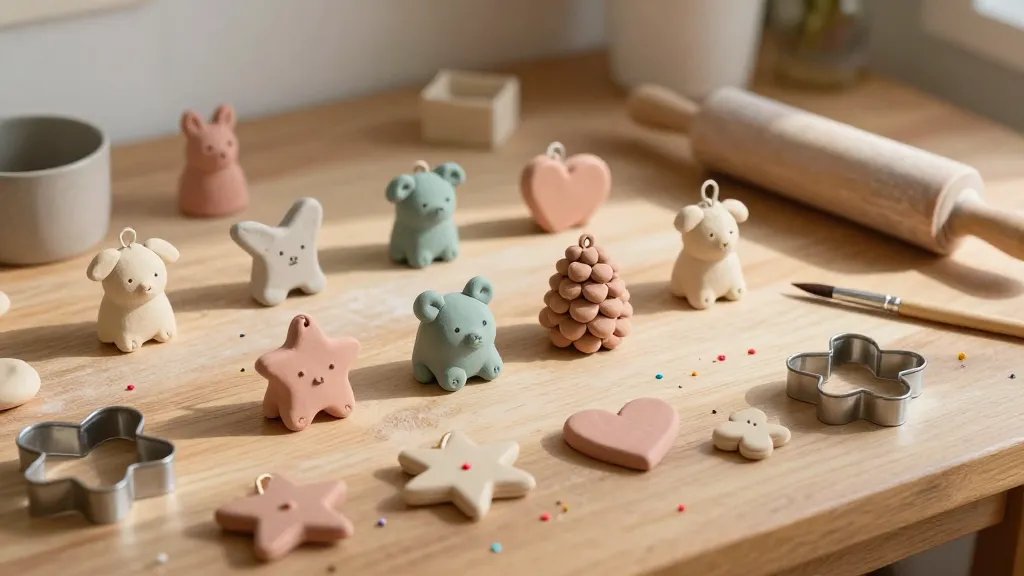
Whimsical Wildlife
Squirrels nibbling acorns, owls with big eyes, or foxes wearing tiny scarves—these little critters add personality to shelves and trees. They’re surprisingly easy to sculpt with rounded edges and a couple of curves.
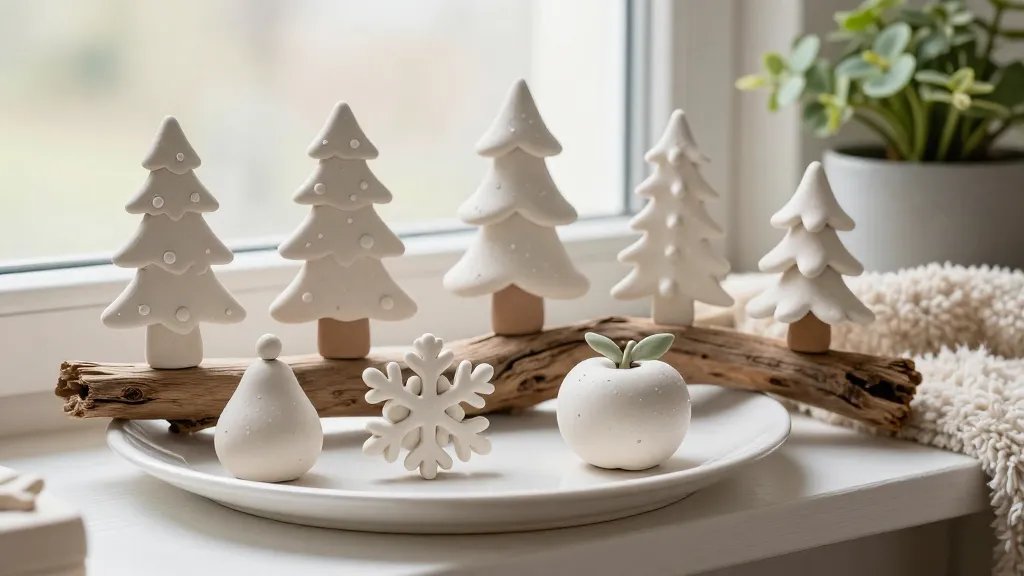
Mini Seasonal Scenes
Create a tiny winter village or a cozy autumn corner. A clay snowman beside a pine tree or a leaf-strewn bench can evoke nostalgia with just a small scene.
Color Play: Painting and Finishing Tips
Painting clay is where the magic happens. Bold pops of color or soft pastels—your call. Here are quick tips to make colors last.
- Use a primer if your clay is very dark or opaque.
- Seal with a clear sealant to protect the finish and prevent chipping.
- Accent with metallics for a little luxe vibe. FYI, a dab of gold paint takes a piece from cute to chic.
- Apply thin coats and let each layer dry—nobody likes globbed-on color.
Textures that Bring Everything to Life
Texture adds depth beyond color. You can achieve it with simple tools and clever techniques.
Soft Scales and Woven Looks
Indent tiny lines to mimic fur or scales, or press a textured leaf into the clay for a delicate imprint. Texture is your friend when you want a handmade, imperfect charm.
Glaze and Gloss
A glossy topcoat can make colors pop and protect your little art. If you want a matte vibe, go for a satin finish—both look adorable on a seasonal shelf.
Display Ideas: Where Your Ornaments Live Their Best Life
Now that you’ve got your cute clay crew, where do they go? Here are some simple display ideas that don’t scream “DIY project in progress.”
- Hang a garland along a mantel with a mix of shapes and sizes
- Fill a glass jar or cloche for a mini-scene centerpiece
- Adorn a snow-danked branch bouquet as a whimsical wall installation
- Pair several ornaments with a tiny string of fairy lights for magical glow
Storage and Care: Keeping Your Clay Creations Looking Fresh
To keep the magic intact, store wisely and handle with care.
- Let fully dry before sealing to avoid cracking
- Store in a shallow box with padding to prevent chipping
- Avoid excessive humidity, which can warp delicate pieces
- Dust lightly with a soft brush or cloth instead of washing
DIY Fast-Track: A Simple Project You Can Finish Tonight
If you’re itching for a quick win, try this 20-minute ornament:
- Roll a small ball of clay and flatten slightly to make a disc
- Cut a tiny star or heart shape, then pierce a hole at the top for a hanger
- Paint with cheerful color blocks and add a tiny face or pattern
- Seal with a clear coat and thread a ribbon through the hole
FAQ
Do I need special clay to start?
Not at all. Start with air-dry clay for easy handling and quick results. If you already know you’ll love clay projects, polymer clay is a good long-term option because you can bake it to harden and you won’t need to wait for dry time.
How durable are clay ornaments for seasonal decor?
They’re pretty sturdy once fully cured and sealed. Handle them gently, especially hanging in drafty spots. If you’re unsure about a finish, test on a tiny scrap first.
Can I personalize ornaments for gifts?
Absolutely. Personalization is where clay shines. Add initials, dates, or tiny symbols that reflect the recipient’s vibe. It’s thoughtful, handmade, and incredibly cute.
What finishes look best on clay?
Glossy seals make colors pop and feel crisp, while matte finishes give a soft, cozy vibe. Metallic accents are the dash of glam many pieces crave. IMO, a little gold or copper goes a long way.
How do I prevent cracking during drying?
Bake or air-dry evenly and avoid thick slabs. If you’re air-drying, cover loosely and let time do the work. Thin layers dry faster and crack less.
What are some quick display tips for small spaces?
Use a shallow tray with a mix of heights—think little risers, a cluster of ornaments, and a sprig of greenery. A transparent vase with a few pieces can also create a cute vignette on a coffee table.
Conclusion
Clay ornaments are a delightful, approachable way to season your decor with personality. They’re forgiving, endlessly customizable, and tiny enough to finish in a single afternoon. So grab a ball of clay, some colors, and a friend to chat with while you craft. You’ll end up with a collection that’s uniquely yours and perfectly Instagram-worthy. Happy claying!


