An instant brain-boost for Easter vibes and kid-approved creativity. This little paper plate bunny craft is simple, adorable, and surprisingly entertaining. Let’s dive in and get those little hands busy with smiles.
Why This Craft Works Right Now
Kids love a project that’s quick, messy-free, and yields something they’re proud of. Paper plates are cheap, easy to find, and endlessly versatile. FYI, you can customize colors, eye shapes, and accessories to fit your family’s vibe. It’s a win for busy parents and a win for curious kids.
Materials You’ll Need (Keep It Simple)
- Paper plates (one per bunny, plus a few extras for practice)
- Construction paper in white, pink, and other fun colors
- Safety scissors
- Glue or glue sticks
- Markers or crayons
- Googly eyes or draw-on eyes
- Cotton balls or pom-poms (for fluff, optional)
- Elastic string or a paper fastener if you want a hanging bunny
Step-by-Step: The Easy Route to Cute
- Trim the plate’s edge if you want a more rounded bunny face. Not a must, but it makes a sleeker result.
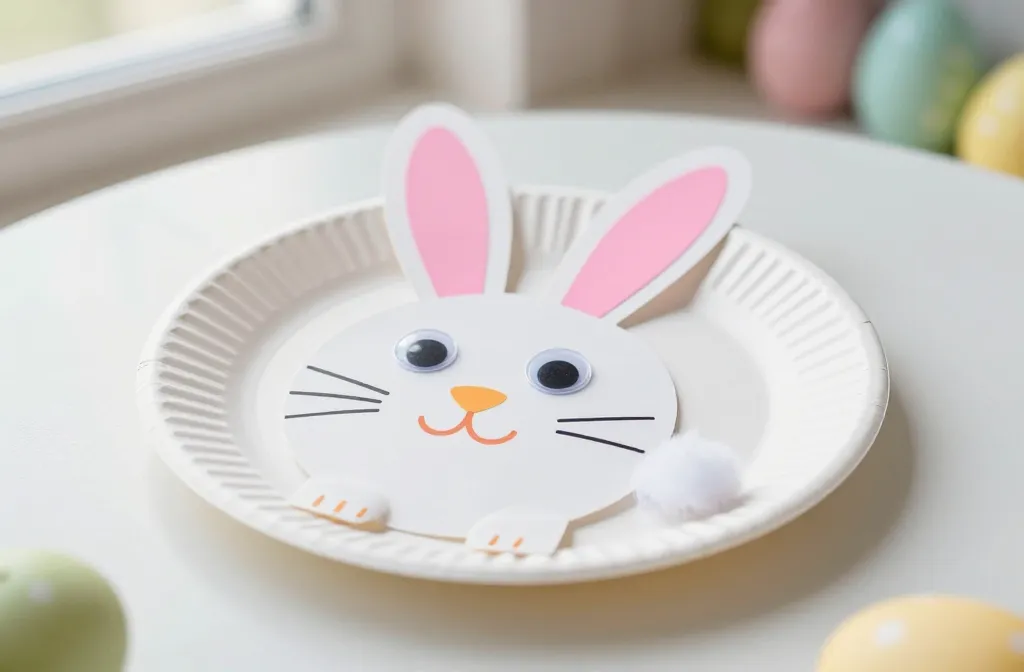
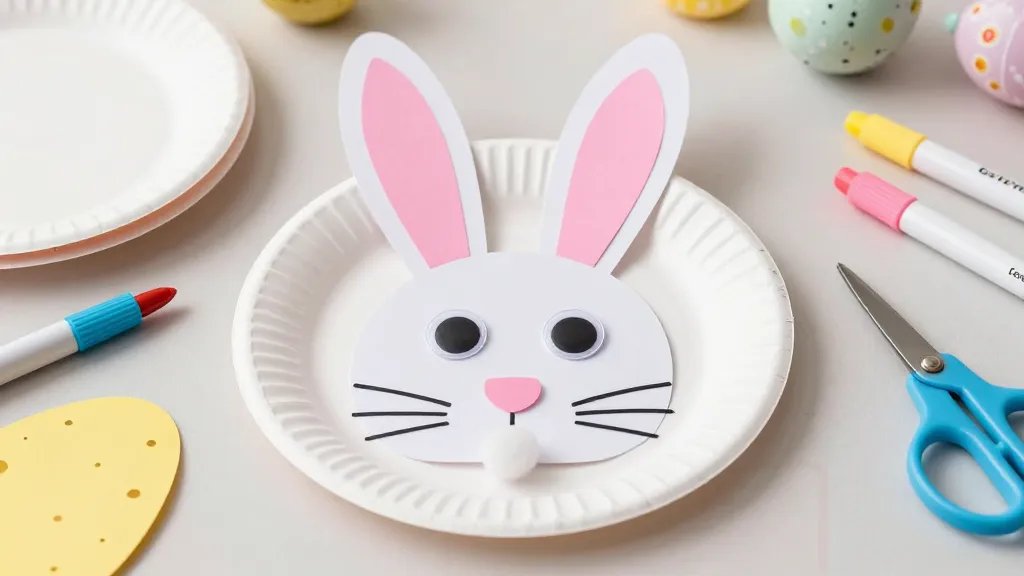
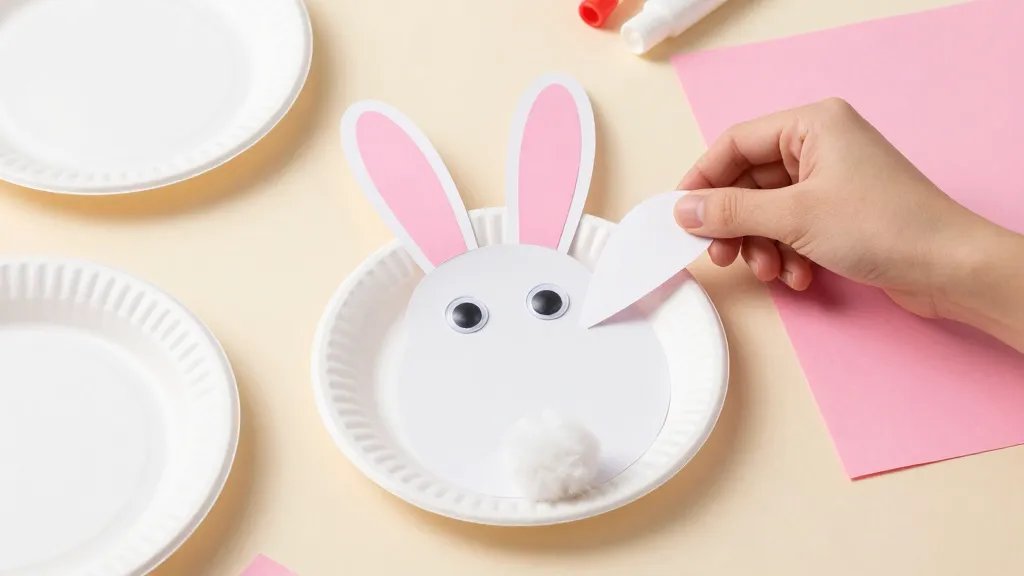
- Cut two long ears from white construction paper. Add a pink inner ear for pop.
- Glue the ears to the back of the plate so the ears stick up when viewed from the front.
- Draw a bunny face with markers, or glue on googly eyes and a pink nose.
- Decorate the plate with markers or extra paper cutouts. Think whiskers, cheeks, or a tiny bow tie for personality.
- Finish with cotton fluff on the cheeks or tail. It’s adorable and adds texture.
- Optional: Attach a string to turn it into a hanging bunny for a door or wall display.
Color Hacks: Make Each Bunny Unique
Kids love expression, and color is the shortcut to personalization. Try these ideas:
- Use pastel palettes for a classic Easter vibe.
- Swap white plates for kraft or brown ones for a rustic look.
- Give bunnies rainbow bows, dotted ears, or glitter accents for flair.
Subtle Texture Tricks
Texture makes photos pop in your snail-speed craft gallery. Try:
- Gluing small pieces of tissue paper onto the ears for a fluffy effect.
- Using crinkled paper strips to create a furry cheek look.
- Dusting with a light sprinkle of glitter glue to catch the light.
Kids’ Involvement: Easy Ways to Include Everyone
Let kids lead with their ideas. You’ll be surprised what they come up with when given creative room. Ask questions like, “What should we name our bunny?” or “Which color should the eyes be?” You’ll get giggles and a sense of ownership that makes the craft memorable.
Age-Appropriate Roles
- Young preschoolers: Glue ears and eyes, color the plate with markers.
- Early elementary: Cut ears with safety scissors, help with mouth and whiskers.
- Older kids: Design patterns, decorate with advanced textures, and decide if it should be a hanging ornament.
Display Ideas: From Tabletop to Wall of Fame
Your bunnies don’t have to stay on the table. Here are quick display ideas:
- Line a row of bunnies on a window sill with mini clothespins.
- Create a seasonal garland by stringing several bunnies together.
- Trim the plate’s edge and mount on a cardstock backdrop for a cute card or wall art.
Hanging Bunny Tutorial
If you want to turn your bunny into a hanging decoration, punch a small hole near the top and thread a color-coordinated string through. Tie a knot and hang on a door handle, curtain rod, or classroom display. Simple, festive, and budget-friendly.
Common Pitfalls and How to Avoid Them
Foibles happen. Here’s how to keep the craft snappy and fun:
- Too much glue makes the plate soggy. Use a thin line, not a swamp of adhesive.
- Paint or markers smudging on the plate? Let the ears dry first to avoid color bleed.
- Little ones crushing the ears? Glue them flat first, then encourage standing to get a bit of extra height.
FAQ
Can I use materials I already have at home?
Absolutely. Odds are you already own most of what you need. Cardboard scraps, markers, glue, and paper plates are classic pantry-craft staples. FYI, repurposing keeps waste down and creativity up.
What age is best for this craft?
Kids as young as 3 can participate with supervision. Older kids can handle more precise cutting and more detailed decorating. The beauty is that you can scale the difficulty up or down.
How long does this craft take?
Roughly 20 to 40 minutes per bunny, depending on the detail level. If you’re batching many bunnies for a party, you’ll want to set up a little workflow station to keep things moving.
Can these be used as gift toppers?
Totally. Attach a small message on the back to turn your bunny into a charming personal card topper or gift tag. It adds a handmade touch that friends and family will love.
What about cleanup? Any tips?
Lay down a washable mat or newspaper, and have a wet wipe station handy. Quick, easy cleanup keeps the vibe high and stress low.
Creative Variations to Try Next Time
- Bunny family portraits: Create a family of bunnies with varying sizes using multiple plates.
- Monochrome bunnies: Use shades of one color for a modern, chic display.
- Seasonal twists: Turn the ears into bunny ears with sunglasses for a sunny spring vibe or add tiny flower crowns for a whimsical touch.
Why Kids Love It so Much
It’s not just about the finished bunny. It’s the process—the mixing of colors, the gluey fingers, the tiny victories when eyes line up perfectly. The craft gives kids a canvas for imagination and a tangible product they’re excited to show off. IMO, that little glow when they say, “Can we make another one?” is priceless.
Final Thoughts: A Craft That Sticks (In More Ways Than One)
This paper plate Easter bunny craft is more than a cute project; it’s a bonding moment, a tiny win, and a doorway to endless mini-creations. If you’re hunting for a speedy, flexible, and adorable activity, you’ve found it. FYI, keep a spare few plates on hand—the kids will want seconds and thirds of cuteness.
Conclusion
From simple materials to big smiles, this craft checks all the boxes. It’s easy, adaptable, and perfect for Easter celebrations, classrooms, or a cozy weekend activity. Grab a plate, some markers, and the buddy energy you’ve got bottled up—your kitchen table is about to become a tiny springtime workshop.


