Making miniature clay candles is a tiny, satisfying obsession you can actually finish in an afternoon. No need to wait for a big project to pan out—these are manageable, adorable, and super shareable. Let’s dive into a playful guide that makes it feel like you’re crafting with a friend (and maybe a sprinkle of glitter).
Why Mini Clay Candles Are Your New Favorite Craft
Miniature clay candles pack a punch: they’re cute, display-ready, and surprisingly versatile. You can tailor colors to your decor, gift them in tiny jars, or use them as charming desk accents. FYI, they’re not real flames, so you can stash them anywhere without worrying about hot wax catastrophe.
- Lightweight and inexpensive supplies
- Instant gratification with quick, satisfying results
- Endless customization options—scents if you want, or keep them scent-free
Materials You’ll Actually Want to Use
Getting the right supplies sets you up for success. You don’t need a fancy shop—just a few essentials.
- Polymer clay in your favorite colors
- A live-scale candle wick or a faux wick substitute
- Small drill bit or toothpick for wick holes
- Strong acrylic paint for highlights
- Clear glaze or varnish to give a waxy shine
- Optional: a tiny glass jar or bottle for a real candle vibe
Pro tip: pick clay brands that cure hard and hold their shape. Sculpey and Premo are solid defaults, but any polymer clay will do the job if you follow baking instructions. IMO, the trick is to keep the shapes light and not overwork the clay—dents can add character, but crumbs of clay on the wick? That’s drama you don’t need.
Design Ideas That Make Your Candles Pop
The fun part is designing. Start simple, then branch out.
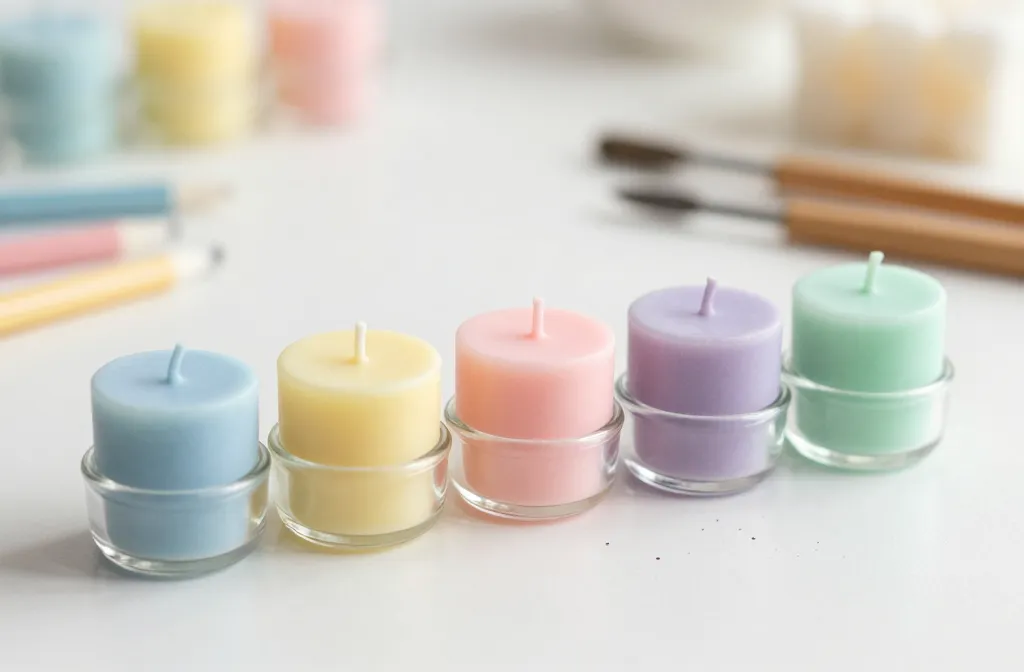
Classic Pillar Mini Candles
Create a small cylinder, add a wick, and bake. Paint with a creamy color, then wipe lightly to leave a soft, candle-like finish. A tiny gold or silver band around the top instantly elevates the look.
Twinkling Soy Vibe in Clay
Layer two colors for a subtle ombre. The wick reads as perfectly imperfect if you keep it slightly off-center—that’s what makes them adorable.
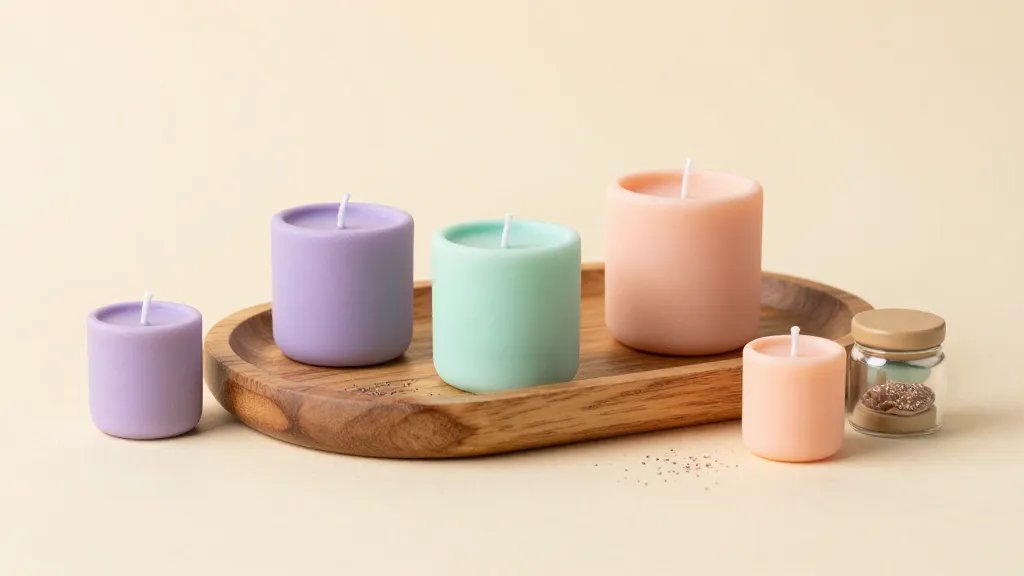
Jars That Spark Joy
Put your clay candle into a miniature glass jar with a tiny lid. It looks legit and gives you a ready-made display piece for shelves, desks, or gift boxes.
Step-by-Step: Crafting Your First Mini Clay Candle
Let’s break it down so you actually finish something today.
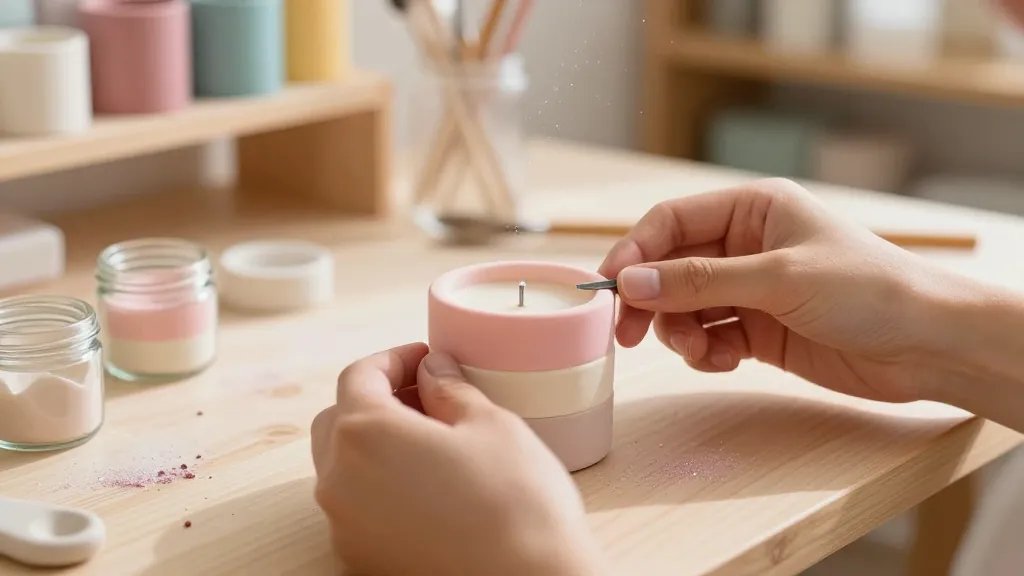
- Condition the clay by kneading until soft. This prevents cracks later.
- Roll a small ball, then flatten into a stubby cylinder for the candle body.
- Make a shallow wick hole with a needle or pin. Insert the wick and anchor it with a dab of clay.
- Bake according to your clay’s instructions. Don’t rush this part; underbaking is a disaster for details.
- Cool, then paint or glaze. A thin wash of paint adds depth, while a glaze gives a glossy finish.
- Seal with a matte or gloss topcoat to protect your hard work.
Wick Wisdom: Keeping It Real
Wick placement matters. If you want a realistic burn line, space the wick slightly off-center and make sure it’s straight. A crooked wick can ruin the whole vibe.
Finishing Touches That Make People Ooh and Aah
The little details matter way more than you’d think.
- Texture: Use a stippling brush to add waxy speckles or tiny cracks for a vintage look.
- Shine: A light coat of clear glaze can mimic melted wax and catch light nicely.
- Packaging: Tie a string around the base or drop a tiny label on the jar for gifting.
Color Palettes That Spark Joy
Soft creams, dusty pinks, warm ambers—choose colors that fit your display space. If you’re gifting, consider a palette that matches the recipient’s decor. FYI, contrast is your friend: a pale candle with a dark jar pops visually.
Troubleshooting Without Tears
Crafting doesn’t always go perfectly. Here’s how to dodge common problems.
- Cracking: Don’t overwork the clay, and bake at a steady, recommended temperature.
- Sagging: Make the base thicker and support any tall components during baking.
- Sticky glaze: Allow plenty of drying time and apply thin layers.
When to Rework vs. Start Fresh
If a piece is truly marred, don’t force it. You can twist off the top layer, re-shape, or start over with fresh clay. It’s cheaper and faster than you think.
Showcasing Your Mini Masterpieces
Your tiny candles deserve a spotlight.
- Photo them on a plain background to highlight color and texture.
- Group them by color or style for a desktop vignette.
- Gift sets: a trio in a cute box feel extra special.
Display Ideas That Sell Themselves
Use miniature stands, clear acrylic displays, or even tiny plates to present your candles. People love little details, so a tiny tag with the color name or scent (even if there’s no actual scent) adds whimsy.
FAQ: Your Mini Candle Night-In Q&A
Can I scent these miniature clay candles?
Yes, but not with real wax scents. You can embed fragrance chips or essential oils into the clay before baking, or place a scented sachet near the display for a subtle aroma. FYI, keep scents light to avoid overpowering the tiny space.
What clay brands work best for beginners?
Sculpey, Premo, and Fimo are popular choices. They cure hard and are easy to shape. Start with a basic pack in a few colors, then expand your palette as you get comfy.
How long do these last as decorations?
If you keep them away from direct sunlight and humidity, they hold their shape for a long time. The glaze helps prevent chipping, so they stay cute on a shelf for ages.
Do I need specialized tools?
Not really. A toothpick for wick placement, a small rolling pin or your fingers to shape, and a craft knife for clean edges work just fine. A tiny drill bit makes wick holes even easier.
Can I make real-use candles from clay?
Nope—these are strictly decorative. They won’t burn, so don’t try to light them. They’re for aesthetics and smiles, not fire safety experiments.
Conclusion: Tiny Candles, Big Joy
Making miniature clay candles is a satisfying blend of creativity and, honestly, low-stakes fun. You’ll finish a handful in a couple of sessions, then surprise friends with a handmade, thoughtful gift. IMO, the best part is how quickly you can refine your technique and start experimenting with textures, colors, and jars. So grab your clay, pick a palette, and start crafting—your shelves (and socials) will thank you.


