An absolute blast for crafty folks and bored eyes alike. You’ll learn how to turn ordinary clay into smiley little friends that light up everyone’s feed. Let’s dive in and unleash your inner clay-happy artist, one smile at a time.
Tools, Materials, and the Mood You Want
– Decide on your clay: polymer clay for durable toys, or air-dry clay for quick, no-bake projects. FYI, polymer clay gives you baked perfection, but air-dry dries faster so you can snack on the creativity sooner.
– Basic supplies: clay in fun colors, a sharp blade or hobby knife, a small rolling pin, a toothpick or needle tool, a soft brush, and a work surface you don’t mind getting colorful.
– Pick a vibe: mega-cute, pastel dream, or bold chibi vibes? Your mood sets the palette, so don’t overthink color theory—just start with a few cheerful hues.
Design Your Smiley Character
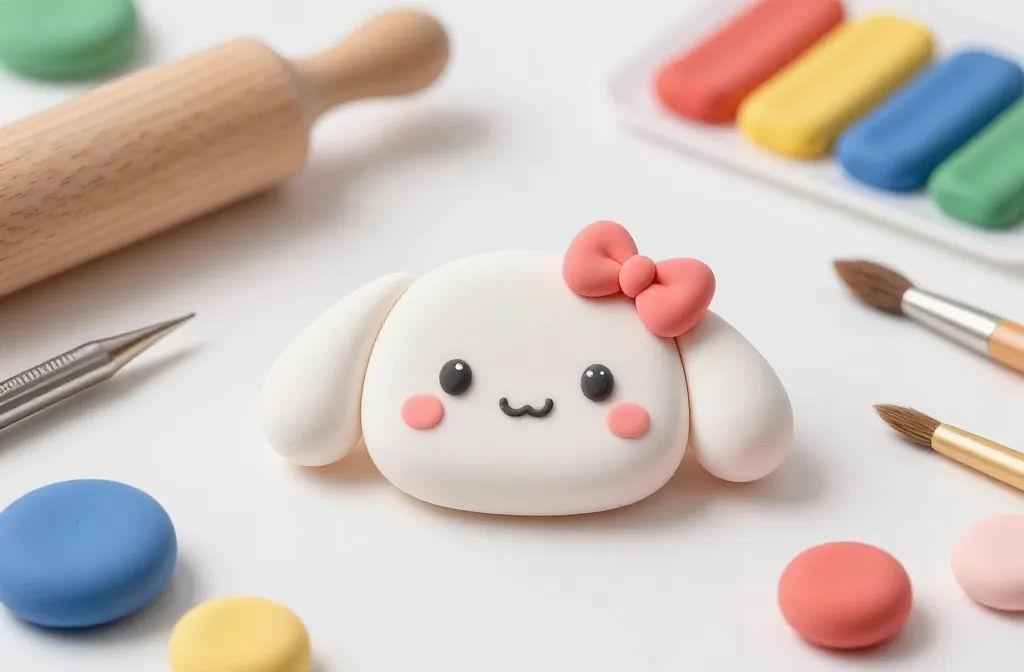
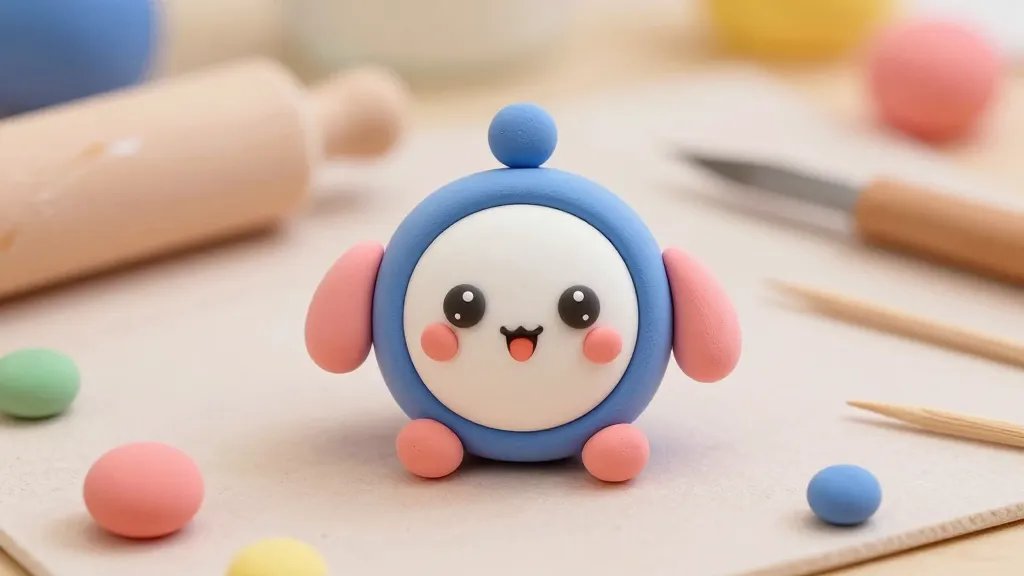
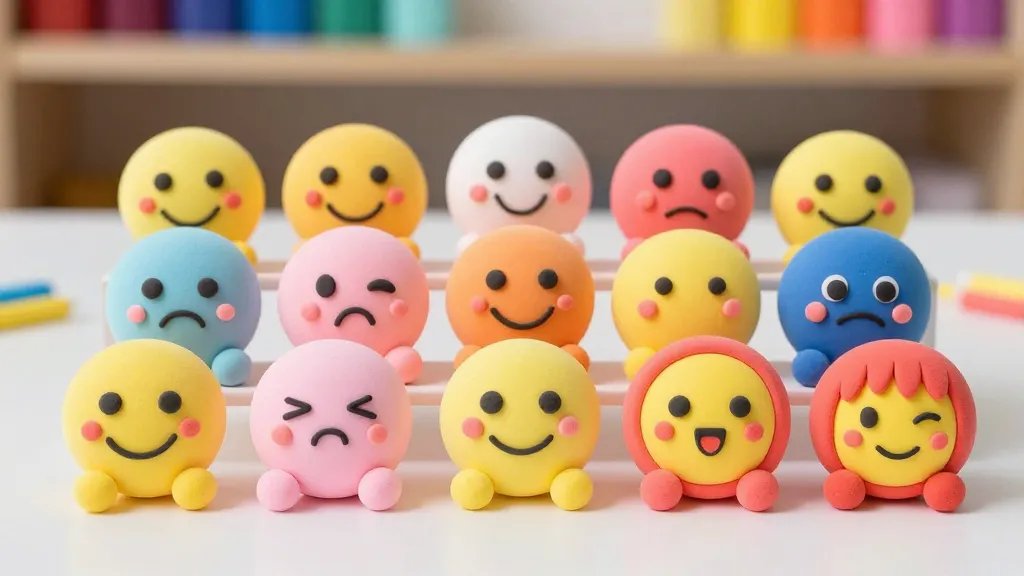
– Start with the face: draw or imagine a simple circle, then decide on the eyes and mouth. Large sparkly eyes and a tiny, open-mouth grin scream kawaii. Want extra charm? Add a tiny blush dot on each cheek.
– Choose accessories: bows, ears, hats, tiny stars, or even a little strawberry. Accessories give each character a personality, so let them tell a tiny story.
– Practice with sketches: quick doodles on paper help you lock down expressions before you commit clay to form. Do a couple of variations and pick your favorite.
Shaping the Base and Features
– Roll the main shape: keep it round and soft. If you’re using polymer clay, bake stabilizes the form; for air-dry, give it time to firm up.
– Add the eyes: small black beads or sculpted ovals work well. For cuteness overload, make the whites a touch larger than proportion would dictate.
– The smile: tiny arcs look adorable. You can make a simple smile or a wide, cheeky grin—just keep it symmetrical for max cuteness.
– Cheeks and blush: a pinch of pink clay or paint on each cheek adds warmth. Don’t go heavy—just enough to suggest a bubbly personality.
Layering Color and Texture
– Build layers: start with a pale base, then add details like cheeks, facial features, and accessories in separate clay pieces. This keeps the seams clean.
– Texture tricks: a light dabbing with a sponge or the tip of a needle can mimic cute fur or soft skin. Tiny dot patterns on a bow or hat read as playful detail.
– Gloss or matte finish: a shiny glaze makes eyes pop but can smear if you’re not careful. A matte sealant feels cozy and friendly.
Subsection: Eyes That Speak
– Large, round eyes with a tiny white dot at the top-left read as lively and friendly. If you want sparkle, add a second tiny white dot inside the iris for catchlights.
– For a sleepy or shy look, tilt the eyelids slightly downward and add a small tear drop accent at the corner—very anime-chic.
Glue, Bake, and Assemble
– If you’re using polymer clay: bake according to the package instructions. Pro tip: place pieces on parchment and space them out so they don’t fuse together in the oven.
– If you’re using air-dry clay: let each layer dry before adding more details. Rushing this can crack your cute little orb into sadness.
– Assembly: join parts with a dab of clay or craft glue after they’re fully cured. Hold briefly to set, then move on to the next piece.
Finishing Touches and Personalization
– Add tiny accessories: a bow, a hat, or a sparkly star pin can transform a plain smiley into a distinct character.
– Personalization ideas: give each character a name and a tiny backstory. Do you see them as office desk buddies, or weekend kitchen helpers? The backstory shapes your color choices and accessories.
– Protective sealant: once everything is dry or baked, seal with a clear glaze to preserve color and keep finger-scoots away from your delicate work.
Subsection: Color-Coding Tips
– Stick to a small palette: 3–5 colors max makes your characters cohesive and cute. You can create lots of variants by combining those few hues.
– Contrast counts: pair light skin tones with bold eyes or bright accessories so the face always stays the star.
Make a Mini Collection
– Start with a set: create 3–5 smiley characters in a similar style. A little collection is more Instagram-friendly than a lone statue.
– Theming helps: choose a theme such as “Café Crew,” “Garden Buddies,” or “Travel Pals.” The theme gives you a fun constraint and sparks creativity.
– Display ideas: tiny shelves, a string of puppet-show bunting, or a mini photo shoot on a cozy blanket. Showcasing your work makes the effort feel real and shareable.
Subsection: Packaging Your Creations
– For gifts or shop listings, package with a cute label and a short, friendly blurb. A tiny note like “Made with clay and a lot of caffeine” earns smiles before the first glance.
– Use eco-friendly materials: a paper bag, a small tissue square, and a sticker. Your future self will appreciate the minimal waste.
Common Pitfalls and How to Avoid Them
– Too-smooth surface: overly polished surfaces can feel lifeless. Embrace a soft matte finish with gentle texture to keep things lively.
– Sculpey seams: seams show up if you press two pieces together without blending. Wet your fingers or use a tiny bit of clay to blend the seam line for a seamless look.
– Overwhelming details: less is more. A few well-placed blush, eyes, and a single accessory read as polished and adorable.
Subsection: Quick Fixes for Mistakes
– If an eye looks off, remove it gently and reset. Clay is forgiving, and you can rework it without ruining the piece.
– Cracks? A dab of fresh clay blend or a matching paint can cover minor cracks. Let it cure, then seal.
FAQ
How long does it take to make a kawaii smiley character from clay?
Creating a single character can take 30 minutes to a couple of hours, depending on how detailed you get and whether you’re baking polymer clay or air-drying. Pace yourself and enjoy the process.
Can I reuse scrap clay scraps for faces and details?
Absolutely. Scraps are your best friends for tiny features and shading. Knead them together to avoid waste, then shape new bits with the scraps to save time.
What’s the best way to seal finished pieces?
For polymer clay, use a UV-resistant gloss or satin glaze after cooling. For air-dry clay, choose a flexible acrylic sealer to prevent cracking as it dries. Always test on a spare piece first.
Do you need fancy tools for this?
Not at all. Start with basics: a sharp blade, a toothpick, a rolling pin, and some imagination. As you level up, you can add small sculpting tools, but you’ll do just fine with a DIY setup.
How can I photograph my smiley characters for social media?
Natural light wins. Shoot near a window during the day, and use a simple background to keep the focus on your characters. A clean desk, a pastel backdrop, or a cute fabric can elevate the look. FYI, tiny props like a mini mug or a flower can add personality without stealing the scene.
Conclusion
Kawaii smiley characters from clay are a joyful, low-stakes way to flex your creative side. Start simple, let your characters tell their own tiny stories, and watch your collection grow with every bend of the thumb and roll of the clay. IMO, the best part is sharing them—with friends, followers, or even a kid who just discovered the magic of tiny, happy faces. Have fun, be a little goofy, and let your clay put a smile on someone’s day.


