An Easter crafting session just got a glow-up. These clay keychains are tiny, charming keepsakes that shout spring, color, and a little bit of whimsy. If you want DIY ideas that actually delight friends and customers, you’re in the right place.
Why Clay Keychains Make Perfect Easter Gifts
Clay is forgiving, affordable, and forgiving (yes, I said it twice—it’s that good). You can push shapes, blend colors, and bake with minimal risk. Easter is all about cute icons—bunnies, chicks, eggs—and clay lets you sculpt those icons exactly how you imagine them. FYI: small scale = big smiles.
Materials That Won’t Break Your Bunny Budget
- Air-dry or polymer clay in pastel hues
- Keychain hardware: split rings, key rings, and eye pins
- Blush brushes or cotton swabs for soft shading
- Clear gloss sealant or resin (for shine and durability)
- Clay tools: rolling pin, needle tool, and a sharp blade
- Optional: tiny bead eyes, glitter, tiny real feathers
Design Ideas That Pop on the Shelf (and in Real Life)

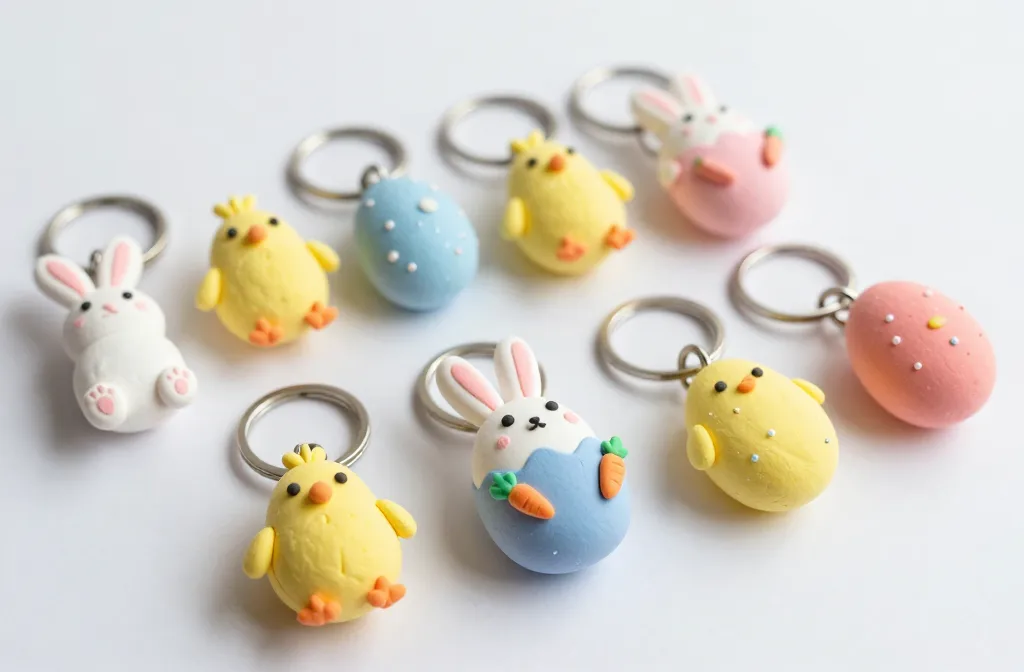
Here are ideas that translate well onto a tiny clay canvas. You can mix and match elements to make sets that feel cohesive.
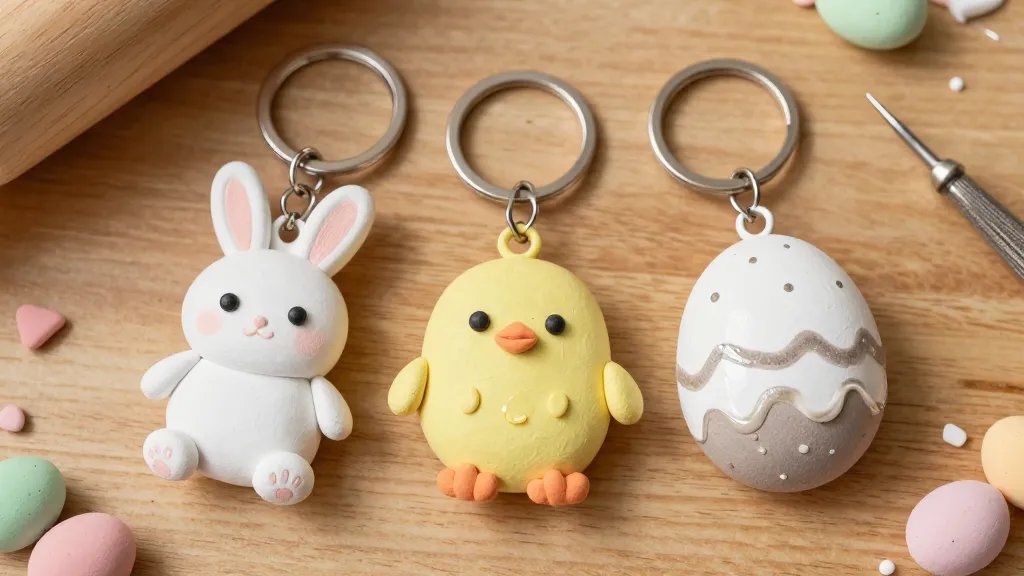
Classic Easter Icons
– Bunnies with floppy ears
– Chicks with fuzzy cheeks
– Painted eggs with stripes and polka dots
Whimsical Combinations
– A bunny riding a pastel egg
– A chick popping out of a mini egg cup
– A tiny carrot or daffodil laying beside an egg
Seasonal Color Palettes
– Buttercream pinks, mint greens, and soft yellows
– Coral, lavender, and sky blue for a modern twist
– Metallic accents like gold or pearl white for a chic look
Step-by-Step: Making Your First Easter Keychain
- Condition your clay by kneading until soft.
- Roll small spheres for eggs or create simple bunny shapes.
- Add details with a thin blade or needle tool—think stripes, freckles, or a smile.
- Attach an eye pin and a keyring hardware piece. Make sure the hole is large enough for the ring to pass through.
- Bake according to your clay’s directions, usually around 265-275°F for polymer clay (check your brand).
- Seal with a gloss finish to lock in color and add shine—optional but recommended.
Finishing Touches: Personalization and Texture
Personalization adds serious value. Try these quick tricks to level up your designs.
Add Faces, But Keep It Simple
Keep eyes and mouths minimal. A tiny dot for an eye or a curved line for a smile reads cute without complicating the piece. Pro tip: place facial features after baking to prevent smears.
Textures That Tell a Story
– Gentle embossing with a toothpick to mimic fur or feather marks
– Tiny ribbing on a carrot shape
– Light stippling on eggs for a matt look that catches light softly
Durability Tips: Because Your Art Deserves to Last
Keychains take a beating in purses and pockets. Here’s how to make them last.
- Bake thoroughly and let cool completely before handling.
- Seal with a durable gloss or resin to resist chipping and moisture.
- Avoid over-soft clay right at the hole where the split ring sits—thin is best.
Display Tips: Packaging That Sells
Presentation matters as much as the craft.
- Bundle mini sets in cellophane with a pastel ribbon.
- Use a small burlap banner with “Easter Essentials” for photo-ready displays.
- Include a tiny care card: “Wipe with a damp cloth; keep away from heat.”
Pricing and Stocking: Quick Gut Checks
If you’re selling these, you want a clean pricing strategy.
- Factor in materials, time, and a modest profit per piece.
- Offer bundles: 3 for a discount to encourage multiple buys.
- Keep a few premium pieces with extra detailing for higher price points.
Incorporating Trends Without Losing Your Style
You don’t need to chase every trend to stay relevant. Mix timeless Easter icons with a few modern touches—like metallic highlights or minimalist faces—and you’ll have pieces that feel current but still classic.
Going Eco-Friendly
– Use recyclable packaging
– Choose non-toxic clays and sealants
– Consider handmade tags with recycled paper
FAQ
What clay works best for Easter keychains?
Clay that’s easy to condition, holds detail well, and cures without cracking is ideal. Polymer clay is a favorite for baked pieces, while air-dry clay is great for quick, no-bake projects. If you go polymer, follow the manufacturer’s baking temperatures precisely.
How long do these keychains last with daily use?
With proper sealing and gentle handling, they can last for months or even longer. The glaze or resin protects colors from fading and moisture. Don’t dunk them in water, and avoid bending the loops too much.
Can I customize them for orders or events?
Absolutely. Personalization is where the magic happens. Offer initials, dates, or small motifs that match a theme. Batch-work helps you stay efficient when you have multiple orders.
What’s the best way to attach hardware securely?
Using a proper eye pin and a wire cutter to trim excess is essential. Bake or cure with the hardware in place so you know the hole size matches. If you’re using air-dry clay, allow extra dry time or seal the piece before inserting hardware.
How should I photograph these for listings?
Natural light is your best friend. Shoot from a slight angle to show depth, and include a close-up of the texture. A simple neutral background helps the colors pop. FYI: a tiny shadow under the piece can make it feel more tangible.
Any quick tips for beginners?
– Start with simple shapes and learn to tweak proportions before diving into complex faces.
– Work in small batches so you don’t lose track of your color palette.
– Bake in a well-ventilated area, and keep your workspace tidy so you don’t lose tiny pieces.
Conclusion
Easter clay keychains blend whimsy, craft skill, and a touch of personality. They’re perfect for quick gifts, party favors, or a side hustle that actually fits into real life. So grab some pastel clay, sketch a bunny or egg, and start squeezing out smiles one tiny keyring at a time. IMO, the world could always use more adorable, handmade joy—and these little charms deliver. If you’re feeling extra ambitious, try a mini set with a matching display tag. You’ll thank yourself later.


