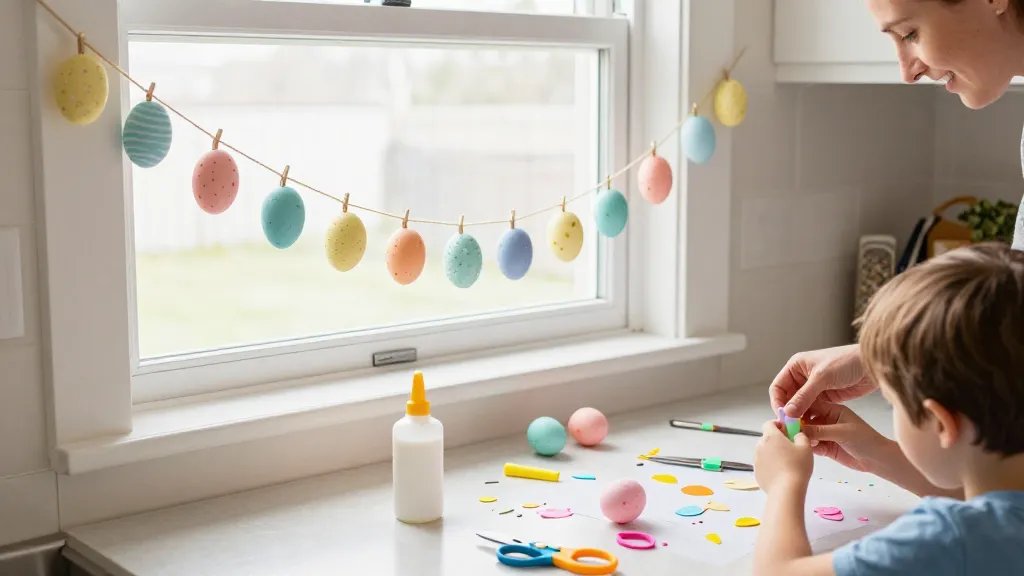
An Easter egg garland DIY is the kind of project that sounds fancy but is actually delightfully simple. You’ll end up with a garland that makes your space feel festive and Instagram-ready, without breaking the bank. FYI, the kids might want to help, and that’s when the real chaos—and the fun—begins.
Why This DIY Keeps Easter Cozy and Fun
Are you tired of generic decorations that melt into the background? This garland brings color, texture, and whimsy to any gap—windows, mantels, or the front door—without needing a degree in crafts. It’s a playful way to celebrate spring while you chat with friends or binge a TV show. Let’s make something that looks polished but feels totally doable.
What You’ll Need (No Weird Supplies Required)
- Egg-shaped papers or lightweight felt (assorted pastels are ace)
- A long string or ribbon (about 6–8 feet per project)
- Glue, double-sided tape, or a hot glue gun (safety first—supervised for kids)
- Scissors, paint or markers, and optional glitter or decorative bits
- Pearl beads, ribbon scraps, or tassels for flair
Two Easy Ways to Make Your Eggs Pop
First, decide whether you want a crisp, clean look or a more artsy vibe. Both are totally doable in under an hour.
Option A: Painted Perfection
- Paint eggs in pastel colors. Let them dry completely.
- Add simple patterns with a fine brush or markers—polka dots, stripes, tiny flowers.
- Seal with a light spray of acrylic sealer if you’re feeling fancy.
Option B: Paper-Cut Charm
- Cut egg shapes from patterned scrapbook paper or cardstock.
- Draw or glue on cute faces, little hearts, or spring icons.
- Laminate or cover with clear contact paper to give them some durability.
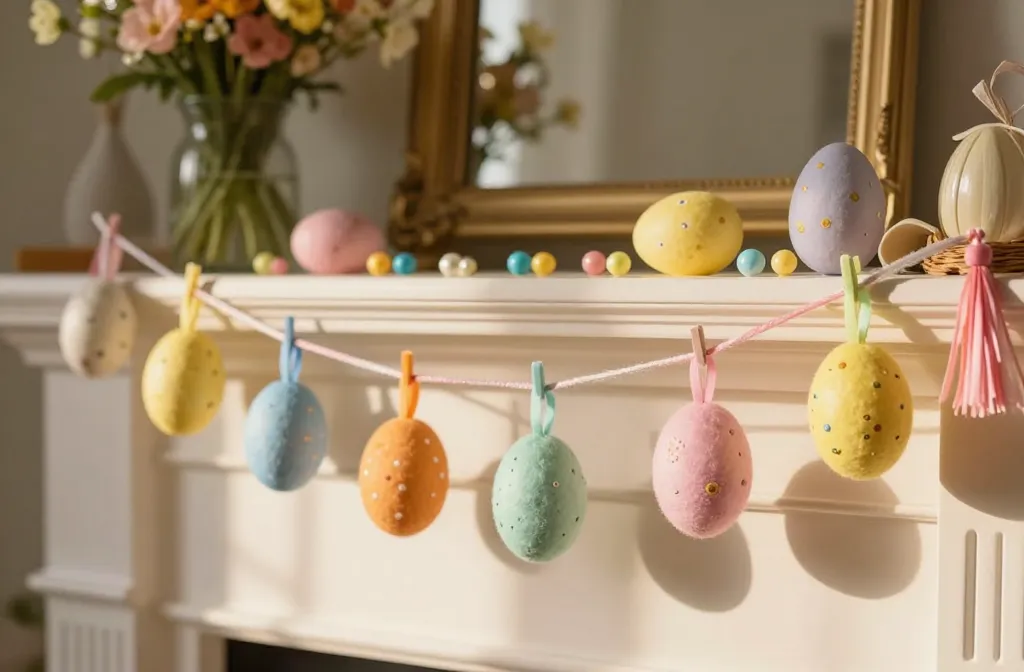
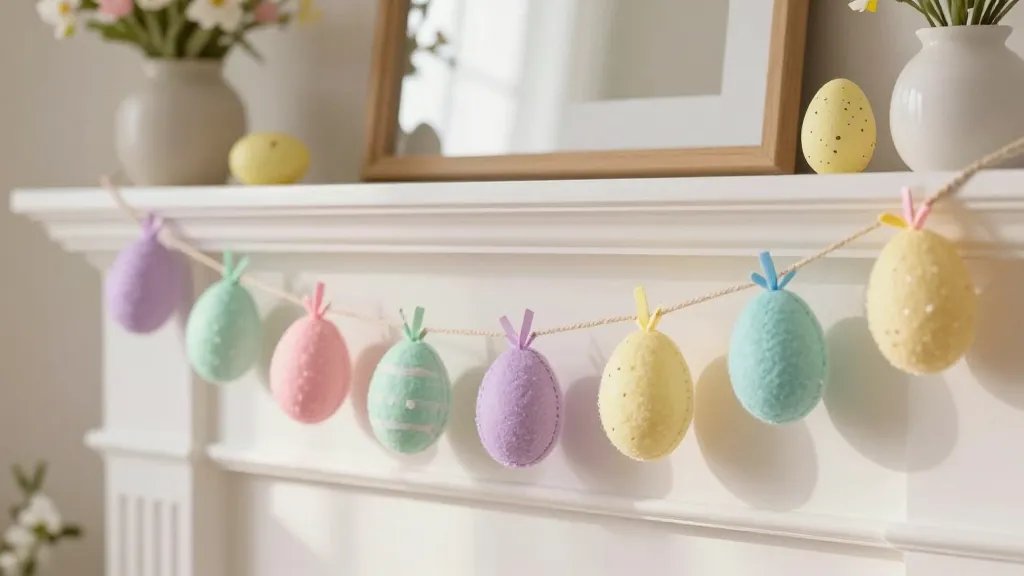
Stringing It All Together: Garland Assembly
The secret to a great garland is spacing and balance. You don’t want a stiff, crowded line, but you also don’t want gaps that look lonely. Aim for 4–6 inches between eggs, with a few clusters of embellishments here and there.
Placement Plan
- Center the garland on a mantle or shelf for a focal point.
- Let it drape across a window or staircase banister for movement.
- Hangs well on a door or over a mirror—just mind the traffic flow.
Adding Little Details That Make It Special
Small touches can elevate your DIY from cute to charming. Don’t overcomplicate things—just layer in some texture and shine.
Texture and Shine
- Wrap sections of the string with thin ribbon before attaching eggs for a variegated look.
- Glue on tiny sequins or faux pearls for a subtle glimmer.
- Incorporate natural elements like dried lavender sprigs or small twigs between eggs.
Personal Touches
- Write initials or short messages on some eggs with a fine-tip marker.
- Attach mini charms related to spring—bunnies, chicks, or flowers.
Alternative Materials: If You’re Short on Stuff
DIY isn’t about having a perfect kit—it’s about using what you have. Here are some quick substitutions that still look adorable.
Substitution Ideas
- Use fabric scraps instead of paint for a textured egg look.
- Cut egg shapes from magazine pages and mod podge onto a ribbon for a collage vibe.
- Make mini pom-pom eggs for a fluffy, whimsical touch.
Hanging and Display Tips for Maximum Wow
Display is as important as the craft itself. A garland that looks great in photos but sits flat in real life isn’t doing you any favors.
Tips to Make It Sit Pretty
- Use a lightweight string to prevent sagging; secure knots every 12 inches.
- Double-sided tape or removable hooks help keep it in place without damage.
- Adjust length mid-hanging if you notice uneven gaps—flexibility is your friend.
Care and Longevity: How Long Before It Needs a Refresh
Depending on your materials, your garland can be a one-season star or a year-round seasonal piece with a quick tweak. If you used fabric or felt, store it flat in a labeled container to avoid permanent creases. Painted eggs can chip if handled roughly, so display over a safe area or behind glass for long-term use.
Storing It Smart
- Use individual tissue sheets between eggs to prevent sticking.
- Keep in a cool, dry spot to avoid warping or fading.
- Label the box with the year so you can track your favorite color combos.
FAQ
How long does a DIY Easter egg garland last?
With paper or felt eggs, you can expect a few seasons if you handle it gently and store it properly. Painted eggs may fade a bit over time, especially in bright sun. FYI, lighter weight fabrics stretch less than paper, so consider your material choice based on where you’ll hang it.
Can kids help with this project?
Absolutely. It’s a perfect family craft. Give them child-safe paints, markers, and pre-cut shapes to avoid running with scissors. The mess is part of the fun, and you’ll get adorable team efforts to display.
What colors work best for Easter garlands?
Pastels rule the roost, but you can push a bolder vibe with sunny yellows, electric pinks, or mint and coral combos. IMO, a balanced mix of light and a pop of bright makes photos pop without feeling loud.
Do I need special glue or power tools?
Not at all. Glue, tape, and a bit of patience do the job. If you’re using a hot glue gun, have a grown-up supervise around kids. Safety first, sparkle second.
How can I make a garland that lasts outside?
Choose weatherproof materials or bring the garland inside during rain. Laminate or seal painted signs, and use UV-resistant colors if possible. If you’re really committed, switch to durable felt or plastic eggs with sturdy string.
Conclusion
This Easter egg garland DIY is proof that simple ideas can spark big smiles. You get a charming, customizable decoration that fits your home’s vibe and your schedule. So grab some eggs, a string, and a splash of creativity—and get ready for compliments, FYI. Happy crafting!


