Creating tiny fruit models sounds cute, but getting them to look realistic? That takes some serious batching and a dash of science. I’m here to break down the tricks, the tools, and the tiny mistakes to avoid. FYI, you don’t need a fancy studio—just patience, curiosity, and a handful of humble materials.
Why Tiny Fruit? The Charm of Miniature Realism
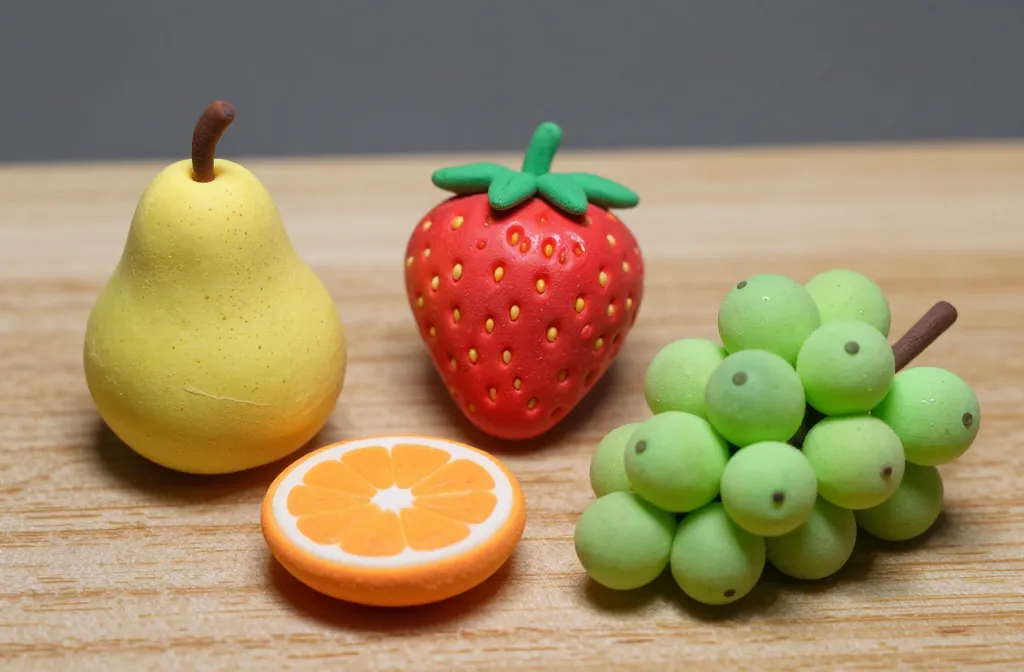
Small fruit has big impact. A tiny pear sitting on your desk can spark a smile, invite a curious glance, or spark a playful debate about scale. Realism matters because it makes the illusion believable. If a seed bead looks out of place, your model screams “toy,” not “treasure.” So aim for texture, color, and subtle imperfection.
fundamentals: Choosing the Right Base Materials
- Clay or polymer clay for firm, sculptable shapes
- Cainting mediums: acrylics or enamel paints for vibrant, durable color
- Wire for internal supports and stems
- Seed beads, micro beads, or granulated sugar for texture
- Air-dry or oven-bake adhesives and sealants
Think of your materials as your toolkit for different textures: skin, peel, flesh, and stem all need their own feel. Beware of over-soft clays for tiny sizes; the moment you touch them, they might sag. Plan your fruit’s final size and scale before you start pinching and shaping.
Texture is the Secret Sauce
Texture sells realism more than color alone. Here’s how to nail it:
- Bumpy peel: press small tools or a toothpick gently to create minute dimples and ridges.
- Flesh inside: mix tiny bits of color close to real fruit flesh. A little white for highlight and a touch of pink or yellow near the edges feels alive.
- Surface gloss: a matte finish on the rind and a slight sheen on the juice pockets make things pop.
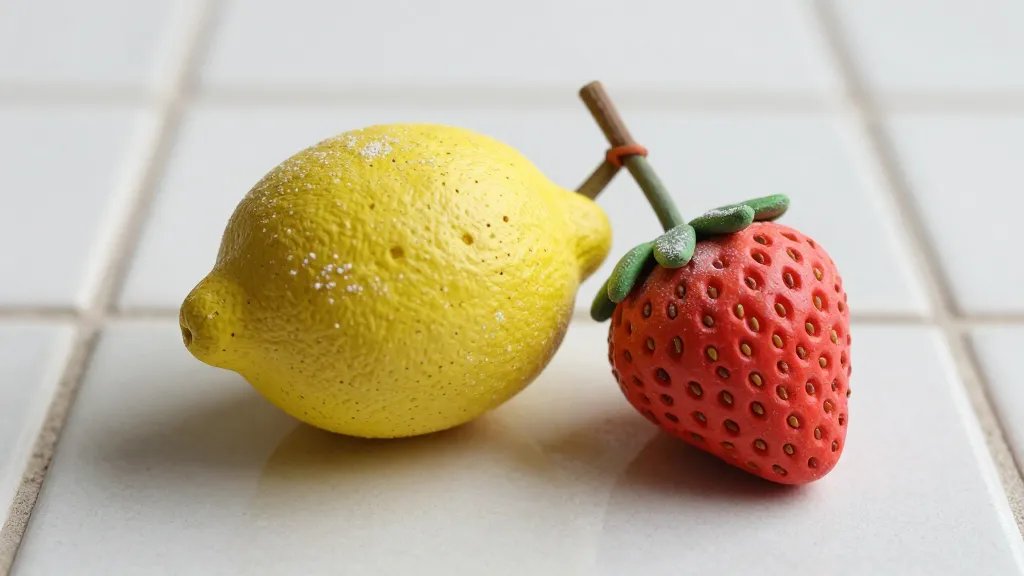
- Natural imperfections: tiny scuffs or color variation mimic real fruit.
If you’re chasing realism, don’t shy away from asymmetry. Real fruits aren’t perfectly round; a little tilt or a small bump makes the model feel honest.
Color Mastery: Paint Like a Miniature Chef
- Base coat: start with a uniform underlayer so colors pop.
- Layering: build up color in thin, translucent layers to mimic depth.
- Shadows and highlights: darken where the fruit meets itself and brighten the top edges for a three-dimensional look.
- Peel edges: a slightly lighter ring around the edge sells the peeled effect without screaming “fake.”
Pro tip: mix in tiny amounts of complementary colors to avoid flatness. FYI, real fruit isn’t one single color—there are blends, flecks, and subtle tonal shifts.
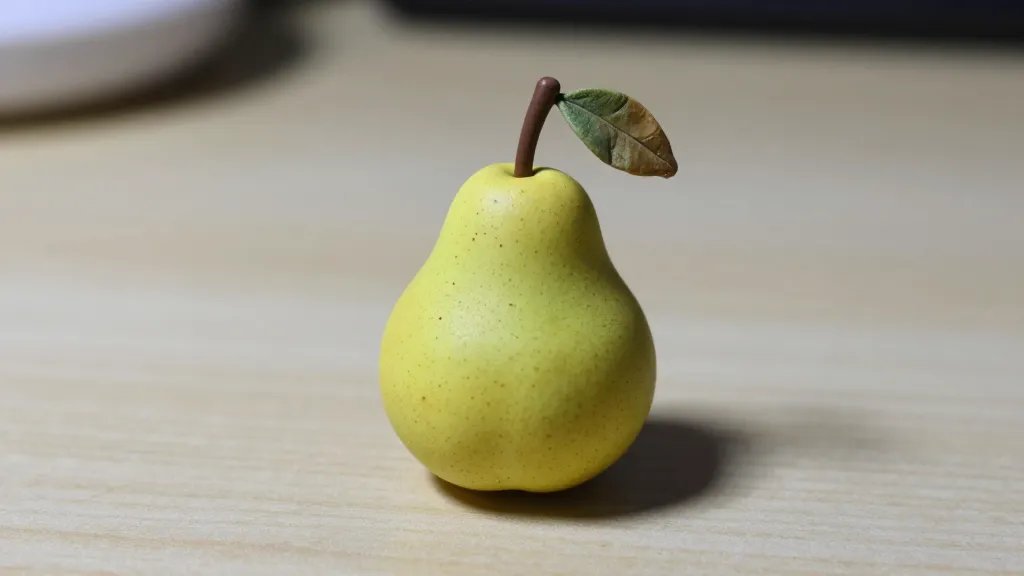
Stems, Leaves, and Tiny Details
The finishing touches can ruin or redeem a model. Use thin wire to create bendy stems; this lets you pose the fruit or insert it into a scene. Leaves should be delicate, with a slight curve. If you’re nervous about realism, practice first on spare scraps.
Subsection: Wiring and Assembly
– Cut fine gauge wire to the desired stem length.
– Shape the stem with a gentle arc that mirrors real stems.
– Secure the fruit with a dab of strong adhesive, then let it cure.
– For extra realism, add a tiny drop of resin on the base to simulate a root nub.
Display and Environment: Making It Pop
Tiny fruit gains life when placed in a setting. Try a mini fruit bowl, a faux market stall, or a creative tabletop vignette. Consider lighting: soft, diffuse light flatters color and texture without harsh reflections. A shallow tray with a few natural props—sand, tiny leaves, or fabric—gives context and scale cues.
Subsection: Photography Tips for Tiny Fruit
– Use a macro lens or the closest zoom on your phone.
– Stack a few objects to get interesting angles; don’t shoot straight on every time.
– Keep background colors complementary to the fruit; high contrast can look cartoonish.
– Shoot with natural light when possible for truer color.
Common Pitfalls and How to Avoid Them
– Overworking the surface: tiny fruits lose form when you press too hard. Use light touches and build in stages.
– Incorrect scale: measure early and reference real fruit sizes. It’s embarrassing to realize your grape is the size of a blueberry after hours of work.
– Color overkill: too many tones in one piece confuse the eye. Start with a base and add small, controlled accents.
– Glossy all over: real fruit has both matte and glossy areas; balance is key.
– Sticky finishes: let paint and glue dry fully between steps. Patience pays off here.
Advanced Techniques for Realism-Seekers
- Airbrushing for subtle skin tones and smooth blending
- Gel mediums for translucent flesh and watery highlights
- Speckling to mimic tiny fruit specks and freckles
- Layered washes to create depth within the rind
If you’re into experimenting, push the boundaries with mixed media: real dried fruit fragments for texture, or tiny edible accents for a whimsical twist. Just don’t eat the final product—these are art, not snacks.
Care and Maintenance of Your Tiny Fruit Collection
Your models deserve a long life. Keep them away from humidity if you’ve used water-based paints. Dust gently with a soft brush. If the glaze yellows over time, a light coat of matte sealant can refresh them. FYI, handling with clean hands prevents oils from dulling the surface.
FAQ
What’s the easiest fruit to start with for beginners?
A simple grape or cherry works great. It teaches texture, scale, and the basics of shading without overwhelming you with details. Start with a cluster to practice consistency.
What materials are essential and affordable?
Polymer clay, acrylic paints, a fine-tipped brush set, and a small bottle of clear gloss or matte sealant are enough to begin. A few micro beads or texture tools help with rind details. You don’t need fancy gear to get impressive results.
How do I prevent peeling from cracking during baking?
Bake at a low temperature and follow the clay’s guidelines. Don’t overwork the clay, and give it a gentle cooldown. If you notice tiny cracks, fill with a little extra clay or a dab of paint to blend them in.
Can I make realistic tiny fruit without baking the clay?
Yes. Air-dry clays and resins work for non-baked projects. They take longer to cure, but you can still achieve fine detail. Just expect longer wait times and occasional warping if you don’t support the piece properly.
How can I age or weather fake fruit for display scenes?
A light wash with a thin brown or green tone gives an aged look. Use a dry brush to pick out raised textures for realism. A few speckles of darker color near the stem add depth.
Conclusion: Tiny Fruit, Big Impact
Tiny fruit models are a playful way to explore texture, color, and scale. With the right approach, you’ll craft pieces that look almost edible—minus the calories, thankfully. So grab a bundle of clay, a few brushes, and start sculpting. IMO, the joy comes from small discoveries: a perfectly placed highlight, a gentle bend in the stem, a skin texture that finally looks right. If you mess up, laugh it off and try again—that’s how tiny mastery happens. Happy sculpting, friend!


