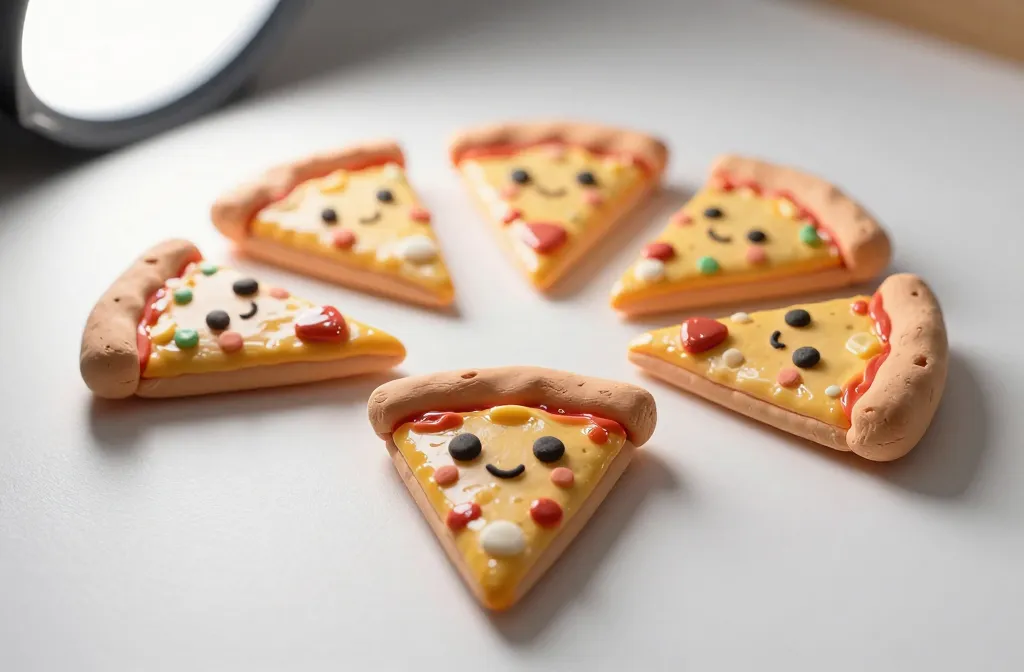
An intro you can’t help but smile at: tiny clay pizza slices with faces turn the boring craft shelf into a giggle factory. They’re magnetically cute, surprisingly expressive, and oddly satisfying to make. If you’ve ever wanted a hobby that’s cute, goofy, and a little bit delicious-looking (even when it’s not edible), you’re in the right place.
What Makes These Tiny Slice Characters So Addictive
You don’t need a kiln to love clay pizza slices with faces. Polymer clay is forgiving, fast-curing, and ideal for tiny experiments. The real trick is giving each slice a personality that pops on a shelf or fridge magnet. Think grins that melt your heart, eyebrows that tell a story, and toppings that tell a joke.
– They’re perfect for quick projects between shows or episodes of your favorite show.
– You can customize them to match seasons, moods, or inside jokes with friends.
– They make excellent tiny gifts that scream “I paid attention to the little things.”
Studio setup on a budget
If you’re just starting out, you don’t need a glam studio. A clean desk, a sharp blade, some toothpicks, and a basic clay kit will do. FYI, a glossy glaze can add charm without turning it into a science experiment. Keep water handy for smoothing edges and a tiny rolling pin for even slices.
Designing Your First Characterful Slice
Design is where the magic happens. Before you roll the clay, sketch a simple face on paper to guide your features. Tiny eyes, a cute mouth, and a wink can convey a lot with minimal detail. Don’t overthink it—these slices thrive on charm, not perfection.
– Choose a vibe: goofy, smug, sleepy, or sassy.
– Pick two toppings that tell the story: pepperoni smile, olive eyes, pineapple hair—go wild.
– Start with a flat disk base, then add a curved edge to mimic a real pizza slice.
Pro tips for expressive faces
– Use a fine tool to etch eyebrows and tiny lines for mouth corners.
– Separate the face features on a contrasting clay color for visibility.
– Bake in short, steady bursts to keep features from sinking into the crust.
Textures, Colors, and Finishes

Texture brings personality. Shiny glaze makes mouths pop, while a matte finish gives a vintage toy vibe. When you mix colors, aim for warm tones that resemble real pizza toppings without going full clown-car red.
– crust: light tan with a hint of orange for warmth
– cheese: creamy off-white or pale yellow with marble swirls
– toppings: tiny dots of red, green, black for pepperoni, peppers, and olives
Glaze and sealing options
– Clear gloss glaze for a glossy pizza-look
– Matte sealant for a retro vinyl toy feel
– A tiny dab of metallic for pepperoni sparkles if you’re feeling fancy
Poll-Sized Personalities: A Quick Create-A-Character Guide
If you’re staring at a blank slice and hearing crickets, use this quick brainstorming guide. Pick one from each column and you’ve got a character.
– Expression: grinning, winking, surprised, sleepy
– Toppings: pepperoni, olives, corn, mushroom, bell pepper
– Accessory: tiny hat, sunglasses, mustache, bow
Sharing and Caring: Display Ideas That Make People Smile
Tiny clay slices aren’t just for your craft cabinet. They’re terrific conversation starters. Pin them on a corkboard, arrange them into a pizza-themed mobile, or gift a set to a friend who could use a daily dose of whimsy.
– Create a mini pizza family wall: “Papa Pepperoni,” “Silly Olive,” and “Cheeky Cheese.”
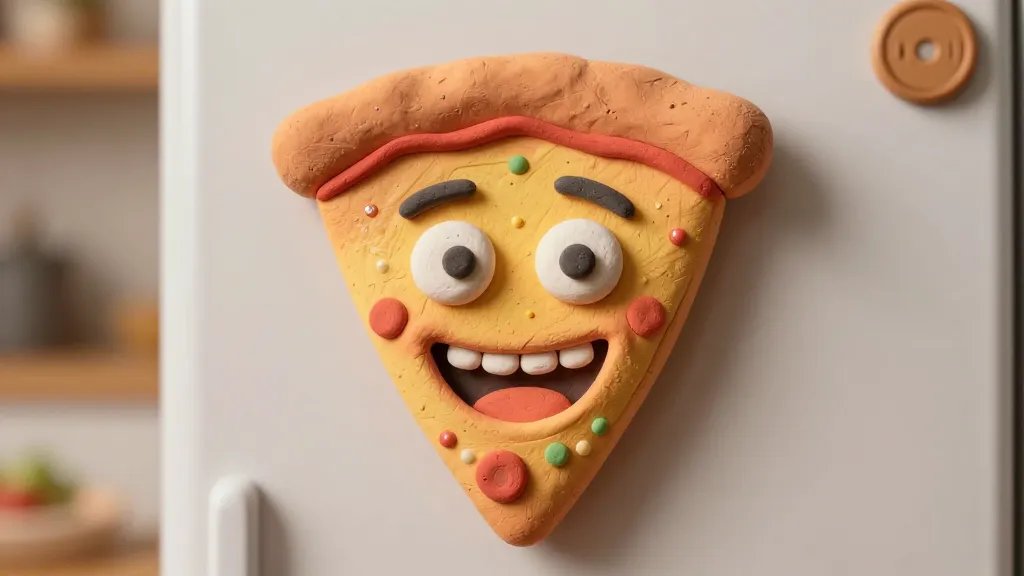
– Build a tiny pizza museum on your fridge with magnets.
– Package a trio as a stand-alone gift with a little backstory card.
DIY display ideas
– Fridge magnets: glue a small magnet to the back of each slice.
– Mini gallery: string them along a thread with mini clothespins.
– Shadow box: nestle slices in a shallow frame with a pizza-themed caption.
Common Hiccups and How to Avoid Them
No project is perfect on the first try. Here are a few pitfalls and quick fixes so you don’t lose steam.
– Issue: Features sinking during bake.
Fix: Keep the face features slightly elevated, add tiny support pieces behind heavier toppings.
– Issue: Cracking edges on thin slices.
Fix: Use a slightly softer clay mix and avoid overworking edges.
– Issue: Colors fading after sealing.
Fix: Test sealant on a scrap piece first; some glazes can darken light colors.
Quick troubleshooting checklist
– Do a small test bake to calibrate temperature and time.
– Use a toothpick to set tiny details before baking.
– Let the clay cool fully before applying any glaze.
Seasonal Spins: Make It Festive All Year Round
The real joy is morphing these slices to fit holidays or moods. Halloween pepperoni eyes? Yes. Valentine’s Day heart-shaped olives? Absolutely. A summer beach slice with sun-tinted cheese and sunglasses can feel like a silly postcard from a vacation.
– Valentine’s: add tiny heart toppings and red-pink glaze
– Halloween: spooky eyes, orange cheese, and a pumpkin cap
– Summer: bright yellows, sun shapes, and blue accents for sky vibes
FAQ
Do I need professional-grade clay to start?
Not at all. Start with affordable polymer clay, a basic set, and a smooth workspace. You’ll learn the rest by practicing, not by overthinking.
How long do these little slices last?
If you keep them indoors away from moisture and sunlight, they stay charming for a long time. Sealing helps a lot, especially if you handle them often.
Can I make a set for kids?
Yes! Keep it simple and safe: softer clay, larger facial features, and supervision during baking. It becomes a cute, kid-friendly craft with plenty of giggles.
What’s the easiest character to start with?
A sleepy slice with droopy eyes and a tiny cheese-yellow grin is a crowd-pleaser. It’s simple, adorable, and surprisingly expressive.
Are these actually edible or just decorative?
They’re decorative only. Don’t bake edible dough with the same equipment you use for polymer clay—safety first, munchies none.
Can I sell my tiny slices online?
Totally. Start with a small batch to test the market, photograph well, and tell a fun backstory for each piece. People buy the personality as much as the art.
Conclusion
Tiny clay pizza slices with faces are a pocket-sized joy that combines craft, whimsy, and a sprinkle of sarcasm (in the fun way). They’re quick to make, endlessly customizable, and oddly comforting to display or gift. FYI, once you start, you’ll find yourself designing mini personalities for every mood and meal. So grab your clay, give a smile to your slice, and roll with it—the cuteness only gets better from here.


