An instant spark of creativity awaits. If you love tiny details, you’re in the right place. We’ll break down the process, share tricks, and keep things fun, not perfect.
Why Tiny Clay Figurines for Dollhouses Are a Big Deal
Tiny clay figurines bring dollhouses to life in a way that no furniture alone can. They give stories shape—imagine a tiny baker whisking flour or a librarian shelving a micro-book. DIY miniatures aren’t just cute; they’re a hobby you can pick up anywhere and carry in a zipper bag. FYI, the joy is in the tiny, imperfect charm, not in perfection. Ready to create characters who could fit inside a thimble? Let’s go.
Choosing the Right Clay and Tools
Your first step sets the vibe. Start with polymer clay for bake-and-hake convenience, or air-dry clay if you don’t want to bake. Here are essentials:
- Polymer clay (fimo, Sculpey) in basic colors
- Air-dry clay for quick setups
- Fine detail tools: needles, dotting tools, a craft knife
- Texture brushes, toothpicks, and a tiny rolling pin
- Super glue or epoxy for tiny assembly jobs
- Sealant or varnish for that lasting shine
Tip: choose a color palette early. It helps you avoid color chaos later and keeps your scenes cohesive.
Sketching Your Mini Cast
Before you dive, sketch character ideas. Think about what little scene you want: a baker at a shop window, a gardener with a wheelbarrow, or a bookworm librarian. Quick doodles keep you focused when the clay starts looking suspiciously blob-like. Ask yourself: What’s their vibe? What tiny prop tells their story? The answers guide proportions and poses.
Proportion, Pose, and Patience
Tiny figures follow different rules than full-size humans. Heads are big, limbs are short, and posture tells a story. Start with a simple body: a ball for the head, a tapered cylinder for the neck and torso, and tiny limbs. Don’t stress about realism—character is king here.
- Build the head first. Add facial features while the clay is soft.
- Attach a neck and torso with a little slip of clay to help adhesion.
- Roll arms and legs as short cylinders; bend for natural poses.
- Sculpt clothes in separate pieces and bridge them onto the body.
Pro-tip: use a tiny amount of water or liquid clay to smooth seams. It helps hide the joins and makes the figure look polished.
Clothing, Accessories, and Tiny Details
This is where your figures come alive. Clothes convey era, personality, and mood. Here are quick ideas:
- Aprons, hats, and tiny shoes to set a scene
- Textured fabrics through scoring and joining with a needle
- Miniature props: a teacup, a book, a plant—anything that tells a story
- Layering small pieces creates depth; go slow and dry-fit often
H3>Texture and Pattern Tricks
– Use a toothpick to imprint tiny fabric patterns, like stripes or houndstooth.
– Press a textured surface (like a shell or lace) gently against the clay for complex surfaces.
– For shiny shoes or glossy coats, apply a gloss glaze after baking or drying.
Painting and Finishing Touches
Paint adds personality and mood. Keep brushes tiny and the paint thin. Here’s a simple workflow:
- Base coat, then let dry completely
- Layer shadows and highlights to create dimension
- Seal with a matte or gloss varnish, depending on the look you want
Tips:
– Use a fine-tipped brush for eyes and tiny facial features.
– Don’t flood the piece with paint; build color in thin layers.
Drying, Curing, and Assembly Tips
Different clays require different endings. Polymer clay bakes at low heat, while air-dry clay needs time. Always check manufacturer instructions. FYI, you’ll get better with practice, so don’t rush.
Common Pitfalls and How to Avoid Them
– Cracking: keep the clay moisture balanced and avoid overworking it.
– Warping: support limbs during curing and add tiny internal supports if needed.
– Sticky fingers: dust with a touch of cornstarch to prevent sticking.
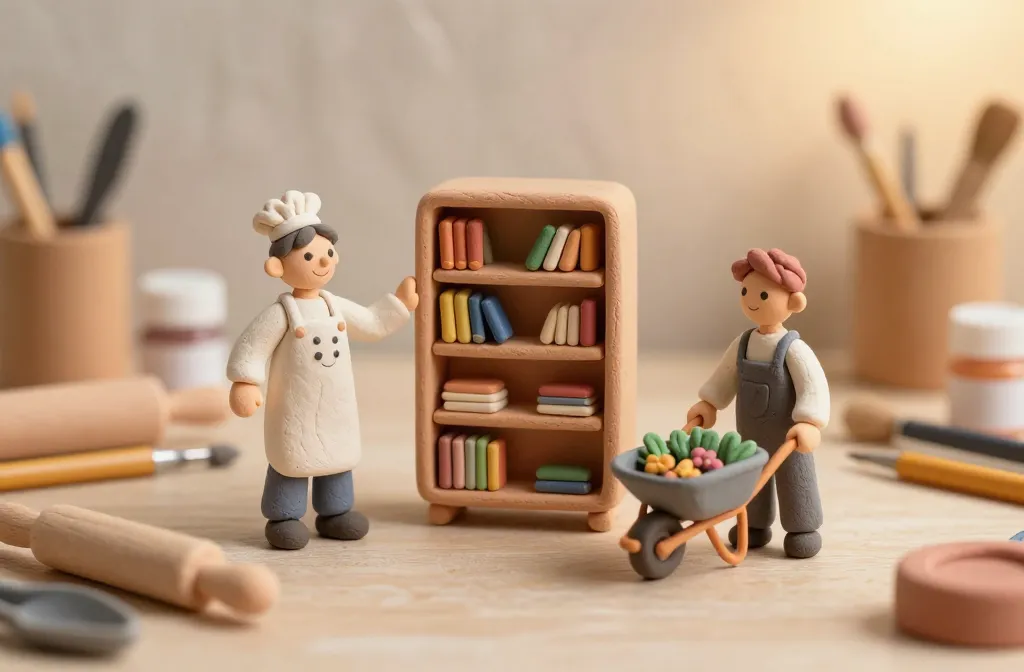
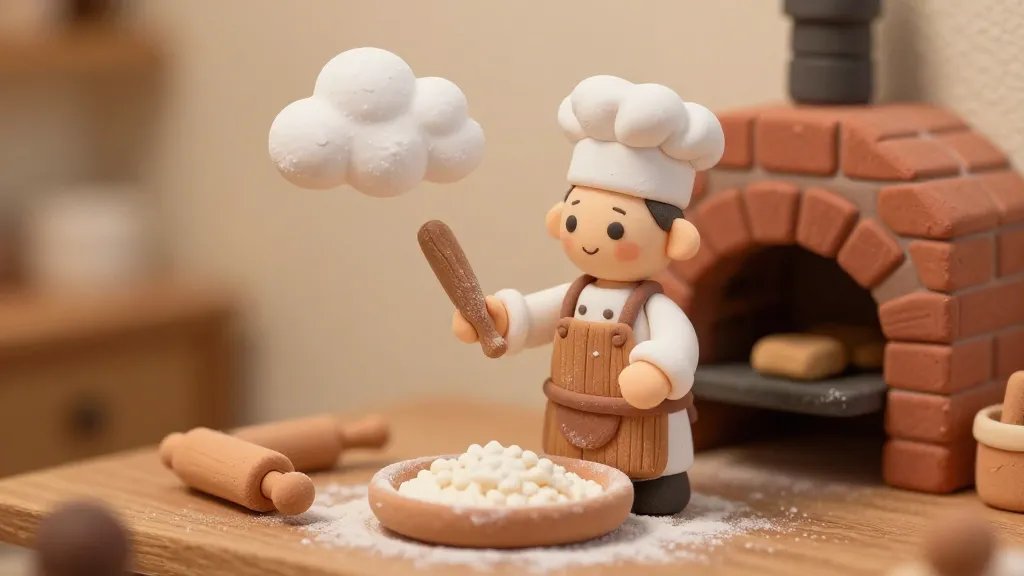
Creative Ideas for Your Dollhouse Scene
– A cozy bakery with a miniature oven and a passing customer.
– A tiny garden with a gnome, a wheelbarrow, and potted plants.
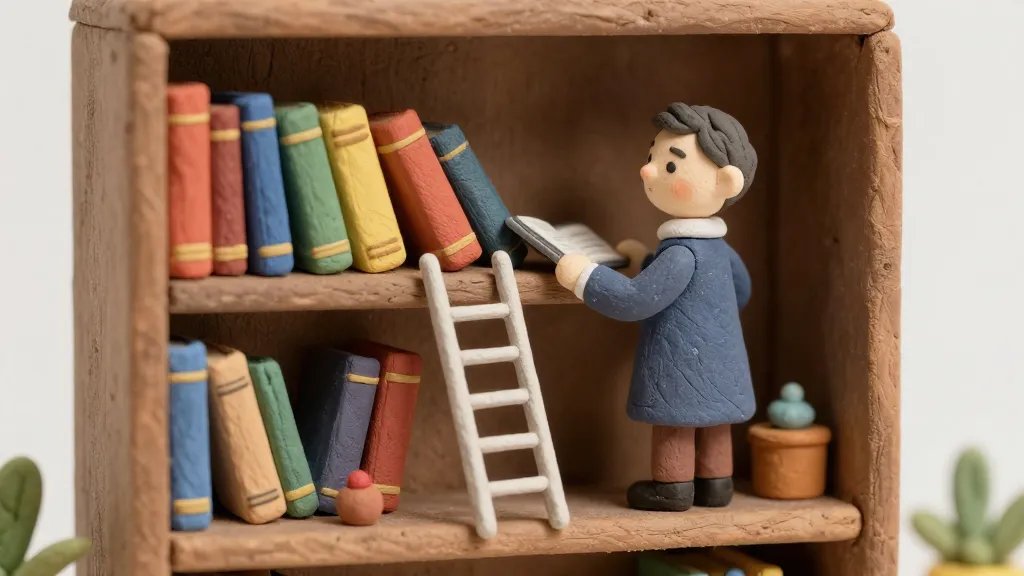
– A library nook featuring a librarian and a stack of micro-books.
Seasonal and Themed Sets
– Holiday shop window with seasonal outfits and props.
– Summer beach corner with sunscreen, a tiny towel, and sandals.
– Winter cafe vibe with mugs, scarves, and mugs of cocoa.
Storage, Display, and Sharing Your Tiny Masterpieces
Keep your miniatures safe and accessible. Use labelled containers or a shallow display case. When you’re ready, share photos online or swap with fellow hobbyists. IMO, community makes these tiny projects even sweeter. FYI, good lighting makes your photos pop, so set up a dedicated little photo corner.
FAQ
What clay is easiest for beginners?
Polymer clay is forgiving and forgiving beginners. It bakes, holds shape well, and comes in vibrant colors. If you’re not ready to bake, try air-dry clay to learn the basics before you commit to heat.
How do I avoid cracks in tiny figures?
Keep your clay evenly moist as you work, don’t overwork too much at once, and use thin, gradual layers. If a crack appears, lightly dampen the area and press the crack closed, then add a tiny amount of fresh clay to seal it.
What tools are essential for tiny details?
A fine-point needle, a small rolling pin, a silicone sculpting tool, a craft knife, and a few steady hands (or a steady desk) are all you need to start. You can upgrade later, but these basics get you far.
How do I seal mini clay figures without dulling colors?
Choose a thin sealant and apply in light coats. A satin or matte finish often preserves color better than high-gloss, unless you want a shiny look for specific items like glassware.
Can I mix polymer clay with air-dry clay?
Yes, but bake polymer clay separately from air-dry pieces to avoid cross-contamination of textures and curing times. Then assemble once each part is fully cured.
How should I store leftover clay?
Wrap unused clay in plastic, or seal in an airtight container to prevent it from drying out. Store away from heat and direct sunlight to maintain color and pliability.
Conclusion
Tiny clay figurines for dollhouses aren’t just cute; they’re storytelling power in miniature form. Start simple, learn as you go, and embrace the quirks that make your figures uniquely yours. The best part? You can revisit a scene, tweak a pose, or swap a tiny character with a friend and instantly refresh your world. So grab your clay, pick a scene, and start crafting tiny legends you can proudly display.


