Kawaii donut clay charms are a tiny, tasty-sized universe you can craft with your own two hands. They’re cute, colorful, and oddly satisfying to make. Let’s dive into why these little squishy donuts are everywhere and how you can start making your own masterpieces today.
Why Kawaii Donut Charms Steal the Spotlight
Kawaii donut charms tap into that kid-at-heart vibe we all secretly chase. They’re instantly joyful, super forgiving for beginners, and surprisingly versatile. You can turn them into keychains, earrings, phone charms, or tiny desk buddies. FYI, the recipe for success here is simple: cute faces, bright sprinkles, and a dash of whimsy.
- Low-stakes craft: You don’t need fancy tools to begin.
- Instant gratification: Small projects, big smiles.
- Shareable hobby: Trade charms with friends or post pics online.
Materials You’ll Want on Hand
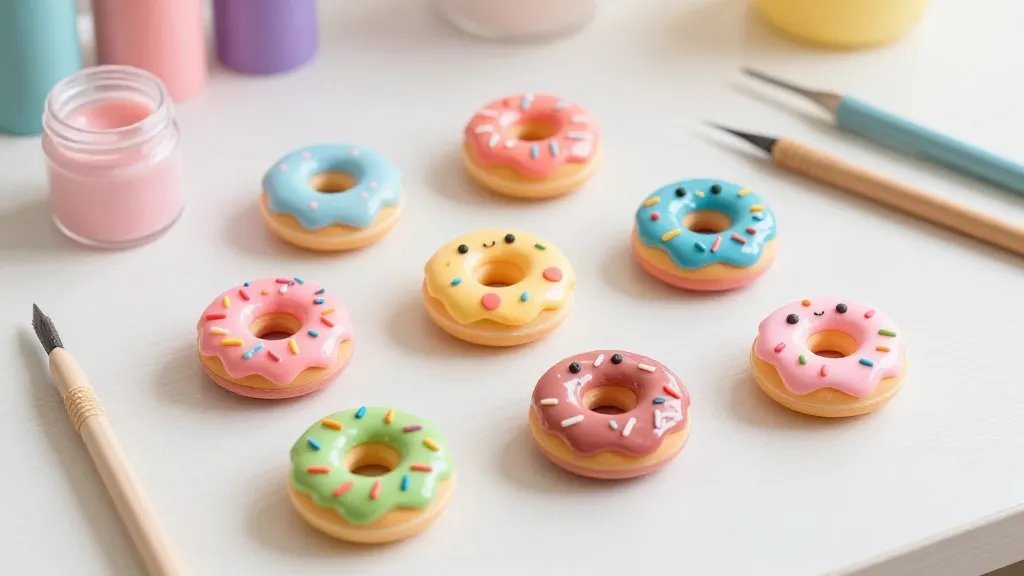
Starting strong means gathering the right supplies. You don’t need a full studio setup—just a few essentials that won’t break the bank. Here’s your quick shopping list:
- Air-dry clay or polymer clay
- Acrylic paints and tiny brushes
- Sealant or varnish for shine and durability
- Beads, glitter, and tiny embellishments
- Jump rings, eye pins, and sturdy cord or keychain hardware
- Clay tools or common kitchen items (toothpicks, plastic knives)
Tips for Beginners
– Start with simple donut shapes before layering faces and sprinkles.
– Bake or dry in a well-ventilated area and follow your clay’s instructions.
– Keep a damp cloth handy to wipe hands and tools—mess is part of the charm, but not the chaos.
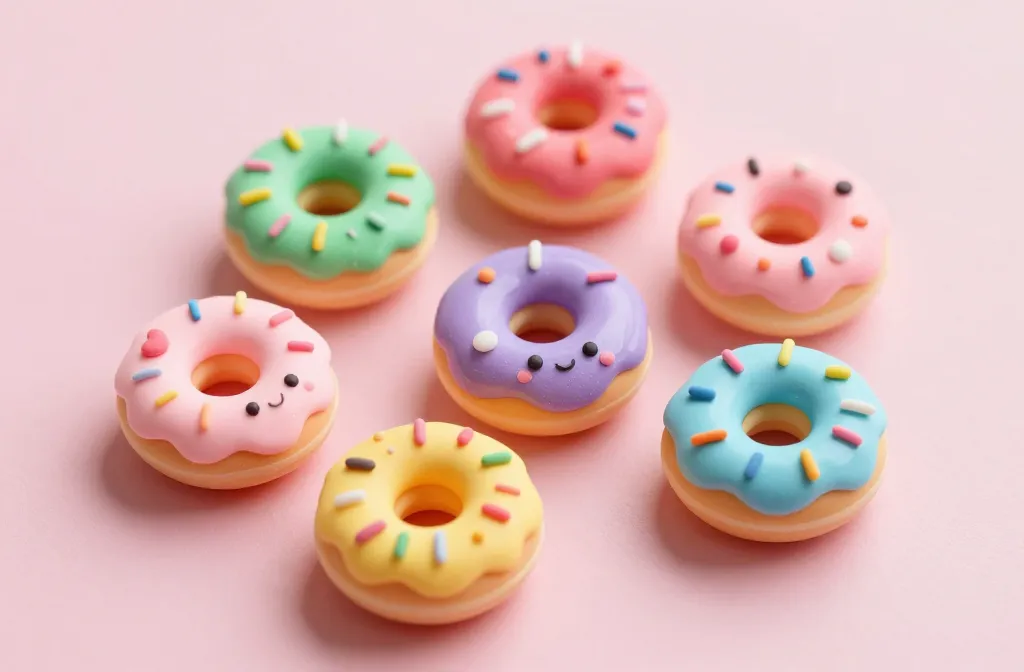
Designing Adorable Donut Faces
A cute face is the heart of a kawaii donut. It’s all about expression without saying a word. Think big eyes, a tiny mouth, and cheeks that resemble over-amped blush.
- Eyes: Round dots work wonders; place them slightly higher for a friendlier vibe.
- Mouth: A tiny smile or a surprised “O” can set the mood.
- Blush: Soft pink circles under the eyes add warmth.
Face Variations to Try
– Surprised Donut: Wide eyes, open mouth, a sprinkle crown.
– Sleepy Donut: Half-closed eyes and a tiny yawn line.
– Smiling Sunset: Gradient glaze with a sunny grin.
Glazes, Sprinkles, and Finishes
The glaze is where your donut really pops. You can layer colors, add shiny finishes, and sprinkle tiny details that catch the light—and the eye.
- Base glaze: Choose a color that suits your vibe—pink, lavender, pistachio, or classic chocolate.
- Sprinkles: Use tiny polymer beads or cuttlefish bone powder for texture.
- Top coat: A clear sealant makes colors pop and protects your charms.
Shade and Shine Techniques
– Ombre glaze: Fade from light to dark for a dreamy look.
– Sugar-dusted: Lightly dust with fine glitter for a sugar-crystal finish.
– Glossy flip: A quick brush of gloss over the sprinkles makes them look like real sugar.
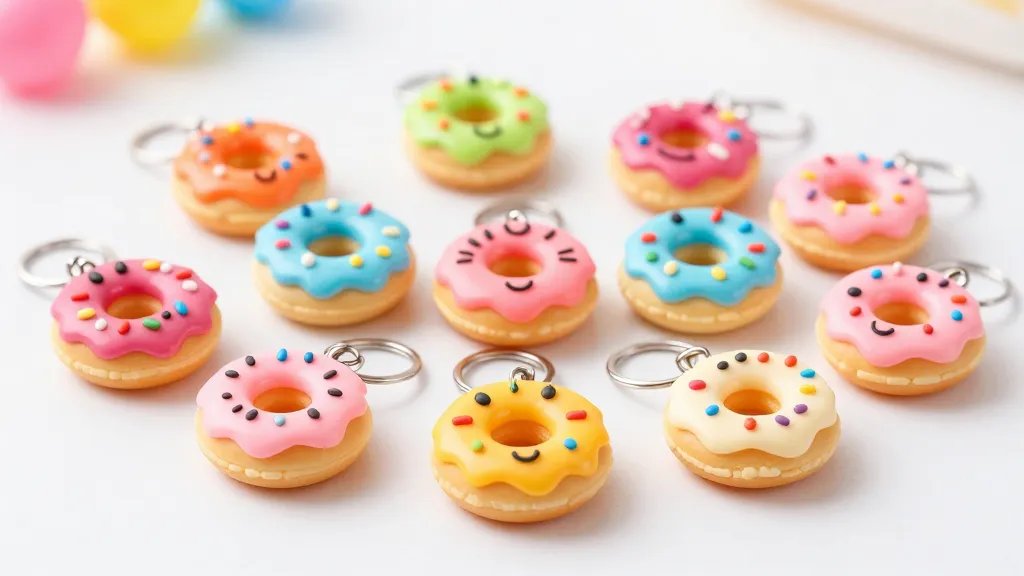
Turning Donuts Into Beloved Charms
Now that you’ve got the basics, it’s time to turn these donuts into wearable art. The right hardware connects your little treats to the world: keychains, earrings, or bag charms.
- Use jump rings to attach to keychains or earrings securely.
- Embed a tiny hole for eye pins if you want a multi-piece jewelry piece.
- Consider a neutral glaze on the back for a neat, professional finish.
Care and Durability
– Store in a dry, dust-free box to prevent surface scratches.
– If using polymer clay, bake with a small air gap to avoid warping.
– Re-seal occasionally if you plan to wear them often or expose them to sunlight.
Inspiration Sources and Quick Themes
If you’re feeling stuck, look for inspo in everyday life: bakery signs, pastel fashion, or even cartoon snacks. Create a theme for a batch—like “Pastel Latte” or “Sprinkle Sunset.” Pro tip: keep a tiny sketchbook or a notes app entry for color palettes and facial expressions you want to try next.
Seasonal Spin-Offs
– Spring bouquet donuts with floral sprinkles.
– Summer gelato donuts in bright, icy hues.
– Halloween munchkins with spooky faces and candy accents.
Showcase, Sharing, and Community Vibes
One of the best parts of this hobby is the people you meet along the way. Share your progress, swap tips, and get feedback from fellow kawaii donut enthusiasts.
- Join maker communities on socials and forums.
- Host a tiny charm trade night with friends.
- Post process videos showing your steps—people eat that content up.
FAQ
What clay is best for beginners?
For beginners, air-dry clay is forgiving and requires no baking, which makes it a great entry point. If you want durability and longer-lasting pieces, polymer clay with proper baking is a solid choice.
Do I need special tools?
Not at all. Start with everyday items: a toothpick for eyes, a small brush for glaze, and a cutting edge from a plastic knife. You can upgrade later if you want more precision.
How long do charms take to finish?
Depends on complexity. Simple donuts dry in a few hours with air-dry clay, while polymer clay pieces need baking and cooling time. Overall, plan a few sessions to polish a batch.
How should I store and transport my charms?
Keep them in a shallow box or a tray with dividers to prevent sticking. If you’re moving them around, wrap each piece in tissue paper or place them on a soft surface to avoid scratches.
Can I customize charms for gifts?
Absolutely. Personalize colors, faces, and themes to fit the recipient’s vibe. Add initials or a small charm that reflects their hobbies. It’s the tiny personal touches that make gifts feel extra special.
Conclusion
Kawaii donut clay charms are the tiny joy you can craft, collect, and share. They’re easy to start, endlessly customizable, and somehow magical in how a simple smiley donut can brighten a day. So grab some clay, pick a glaze, and let your inner pastry artist loose. You might just become the friend who brings the happiest little charms to every meetup.


