An easy, cute project you can tackle in a rainy afternoon. Grab some clay, a magnet, and your inner kid—you’ll be surprised how fast these little critters come to life. Let’s dive into a tiny world of fuzzy faces and fridge-worthy charm.
Why DIY Clay Magnets Are Impossible to Resist
If you’ve ever wanted a tiny creature staring back from your fridge, you’re in the right neighborhood. Clay magnets merge crafts, personality, and practicality in one sweet package. They’re budget-friendly, endlessly customizable, and you get bragging rights for handmade decor that actually sticks around.
- Low barrier to entry: squish, sculpt, bake, attach magnet—done.
- Endless customization: animals, colors, poses, you name it.
- Personalized gifts: grandma’s going to melt when she gets a penguin holding a heart.
What You’ll Need (No Fairy-Teeps Required)
Keep this short and sweet so you can start crafting today. Most supplies are in any craft aisle or online.
- Air-dry or polymer clay in a few colors
- Strong magnets (neodymium work great)
- Acrylic paint and fine brushes
- Gloss varnish or Mod Podge for shine
- Craft glue or super glue (for magnet backing)
- Sealant spray or clear sealant
- Optional: needle tool, clay tools, and a small rolling pin
Design Ideas: Adorable Animals to Try
In this section, we’ll brainstorm characters you can sculpt, plus quick tips to nail the cuteness factor.
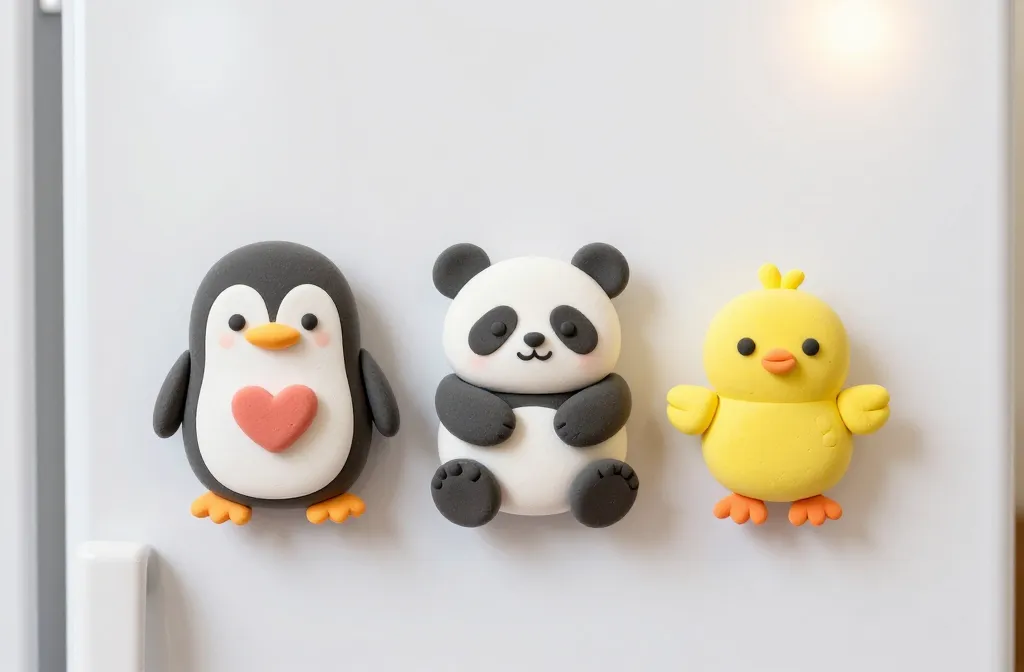
1. Pancake-Penguin Duo
Two little penguins snuggling on a fridge magnet? Yes, please. Keep bodies simple with basic teardrop shapes, add a little white belly, and don’t overthink the beak. A tiny blush of pink on the cheeks and a glossy finish seals the deal.
2. Sleepy Sloth on a Branch
Sloths are basically built for magnets—relaxed poses, sleepy eyes, and a cute branch perch. Use gravity-defying arms to hug the branch, and make sure the magnet sits behind the branch for balance.
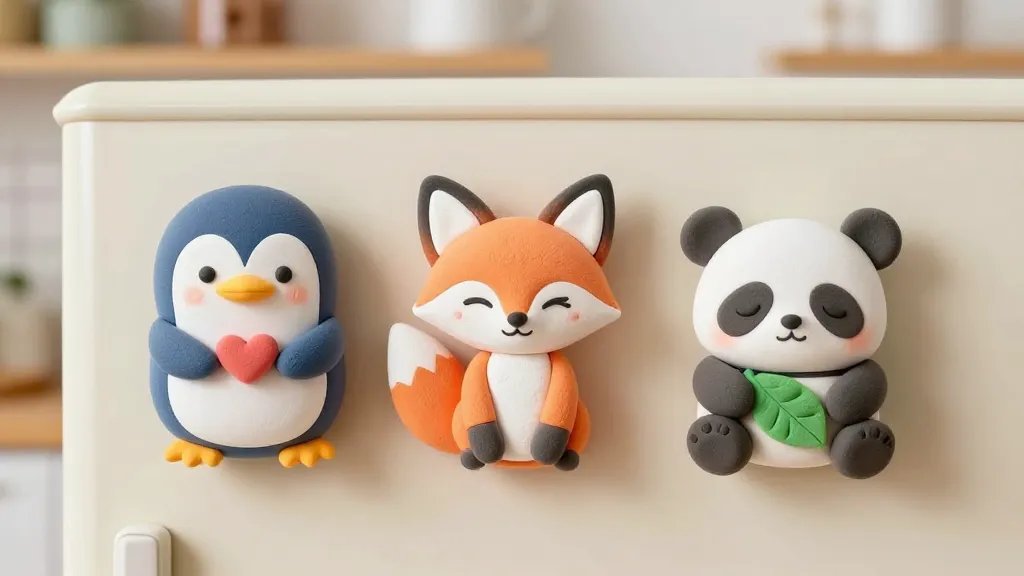
3. Grinning Fox Buddy
Foxes look instant-ready for a magnet. Pointed ears, a bushy tail, and a cheeky smile. Layer colors to create depth: orange for the body, white for the chest, and black accents for eyes and nose.
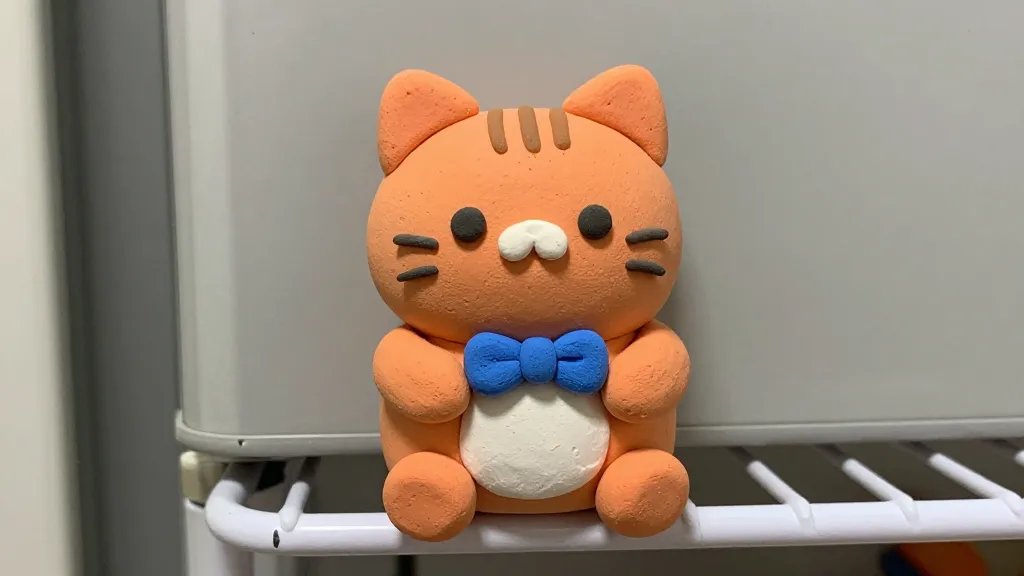
4. Curious Cat With a Yarn Ball
Cats are magnet gold. A round head, perky ears, and a tiny skein of yarn wrapping around the side keep things dynamic. A glossy finish makes the fur look smoother and more “photo-ready.”
5. Bouncy Bunny Parade
A row of tiny bunnies can create a charming herd magnet. Round bodies, long ears, and a touch of pastel color. Add little paws peeking out and a mini carrot prop for whimsy.
Technique Quick Tips: Getting That Studio-Quality Finish
These tricks will help you go from “meh” to “wow” without turning baking into a science experiment.
- Stiff clay holds its shape better—don’t skip kneading.
- To avoid indentations, smooth surfaces with a damp fingertip or a soft brush.
- Bake times vary by clay type—double-check packaging and do a small test piece.
- For air-dry clay, give it 24–48 hours to harden fully, then paint.
- Sealants matter: a thin coat preserves color and prevents chipping.
Choosing the Right Magnet Backing
A strong magnet backing keeps your art in place and prevents top-heavy critters from tipping over.
- Neodymium magnets: thin, powerful, but handle with care.
- Epoxy or glue method: attach magnet with a dab of strong glue behind the finished piece.
- Balanced weight: ensure the magnetic force matches the animal’s size.
Safety Note
Magnets can be a choking hazard for kids. If you’re crafting with little ones, supervise closely and keep magnets away from mouths.
Color Tutorial: Making Your Animals Pop
Painting can elevate your magnets from cute to gallery-worthy. Here’s a simple approach.
- Base coat: apply a flat color and let it dry completely.
- Shading: add a darker shade around edges and curves to create depth.
- Highlights: a touch of white or lighter color on the nose and cheeks adds life.
- Finish: seal with a clear varnish to protect against fingerprints and smudges.
Finishing Touches: Personalization That Delights
– Add tiny accessories: glasses, hats, or little scarves can transform a generic animal into a character with personality.
– Experiment with poses: sitting, standing, or peeking out from behind a leaf gives variety.
– Create mini scenes: a magnet of a bear with a honey pot or a cat with a yarn ball tells a tiny story on your fridge.
Storage and Display: Keeping Your Collection Fresh
– Keep your magnets flat while drying or curing to avoid warping.
– Store finished pieces in a dust-free box with tissue paper.
– Create a rotating “gallery” on your fridge by swapping magnets weekly.
FAQ: Quick Fire Answers
What clay is easiest for beginners?
Air-dry clay is the simplest entry point. It requires no oven and dries on its own, making it forgiving if you’re still learning how to smooth edges.
How long do these magnets last?
With proper sealing, good magnets, and careful handling, they can last months to years depending on how often you tug them off and on.
Can I make these for gifts?
Absolutely. Personalize with a friend’s favorite animal, color palette, or a tiny message on the back with a Sharpie (wait for paint to cure first).
What if I don’t have a kiln or oven?
No kiln needed a lot of clay works with air-dry or UV-curing options. If you want epoxy-backed magnets, you’ll still bake the clay separately and attach the magnet later.
How do I fix a chipped paint job?
Lightly sand the area, reapply paint, then seal again. If the surface is rough, add a thin coat of sealant before repainting.
Conclusion: Start Small, Laugh Loud, Cute Magnets Win
DIY clay magnets with adorable animals are a playful way to dip your toes into crafts while making something genuinely delightful. They’re quick to learn, endlessly customizable, and frankly, guaranteed to earn you some serious fridge-approved glory. So what are you waiting for—grab your clay, sculpt a furry friend, and post your creation because,IMO, your future magnetic gallery deserves its moment in the sun. FYI, friends will beg you for one more cute critter.


