An adorable seal clay sculpture can turn a dull shelf into a tiny slice of ocean magic. If you’ve ever stared at a lump of clay wondering what it could become, you’re not alone. Let’s dive into charm, texture, and the tiny triumphs of sculpting a seal that looks ready to waddle off the desk and into your heart.
What Makes a Seal Sculpture So Satisfying
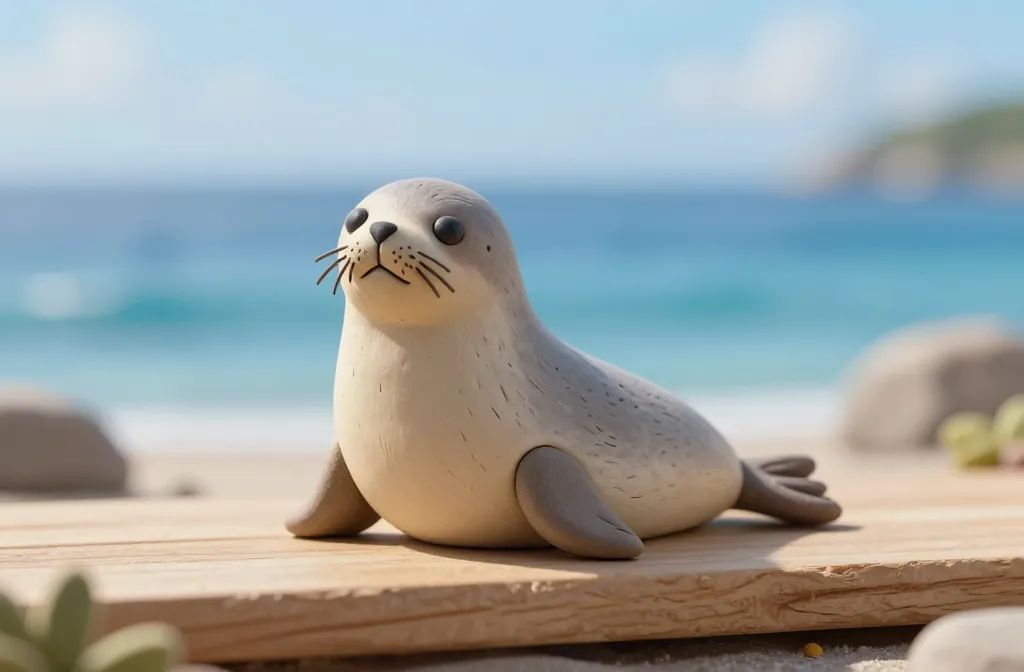
Seals have those perfect little features that are oddly satisfying to sculpt: the rounded body, the button-like eyes, and that goofy, lovable smile. You don’t need to be a pro to capture the vibe—just a little patience and a willingness to be delightfully imperfect. FYI, the magic happens in the tiny details: whiskers, flippers, and the subtle blobby belly that says “snack time.”
Choosing Materials That Play Nice
- Air-dry clay is beginner-friendly and forgives a lot of mistakes.
- Polymer clay needs baking, but it stays nice and sturdy.
- Armature wire helps props like flippers stay put without cracking.
Start simple: a small egg-shaped body with a separate tail and head piece. You’ll thank yourself later when you don’t have to re sculpt the torso five times. IMO, a well-made basic shape saves you from tears and dramatic sighs.
Step-by-Step: Getting the Form Right

- Shape the main body: make it rounded, but not pancake-flat. Think fitness model, not blob.
- Attach the head and tail with a sturdy join. Score the surfaces, brush on a bit of slip, then blend the seam.
- Sculpt the flippers: tiny ovals that curve slightly—like the seal is ready to paddle out for a snack.
- Detail the face: dot the eyes, tiny nose, and a gentle smile. Less is more here; overstuff the face and you’ll lose character.
Pro Tips for a Plush Look
- Use a tiny brush to stipple fur texture along the back. It gives that “soft toy” vibe.
- Lightly dust with a baking soda powder for a sandy, beachy finish.
- Seal the sculpture with a varnish if you plan to display it in a humid space.
FYI, tiny imperfections make your piece uniquely yours. Don’t stress the small stuff—seals aren’t built to be perfect, they’re built to be cute.
Color Choices That Elevate the Cuteness
Classic gray and tan tones are timeless, but a splash of whimsy never hurts. Consider:
- Soft gray with a lighter underbelly for contrast.
- Warm sandy browns for a beachy vibe.
- Playful accents like a coral pink nose or teal flippers for personality.
Remember, shading adds depth. A few darker strokes along the back can create the illusion of fur without turning your sculpture into a furry monster. IMO, subtlety wins here.
Nails, Not Fails: Fine Details That Make It Real
Those tiny features are where the magic hides. Use a fine needle tool or a toothpick to etch whiskers, mouth line, and the little crease where the flippers meet the body. A glossy eye bead can instantly up the charm, but you can also paint tiny white highlights to give the eyes a glint.
Alternative Textures: From Plush to Slick
- Use a soft brush to create a fuzzy texture for a “plush toy” feel.
- Go for a smooth, polished finish for a modern display piece.
Either way, testing on a scrap piece helps you dial in the look before you ruin your main sculpture. Don’t rush—or you’ll be stuck with regret and a vacuum of inspiration.
Display Ideas That Spark Joy
A seal sculpture deserves a cute home. Try:
- A tiny cliff display with a faux waterline using clear resin or gloss varnish.
- A mini beach scene with shells and a strip of faux seaweed.
- A shelf centerpiece with a couple more sea critters for a mini marine diorama.
FYI, lighting matters. A soft LED spotlight can turn a simple sculpture into a star of your desk. And yes, the seal will still act surprised when the light hits its “eyes” at just the right angle.
Maintenance and Troubleshooting
Sculpting is a forgiving art, but a few hiccups can derail your vibe. Here’s how to keep things smooth:
- If the clay cracks while drying, wrap it loosely and give it time to cure slowly.
- Excess moisture leads to warping—soap up a damp sponge and gently pat the surface.
- Paint peels? Seal with a clear top coat to lock in color and texture.
IMO, patience saves projects. Step back, admire, tweak, repeat. You’ve got this.
From Hobby to Gift: Spreading the Cute
Gift-ready seals make adorable presents for friends and kids. Add a little stand, a name tag, or a tiny note about the piece’s “ocean vibes.” FYI, handmade gifts carry that extra warmth—people notice the love you poured in between the curves of clay.
Mini Workshop Ideas
- Host a weekend clay session with a friend and churn out a small crew of seals.
- Share tips and swap color palettes to keep things fresh.
Sharing is part of the fun. It’s like a tiny art community, but with less drama and more beaming smiles.
FAQ
How long does a seal sculpture take to dry?
Air-dry clay can take anywhere from 24 to 72 hours depending on thickness. If you’re impatient, use a hair dryer on a cool setting to speed up surface drying, but avoid overheating the core. FYI, slow and steady wins this race.
What clay is best for beginners?
Air-dry clay is the friendliest option for beginners because it cures without ovens or kilns. Polymer clay is great too if you don’t mind baking. Both can yield adorable results with patience and practice.
How can I fix a broken seam?
Gently rejoin with a bit of fresh slip, press, and blend the seam with a soft tool. Let it dry again and assess. If the seam reopens, consider reinforcing with a thin wire armature for extra strength.
What finishes make a seal sculpture last?
A clear sealant or varnish protects against smudges, moisture, and dust. Choose a matte or glossy finish depending on the look you want. Remember: a little guard goes a long way.
Can I paint after it dries?
Yes. Acrylic paints work well on dry clay. Seal the paint layer with a varnish to protect the color. Pro tip: test on a scrap piece first to ensure you like the texture and hue.
Conclusion
With a bit of patience and a splash of whimsy, your cute seal clay sculpture can become the star of any shelf. The charm lies in the imperfectly perfect shape, the gentle textures, and the stories you tell through tiny details. So, roll up your sleeves, grab some clay, and let your inner sea animal whisperer shine. You’ll likely end up with a piece you’ll proudly show off and maybe even hoard for yourself—because adorable is practically a superpower.


