An absolute treat for tiny-world lovers: clay mushrooms that look charming, adorable, and almost real enough to tuck into a secret fairy circle. If you crave whimsy without the fuss, you’re in the right place. Let’s dive into crafting charming little fungi that brighten any fairy garden.
Why Handmade Clay Mushrooms Make Your Fairy Garden Pop
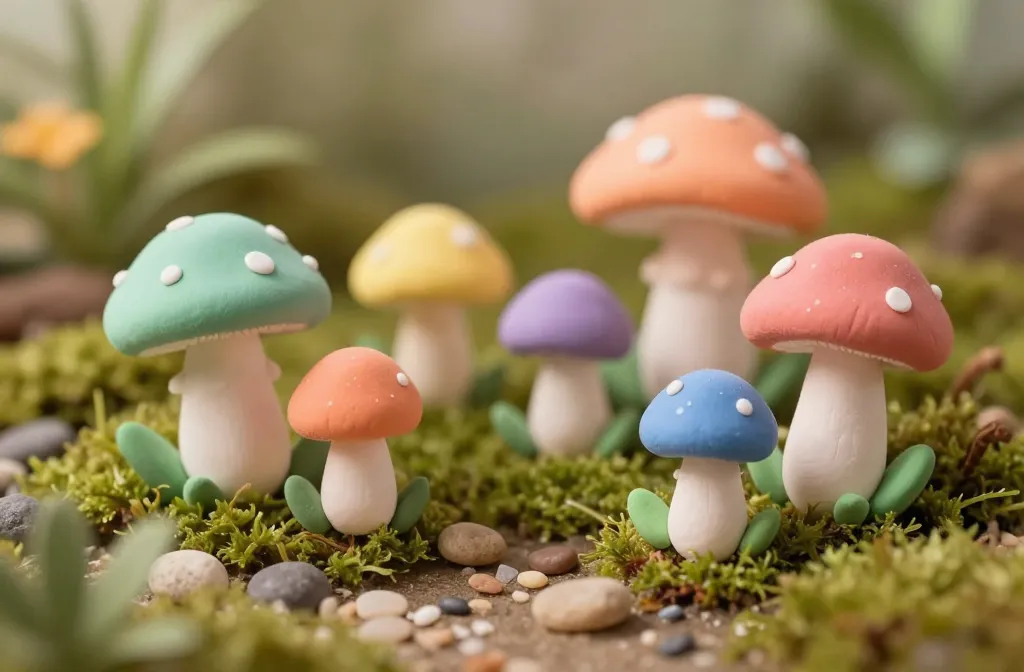
Have you noticed how DIY touches make spaces feel personal? Clay mushrooms bring color, texture, and a dash of whimsy that store-bought décor rarely nails. They’re affordable, durable, and surprisingly forgiving for beginners. FYI, the tiny details matter—layered colors, glossy caps, and the polka-dot surprise.
Materials You’ll Need
- Air-dry clay or polymer clay
- Acrylic paints in playful hues
- Soft brushes and a fine-tinish detail brush
- Gloss varnish or sealant
- Toothpicks or small sculpting tools
- Clear glue or a glue gun
No need to go overboard: you probably already have most of this. The goal is to keep things simple, so you actually finish the project instead of starting a dozen.
Getting the Shape Right: Simple Clay Mushroom Basics
Mushrooms are basically little umbrellas with stems—fun, right? Start with a small ball for the cap and a short cylinder for the stem. Blend the seam where cap meets stem so it looks natural. Don’t overthink it; imperfect edges add charm.
Common Mistakes to Avoid
- Too-thick stems that topple the scene
- Sticky clay that won’t dry evenly
- Over-smoothing, which makes them look plastic
If a piece is too soft, pop it into the fridge for a few minutes. It firms up just enough to work with.
Color Play: How to Paint Cute Caps Without Looking Like a Circus
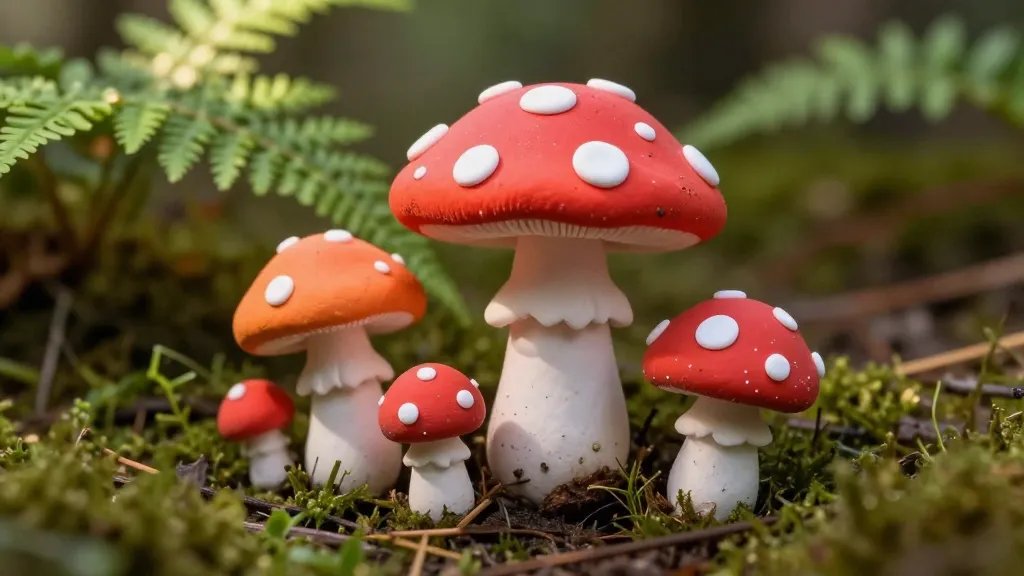
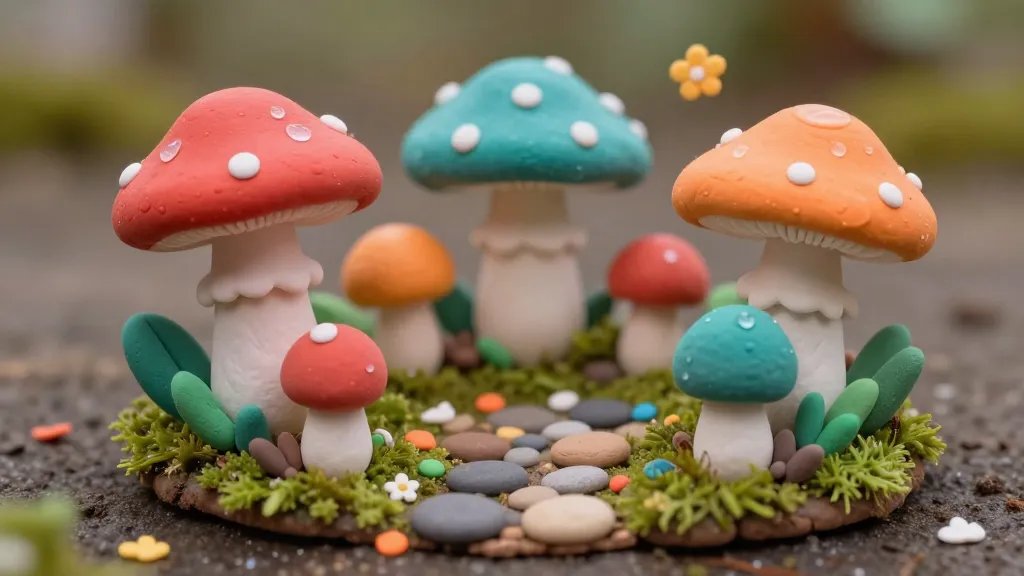
Color makes the forest come alive. Think soft pastels, playful polka dots, or a bold red with white specks. Start with a base, then add shading to give depth. A tiny hint of white or yellow at the cap edge adds realism without losing whimsy.
Techniques for Realistic Yet Playful Looks
- Dry brushing for subtle texture on the cap
- Dotting for mushrooms with personality—random is good
- Glossy cap highlights to imitate dew
Improvise and own your palette. FYI, the point is to evoke a magical vibe, not to win an art show.
Sealing the Deal: Making Them Last in Your Fairy Garden
You want these little guys to survive rain, sun, and curious garden gnomes. A good sealant protects color and keeps smudges away. Apply a thin, even coat and let it dry completely before placing them outside.
Indoor-Outdoor Ready Tips
- Use a polymer clay with built-in bake or air-dry time that suits your climate
- Seal with a UV-resistant spray to prevent color fading
- Place them in shaded spots to avoid sun-bleached edges
If you’re worried about weather, keep a few backups in a jar for seasonal swap-outs. It’s the ultimate fairy garden remix.
Placement Ideas: Making Your Fairy Scene Truly Magical
Where you put them changes everything. A cluster near a tiny toadstool house? Yes, please. A row beside a miniature moss path? Absolutely. Think narrative: a little village of mushrooms guarding a tea party, a mushroom archway leading to a “forest” of ferns—let your imagination lead.
Theme Possibilities to Try
- Forest party with a cap-topped table and chairs
- Fairy doorway peeking through the moss
- A mushroom bridge over a pebble stream
If you’re feeling extra festive, mix in other clay creatures—snails, toad stools, or a sleepy hedgehog. The more whimsy, the better.
Maintenance and Refresh: Keeping the Magic Fresh
Fairy gardens are dynamic. Seasons change, moisture shifts, and little hands (pet paws, not yours) might knock things around. A quick re-paint or a fresh gloss layer can revive a scene in minutes.
Seasonal Swaps
- Spring: pastel caps, bright stems
- Summer: saturated greens and sunny yellows
- Autumn: earthy tones with orange specks
- Winter: frost-like white caps with glitter accents
Not every piece needs a full overhaul. Sometimes a single new cap or a gloss update does the trick.
Creative Variations: Beyond the Classic Cap
Why stop at classic red with white dots? Try a purple cap with gold flecks, a turquoise cap with silver specks, or a translucent cap that catches sunlight like stained glass. You can also experiment with different stem textures—grooves, tiny ridges, or a twisted twisty stem for a whimsical look.
Texture Tricks
- Crisscross scoring on the cap for a rustic feel
- Imprint tiny lines with a needle to mimic gills
- Dust with fine glitter for magical sparkle
Be mindful that too much glitter can look juvenile; aim for subtle shimmer.
FAQ: Quick Answers About Cute Clay Mushrooms for Fairy Gardens
Can beginners really make clay mushrooms look good?
Absolutely. Start simple with a few shapes, practice blending, and you’ll get the hang of it in no time. The charm lies in the tiny imperfections and personality you add.
What kind of clay is best for outdoor use?
Air-dry clay is beginner-friendly and works well with a clear sealant. Polymer clay is also great if you bake it, but make sure your sealant is compatible with the finishing material you choose.
Do these need to be stored indoors during winter?
If you live in a harsh climate, it’s safer to bring them indoors or cover your garden decor to protect from freezing temperatures and moisture. A little care goes a long way.
How can I make them child-friendly?
Keep the pieces lightweight and non-sharp. Use non-toxic paints and sealants. That way, little hands can admire the mushrooms without worry.
What’s a quick way to create a cohesive look for a whole garden?
Choose a color palette and stick to it. Use 2–3 cap colors and complementary stems, then repeat those choices across different mushrooms to tie the scene together.
Conclusion
Cute clay mushrooms are a playful, approachable way to add personality to any fairy garden. They’re affordable, customizable, and forgiving—perfect for crafters of all levels. So grab your clay, paint, and glossy sealant, and start building your miniature woodland. FYI, the only limit is your imagination, and a damp driveway when you’re rushing to finish before sunset. Happy crafting!


