An excited hello to all you crafty folks ready to dive into clay earrings. We’ll keep it friendly, fast, and fun, no fluff. By the end, you’ll actually want to make your own tiny masterpieces instead of scrolling past every cute piece online.
Why Clay Earrings, Anyway?
Clay earrings are a total vibe: lightweight, customizable, and surprisingly forgiving for beginners. You can switch colors, shapes, and finishes with almost zero commitment. FYI, the only limit is your imagination (and maybe your oven temperature). Ready for a small-pat-on-the-back moment? You’ll be surprised how far a little polymer clay can go.
Tools and Materials You’ll Need
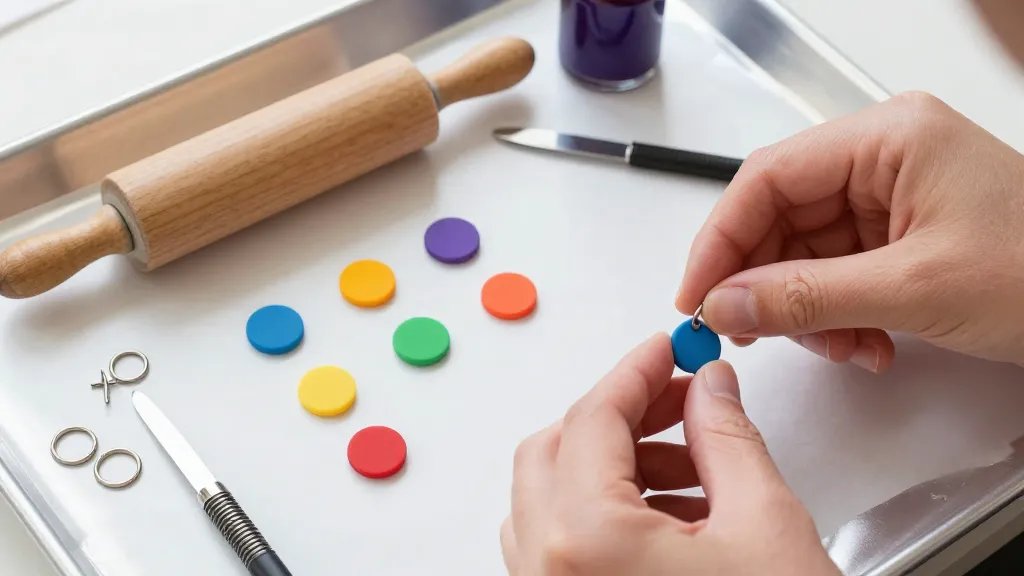
– Polymer clay in your favorite colors
– A basic rolling pin or a smooth glass bottle
– Earring posts and jump rings
– Craft knife or precision blade
– Aluminum foil and a baking sheet
– Fine sandpaper or a nail buffer for smoothing
– Optional: glaze or resin for extra shine
Pro tip: start simple. Pick two colors, a few shapes, and a basic drill-down plan. If you overthink it, you’ll freeze up—trust me, I’ve been there.
Picking Your First Shapes
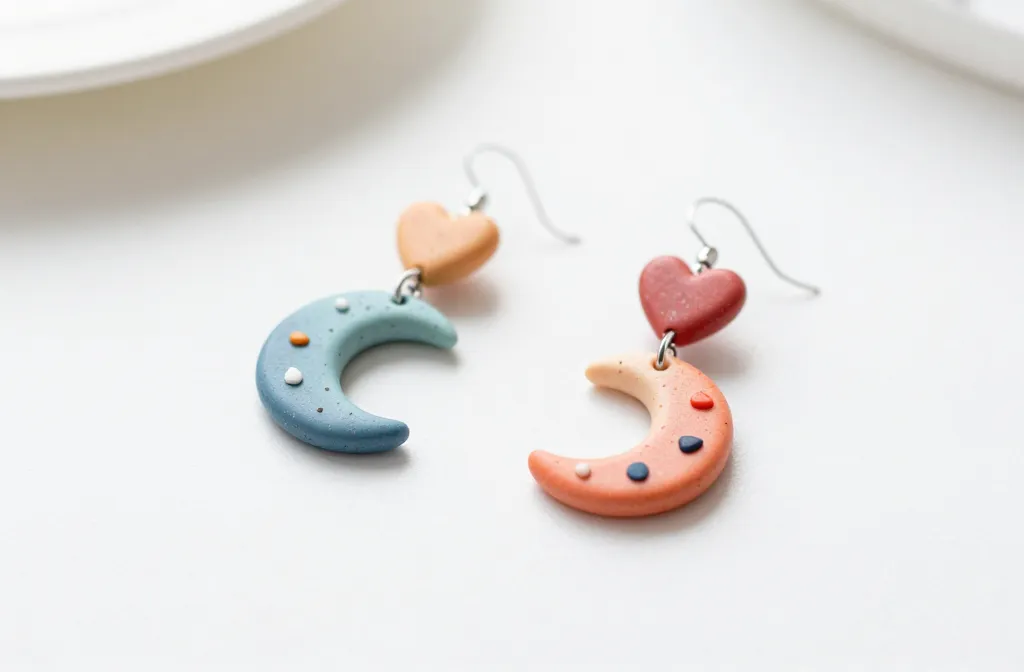
Choosing shapes is part of the fun. Start with classic cute options: moons, hearts, circles, and tiny geometric shapes. Don’t worry about perfection; asymmetry often reads as charm. If you’re feeling extra brave, mix in a pop of speckled color or tiny embossed dots to give your pieces personality.
How to Cut Clean Shapes
– Soften clay with warm hands or a quick knead. It helps avoid cracking.
– Roll to even thickness using a ruler or a textured mat.
– Use a sharp blade for crisp edges. Do multiple passes if needed.
– Store scraps and reuse them to reduce waste. We love a low-waste craft vibe.
Making the First Pairs: A Simple Step-by-Step
1. Condition your clay by kneading it until it’s smooth and pliable.
2. Roll, cut, and shape your pieces. Keep shapes roughly the same size so they feel balanced.
3. Create a small hole or ridge for the post to anchor. It’ll prevent spinning.
4. Bake per your clay’s instructions, usually around 265-275°F (130-135°C) for 15-30 minutes.
5. Let cool completely, then sand lightly for that pro finish.
6. Add a coat of glaze or resin if you want extra shine and durability.
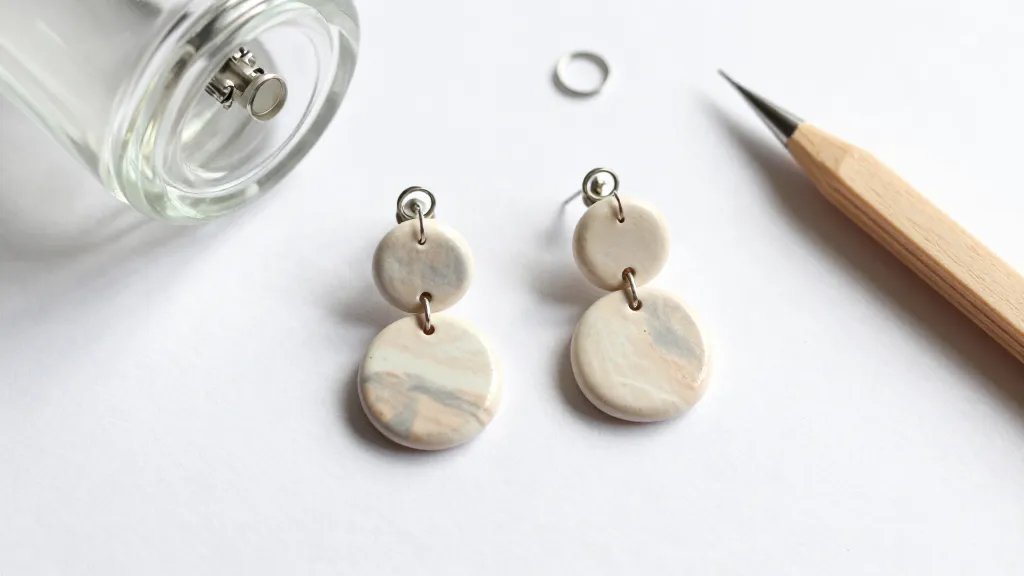
7. Attach the earrings posts and jump rings. Double-check everything is secure before wearing.
FYI: uneven edges? A quick sand and a tiny dab of glue will fix most issues. No drama, just practice.
Finishes: How to Make Them POP
– Matte look: skip glaze and buff lightly with a soft cloth.
– Glossy shine: a thin glaze layer or resin coat does wonders.
– Marble or speckled: mix two colors while still warm, then roll for a natural swirl.
– Pastel perfection: blend soft colors and keep shapes clean for a dainty aesthetic.
Sealing and Longevity
– Glaze or resin adds durability and water resistance. It’s not a magic shield, so avoid soaking in water.
– Store your earrings in a cool, dry spot to prevent warping or color fading.
– If a piece chips, you can fill with a tiny bit of clay and re-bake.
Showcase Your Creations: Storage and Display
– Use an organized tray with dividers to keep shapes and colors separate.
– Label sets by color or theme so you can find the right pair fast.
– Try a mini display board or a jewelry tree for cute photo opportunities.
– Share your makes with friends or online—community is fuel for motivation.
Common Mistakes and How to Avoid Them
– Overworking the clay: it makes edges brittle. Knead just enough to soften, then stop.
– Uneven baking: follow the clay’s guidelines; inconsistent heat leads to cracks.
– Skipping sanding: tiny burrs snag hair and fabrics. Buff those edges smooth.
– Too thick pieces: heavy earrings drag on your ears and feel uncomfortable.
Fix-It Tricks
– If a piece warps, reshape while still warm, then re-bake.
– For glossy flaws on finishing, a light sand and another thin glaze pass smooths it out.
– If you drop a bead, hot glue a tiny piece back on and re-bake if needed.
Inspiration on Tap: Where to Take It Next
– Mix textures: add tassels or metal charms for a modern twist.
– Seasonal sets: create autumn leaves, holiday motifs, or bright summer vibes.
– Personalizes: initials, tiny icons, or favorite color combos reflect your style.
Experimenting with Mixed Media
Try combining polymer clay with small beads, silicone findings, or metallic foils. It adds depth and interest without turning your workspace into a cluttered chaos. IMO, the best pieces happen when you mix a little mess with a lot of play.
FAQ: Quick Answers for Beginners
Do I need expensive tools to start?
Polymer clay basics work with simple tools. A rolling pin, a sharp blade, and some basic ear posts will get you far. You can upgrade later as you discover what you actually enjoy making.
How long do clay earrings last?
With proper curing and finishing, they can last for years. Avoid soaking, store them dry, and give them a light wipe between wears to keep colors vibrant.
Can I make custom orders for friends?
Absolutely. Start with a few signature shapes, offer color customization, and set clear timelines. People love unique earrings that feel personal.
What if my pieces crack after baking?
Cracks usually come from overbaking, underbaking, or rushing cooling. Ensure even baking, let pieces cool gradually, and sand any small cracks smooth before applying glaze.
Is resin finishing necessary?
Not necessary, but resin or glaze adds durability and shine. If you’re new, try a light glaze first to test the finish you prefer.
Conclusion
You’ve got everything you need to start making adorable clay earrings today. Start with a couple of simple shapes, nail a clean finish, and build your collection from there. Remember: practice is your best friend, and fun should lead the way, not perfection. FYI, the more you play, the more confident you’ll feel rocking your own handmade jewelry. Ready to dive in and show off your first cute pair? Go ahead—your ears will thank you.


