
An adorable project that packs charm, color, and tiny chewy beads into one satisfying craft. Grab your clay, your glue, and a cup of imaginary tapioca—we’re making boba tea charms you’ll actually want to carry around. Let’s dive in and get those little pearls dancing on a charm bracelet, keyring, or backpack.
Why Boba Charms Are Peak Craft Vibes
Anyone else obsessed with tiny things? These clay boba tea charms hit the sweet spot between cute and doable. They don’t require fancy tools, and the result looks totally Instagram-worthy. FYI, the trick is keeping the pearls uniform and the cup crisp enough to read as a real drink on a mini scale.
What You’ll Need (No Crazy Shopping Spree Required)
- Air-dry or polymer clay in your favorite colors
- Acrylic paints for tiny details
- Fine-tipped brushes and a dotting tool
- Toothpicks or needle tools for texture
- Clear varnish or gloss glaze
- Jump rings and a sturdy bail for attachment
- Optional: a tiny clay straw, whipped cream, or fruit slices for flair
Step-by-Step: Crafting the Cup That Sips with Style
- Shape the cup: Roll a small ball for the base, then flatten to form a cup outline. Pinch the sides slightly for that cup silhouette.
- Make the lid and straw: Create a tiny curved lid and a slender straw. Attach carefully to the top—keep it slim so it doesn’t overwhelm the cup.
- Texture and color: Use a toothpick to draw a subtle seam where the cup meets the lid. Paint the cup with a base color, then add a contrasting stripe or logo if you’re feeling fancy.
- Seal the cup: Let the paint dry fully before moving on to the pearls.
The Pearl Parade: Crafting Those Cute Tapioca Pearls
Pearls are the whole vibe here. They need to look perfectly spherical and glossy, not sad little marbles. Here’s how to nail it:
- Roll tiny balls of black or dark brown clay for the pearls. Aim for a consistent size so they sit nicely in the cup.
- For extra shine, lightly brush with gloss glaze after baking or drying.
- Glue a few pearls inside the cup and let them settle before attaching the charm to a bail.
Finishing Touches: Whipped Cream, Straw, and Details
Now we level up with tiny toppings. These are the details that get the likes.
- Whipped cream: A fluffy white clay swirl perched on top looks adorable and cozy.
- Straw art: A diagonal straw slice peeking out adds whimsy. Don’t stress about perfection—quirky charm is a vibe.
- Fruit accents: A slice of lemon or strawberry wheel can make the cup pop with color.
Attaching Your Charm: Turn Your Mini Drink Into a Accessory
Time to make it wearable. There’s no right or wrong way—just pick a method that fits your project.
- Jump rings: Thread a jump ring through a small hole you pre-drilled in the cup or through a clay loop you baked in.
- Line up with a chain or keyring: Attach the charm to your favorite bag, phone case, or bracelet. IMO, it looks best on a denim jacket or tote.
- Seal and cure: If you used polymer clay, bake per package instructions. For air-dry clay, allow ample drying time and finish with a clear gloss.
Pro Tip: Keep Pearls Separate for a Clean Look
If you pack too many pearls into the cup, it starts to look crowded. Place a couple on the rim or inside with space around them. This helps the pearls shine instead of sinking into chaos.
Color Play: How to Choose Your Palette
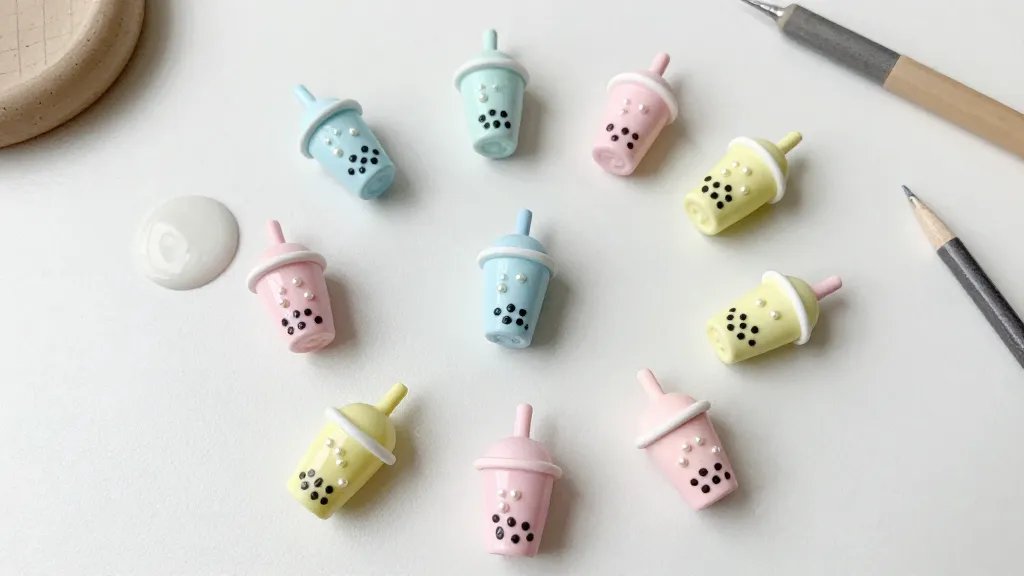
Color sets the mood. Do you want cute pastel vibes or bold, kawaii vibes? Here are some quick palettes you can mix and match:
- Pastel Peach, Mint, Baby Pink, and Cream
- Bubblegum Pink, Sky Blue, Lavender, and White
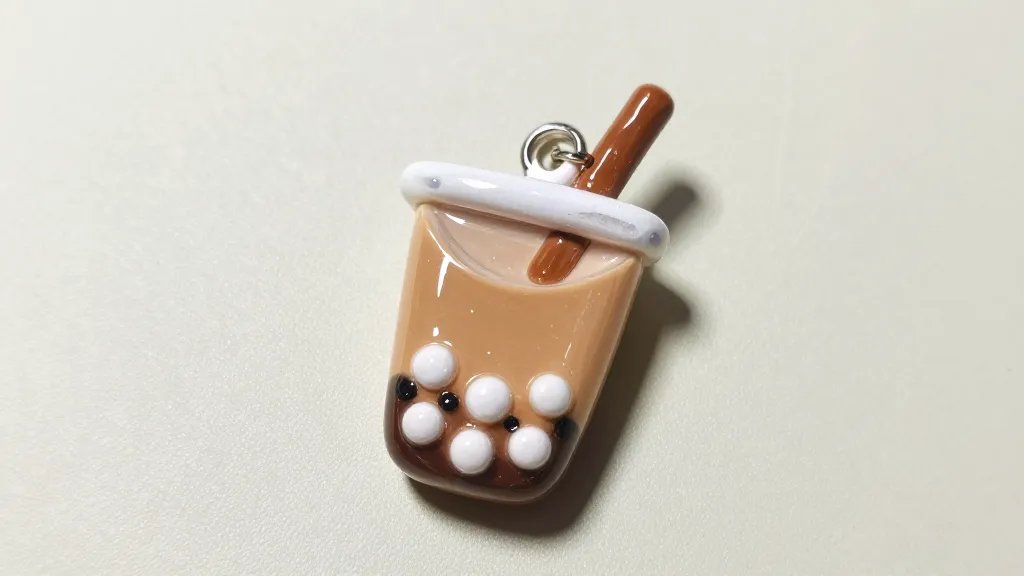
- Classic Brown Cup with Black Pearls for a cute monochrome look
Texture Fun: Matte vs. Gloss, What Works Best
Glossy coats catch the light and give those pearls a true syrupy shine. Matte finishes are adorable too and pair nicely with whipped cream textures. FYI, you can always layer a gloss glaze on top for extra pop.
FAQ
Do I need specialized tools to make boba tea charms?
Not really. A basic set of clay tools, a small brush, and a dotting tool will cover most tasks. If you don’t have a dotting tool, a smooth toothpick works in a pinch.
How long does it take to finish one charm?
Expect about 1–2 hours for a simple charm, more if you experiment with multiple toppings or a detailed cup. If you’re speed-running, you’ll still want to bake or dry in between steps to set colors properly.
Can I use air-dry clay instead of polymer clay?
Absolutely. Air-dry clay is forgiving and nice for beginners. Just note it takes longer to cure and may be more fragile. You can seal with a clear glaze to prevent chipping.
How do I attach the charm to clothing or bags without snagging?
Use a sturdy jump ring with a bail and consider a small lobster clasp for easy clipping. If you’re worried about snagging, sew a tiny fabric loop instead of attaching directly to delicate fabrics.
What if my pearls crack or crumble?
Don’t panic. If a pearl cracks, you can patch it with a tiny dot of matching clay and smooth it. If you’re painting, a thin layer of gloss after drying helps keep color intact and shiny.
Creative Variations to Try Next
- Mini boba tea sets: Make a tiny cup with two different colored pearls to simulate “flavors.”
- Seasonal flavors: Pumpkin spice for fall, strawberry milk for spring—swap colors and toppings accordingly.
- Character boba: Turn a cup into a cute character by adding eyes, a tiny mouth, and a playful hat.
Sharing Your Creations: Community and Confidence Boost
Post your finished charms and ask for feedback. IMO, you’ll be surprised how many people fall in love with tiny clay drinks as much as you do. FYI, a quick tutorial clip or time-lapse video can spark serious engagement. Don’t be shy—show off your messy workstation and celebrate tiny victories.
Conclusion
Your cute boba tea clay charm is more than a tiny accessory—it’s a tiny piece of joy you can customize forever. With a little patience, your cup will glow with color, shine, and personality. So go ahead, bake or dry, string it up, and wear your beverage-inspired art with pride. You’ve got this, and your future charm collection will thank you.


