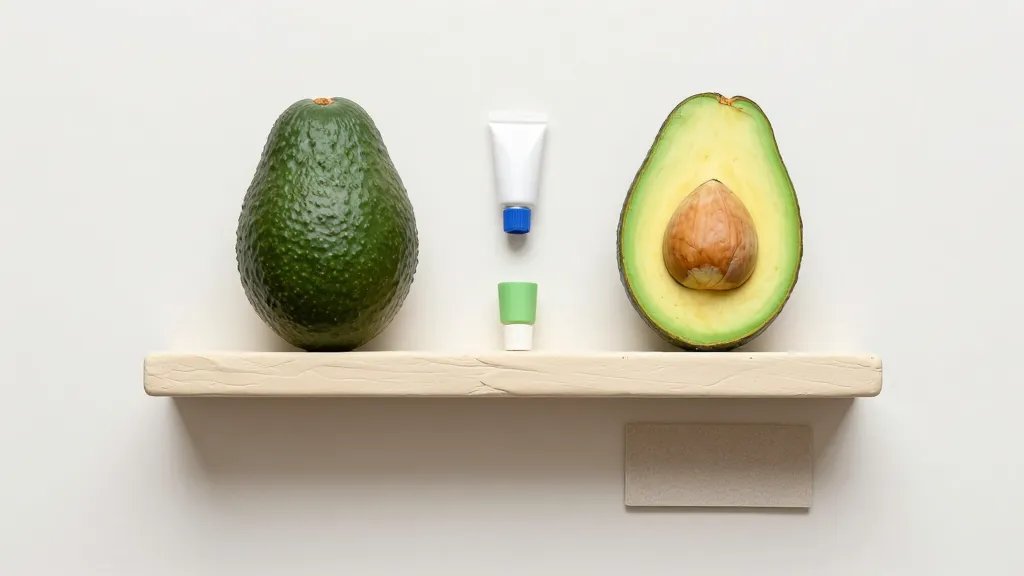
An avocado-colored spark just landed on your craft desk, and yes, it might be the cutest thing you’ll make all week. This guide walks you through a playful, beginner-friendly avocado clay project that looks gorgeous in photos and ridiculously satisfying to sculpt. Grab your clay, a smile, and let’s get cuddly with avocados.
Why Avocado Clay Wins as a DIY Object
Avocado clay blends whimsy with practicality. It’s squishy enough to satisfy those tactile crushes, but sturdy enough to display on a shelf or desk. Plus, green hues are instantly calming and photogenic. FYI, this is the kind of project you can customize for friends, coworkers, or your own inner plant mom.
What You’ll Need (Minimalist Starter Kit)
– Air-dry clay in a few shades of green, plus a brown pit color
– Small sculpting tools or household alternatives (toothpicks, a paper clip, a plastic knife)
– Acrylic paints or markers for tiny details
– Fine sandpaper or a nail file for smoothing
– Gloss varnish or clear sealant
– A shallow tray or mat to keep your workspace tidy
– Optional: tiny poseable arms or cheeky facial features for extra personality
Step-By-Step: The Core Unreal-Smooth Avocado
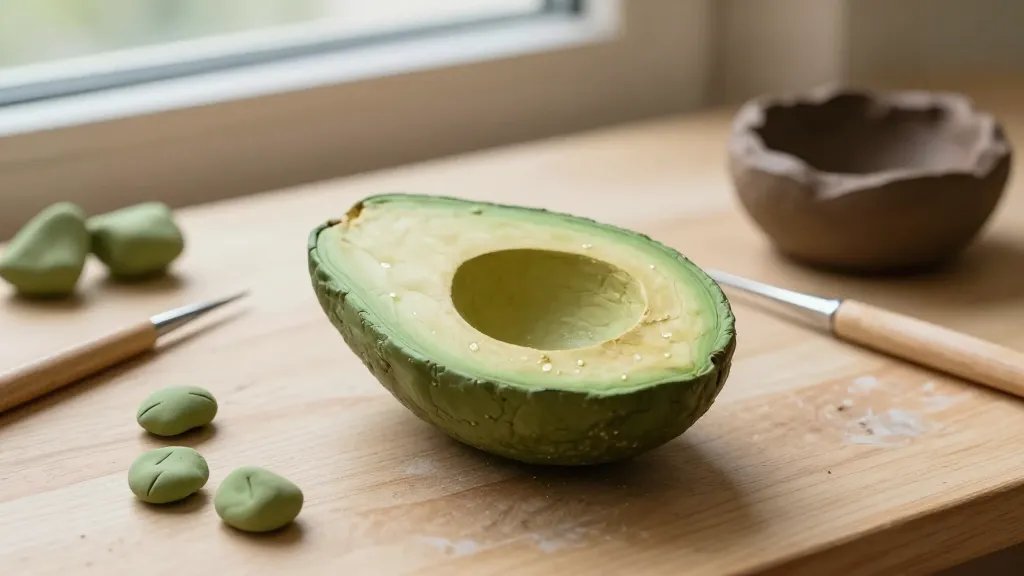
- Shape a plump, oval base for the fruit and a slightly flatter bottom so it can “sit” on a surface.
- Roll a smaller, teardrop-shaped piece for the pit. Carve a shallow indentation so it nests neatly inside.
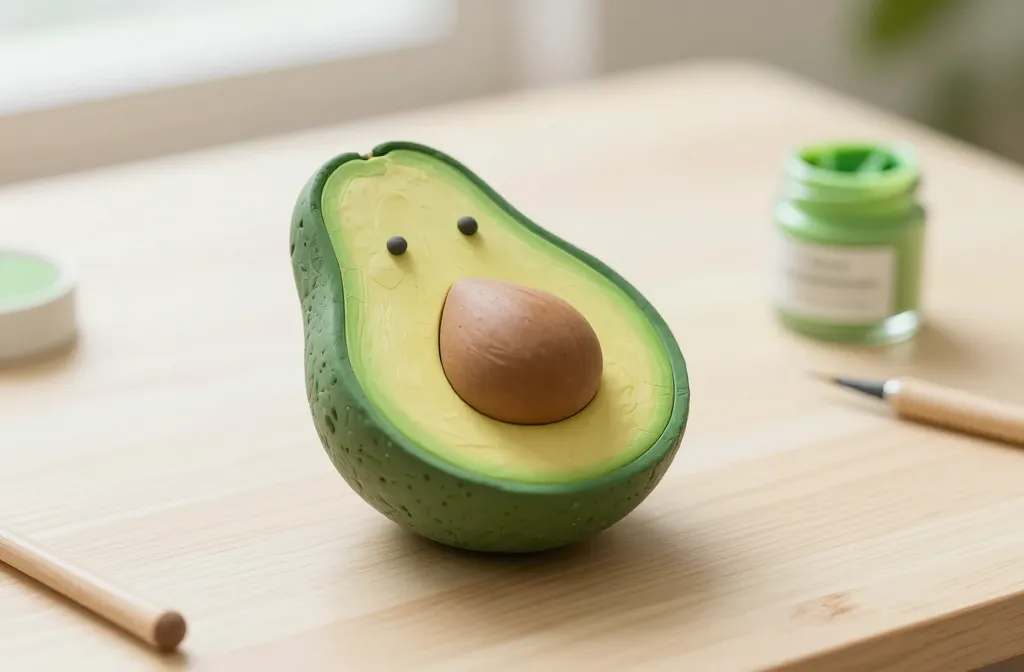
- Blend the pit into the fruit with gentle pressure, keeping a soft seam-free look. The trick is smoothing along the boundary where colors meet.
- Texture the skin with light wrinkles or tiny dots to mimic actual avocado skin. Don’t overdo it—subtlety wins here.
- Let the core dry completely. This prevents messy color transfer when you add accents.
- Paint the pit in a warm brown tone and add a glossy glaze to simulate real seeds. A tiny highlight on the seed makes it look alive.
Finishing Touches: Details That Speak Louder Than Size
– Highlight: A dab of white or light green on the top edge makes it feel sun-kissed.
– Texture: A couple of shallow scratches with a needle create realistic skin texture.
– Seal: A clear varnish adds durability and a subtle shine, so your avocado photos pop.
Turning Your Avocado Into a Tiny Scene
A single avocado can be the MVP of a mini still life. Try placing it on a tiny cutting board, with a spoon and a few artificial leaves. Or prop it next to a tiny cup of tea for that cozy, “lazy Sunday” vibe. The more you play, the more your composition improves.
Color Play: How to Mix the Perfect Green
– Start with a base of olive or sage as the main skin shade.
– Add a touch of gray-green for depth in the deeper areas.
– Paint the pit in a warm, cinnamon-brown to contrast with the green.
– If you want a “ripe” look, dab a bit of yellow-green toward the top edge to simulate sunlight.
Common Pitfalls (and How to Avoid Them)
- Cracking while drying? Slow, even air drying helps. Wrap unused clay tightly to keep it malleable.
- Color fading after sealing? Use a reputable sealant and let it cure fully before handling.
- Seams showing? Emphasize smooth blending with a damp fingertip or a soft brush.
Pro Tips for Studio-Quality Finish
– Always keep a damp sponge handy to wipe away dust during shaping.
– Work in small sections to prevent cracking as the clay dries.
– Practice a few test squishes to understand how your clay responds to warmth and pressure.
Creative Variations That Still Feel Easy
– Mini avocado family: Make a trio in different sizes to tell a tiny story.
– Avocado with a smile: Add a cheeky face for Instagram-worthy cuteness.
– Avocado lamp: Use translucent clay to craft a glossy pit that glows softly under a lamp.
Accessory Ideas to Pair with Your Avocado
– Tiny clay toast slice as a base for a “breakfast moment.”
– A pair of leaf-shaped coasters to make your triangle of decor feel intentional.
– A faux spoon or knife to complete a stylized kitchen scene.
Photographing Your Avocado Project for Socials
Yes, people want to see the cuteness in full light. Here are quick tips:
– Use natural light, ideally near a window, to keep greens vibrant.
– Shoot from a slight angle to emphasize the pit’s depth and the skin’s texture.
– Add a soft background blur to push focus onto your avocado. FYI, a simple white plate or wooden board makes colors pop.
Captions That Catch Attention
– “Tiny avocado, big vibes.”
– “When your snack and your decor collide.”
– “Sculpted with love and a pinch of patience.”
Frequently Asked Questions
1. Do I need special tools to start?
You can begin with simple household items and a basic set of clay tools. A craft knife, a needle tool, and a smoothing spoon work just fine. As you get more into it, you can upgrade to professional clay sculpting tools, but they’re not mandatory.
2. How long does it take to dry?
Air-dry clay typically dries in 24 to 48 hours, depending on thickness. If you live in a dry climate, it may set faster; humid spaces can extend dry time. Plan for a small project window so you don’t rush the finish.
3. Can I paint after it dries?
Yes. Painting after initial drying gives you more control over color accuracy. Use acrylic paints for bold hues, and seal afterward to lock in the finish.
4. How durable is an air-dry avocado once sealed?
Pretty durable for display purposes. However, avoid heavy handling and moisture exposure. A light wipe with a dry cloth is enough for maintenance. IMO, it’s best kept as a decorative piece rather than a functional toy.
5. I want bigger, more complex versions—any tips?
Scale up gradually. Start with a larger base and a bigger seed, then add painted details and texture. Keep a consistent color palette to maintain a cohesive look across multiple pieces.
Conclusion: Your Cute Avocado Adventure Starts Here
This little project blends playfulness with a surprisingly polished result. You’ll love the tactile joy of molding, the instant charm of the finished piece, and the social-media-ready photos that follow. If you’re craving a tiny, cheerful victory this week, avocado clay is the perfect bite-sized DIY. So, what are you waiting for? Grab your clay, channel your inner sculpture buddy, and make something irresistibly cute.


