An eye-catching project awaits you. We’re carving cute, squeeze-worthy bunnies from clay, and you’ll walk away with a masterpiece you’ll actually want to hug. FYI, this tutorial is beginner-friendly, but it’s also delightfully satisfying for seasoned crafters who need a quick dopamine hit.
Why Clay Bunny Success Feels So Rewarding
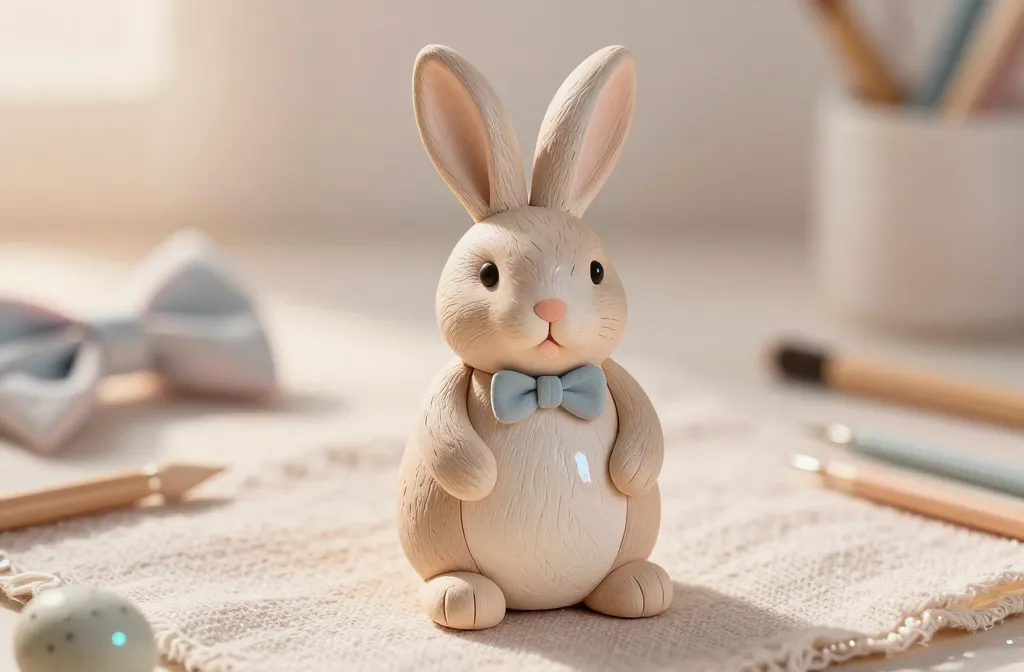
Clay allows you to sculpt with your hands like a kid, only you get to finish it with a glaze and a tiny bow tie. Do you really need a reason to craft something fuzzy and adorable? Probably not. But here’s the kicker: when you seal the deal with a glossy glaze, your bunny goes from “cute” to “gallery-worthy.” IMO, that final shine is everything.
What You’ll Need (The Must-Haves)
– Air-dry or oven-bake clay in your favorite colors
– Craft knife or clay shaping tools
– Soft brush for smoothing and detailing
– Fine-grit sandpaper (optional, for extra smoothness)
– Acrylic paints for accents
– Small bristle brushes and a toothpick for texture
– Sealant or clear glaze to finish
– A simple baking sheet or protected surface for curing
Optional extras for personality:
– Tiny fabric bow, scarf, or a painted flower
– Glitter or metallic accents for a playful twist
– Jump rings if you want to hang your bunny as an ornament
Step 1: Sketch Your Bunny’s Silhouette
Before you touch clay, imagine the pose. Classic is a chubby-cheeked bunny sitting upright, with long ears that perk up. Grab a light-colored clay and roll it into a round body, then a smaller oval for the head. If you’re more daring, try a hopping pose with one ear flopped over. The goal: simple shapes that feel alive.
Tip: Keep Proportions Friendly
– Head about 1/3 to 1/4 the body size
– Ears twice as long as the head is tall
– Tiny paws peeking from the front
Step 2: Build the Form
Join the head to the body with a dab of slip (a wet clay glue). Smooth the seam with your finger or a tool. Add little tail fluff by rolling a tiny ball and pressing it to the back. Don’t worry if it looks imperfect—this is where character lives. Claysynergy is real, friends.
Texture Tricks
– Lightly press a toothbrush over the fur areas to create a subtle tactile texture.
– Use a pointy tool to carve a tiny, cute smile.
Step 3: Add Ears, Face, and Feet
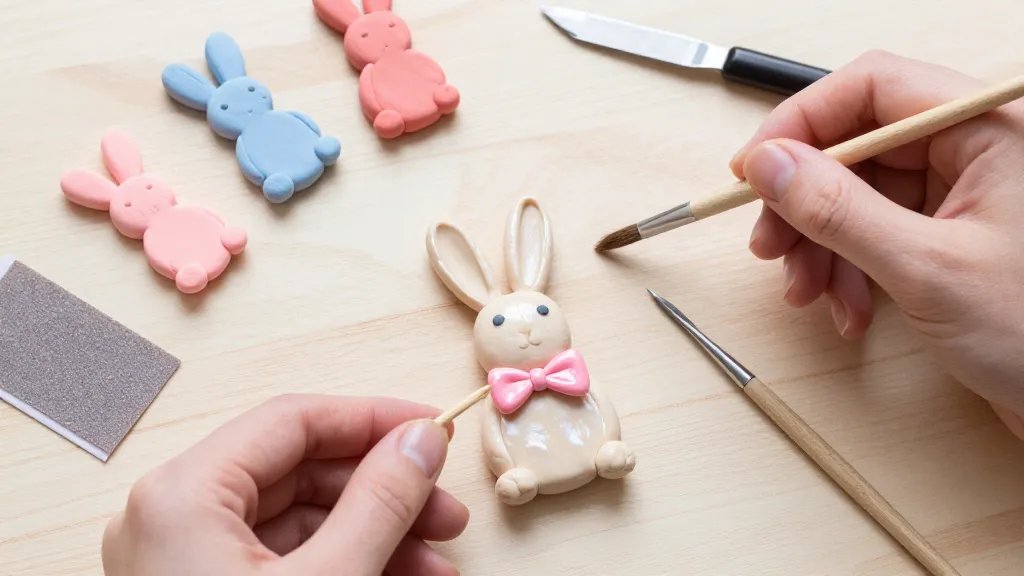
Shape two long ears and attach them to the head. Make sure they taper toward the tips; it reads as elegant rather than cartoonish. For the face, place two tiny indentations for eyes and a small dot or line for a mouth. Press a little pink or peach clay into the cheeks for a pinch of cuteness.
– Pro tip: If your clay is too sticky, chill it for 10 minutes. Working with cool clay feels like magic.
Color Play
– Base color for the bunny body
– Pink inner ear accents
– A dash of color on the cheeks if you’re feeling fancy
Step 4: Bake or Dry (Depending on Your Clay)
Follow your clay’s instructions. Air-dry clays need patience; oven-bake clays require accurate temperature and time. FYI, oven-baked clays crisp up nicely and hold details better. If you’re in a rush, air-dry with a fan—you’ll still nab that adorable vibe.
Safety Note
– Use a dedicated baking sheet for clay
– Avoid cross-contamination with food items
– Let pieces cool completely before painting
Step 5: Paint and Details
Once your bunny is dry or baked and cooled, it’s time to bring it to life. Use fine brushes for precise eyes and whiskers. A tiny dot of white on the eyes can make them pop, and a soft wash of pink on the cheeks reads as extra cute.
– Add a tiny bow or accessory for personality
– Paint the interior of the ears a lighter shade for depth
– Seal with a clear glaze to protect the finish
Shading 101
– Use a dry brush technique to add soft fur texture
– Apply a light wash to the ears for depth
– Avoid overloading the brush; you want subtle, not splashy
Step 6: Add Finishing Touches
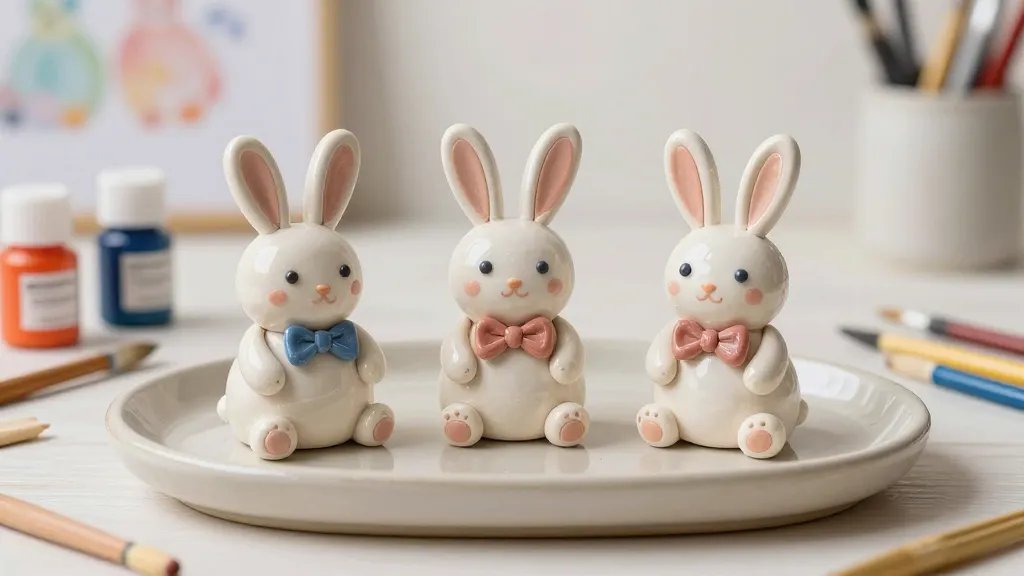
Now the fun part: the final flourishes. A glossy glaze makes the bunny feel lively. If you want a rustic look, skip the glaze and go with a matte seal. For a festive Easter vibe, try pastel accents or a tiny painted heart under the chin.
– Attach a small jump ring so you can hang it as an ornament
– Glue a mini carrot accessory on a paw for whimsy
– Consider a mini stand for desktop display
Gallery of Possible Variations
– Classic chubby bunny with big eyes
– Petite woodland bunny with mossy accents
– Fluffy tail bunny with a faux fur pom-pom
– Easter bunny wearing a bow tie
– Bunny with a tiny painted sweater pattern
Subtle Details That Elevate Your Piece
– A gentle speckle effect using a fine sponge
– Tiny painted freckles on the nose
– A brushed-on glaze highlight on the ears
FAQ
What clay is easiest for beginners?
Clay that air-dries is forgiving and great for quick results. It’s simple to shape, won’t crack easily, and you can paint right after it dries.
How long does it take from start to finish?
If you keep a steady pace, you can finish a cute bunny in under 2 hours, including drying and painting time. If you’re meticulous, give yourself a bit more air-dry time.
Can I customize this bunny for gifts?
Absolutely. Swap colors to match the recipient’s vibe, add initials, or attach a tiny charm. Personal touches turn a craft into a keepsake.
My bunny won’t hold its shape after baking. What did I do wrong?
Overhandling hot or flexible clay, or not using a proper stiffener, can cause sagging. Try ising a firmer base, don’t over-bend while attaching parts, and let each section set before moving on.
Any quick glaze tips?
Use thin, even coats and let each layer dry before adding another. A single glossy coat reads polished; multiple coats can become sticky if not perfectly dry.
Conclusion
If you want a project that’s cute, satisfying, and socially shareable, this bunny clay tutorial hits all the sweet spots. You’ll end up with a darling keepsake and some seriously happy crafting photos to post. So, grab your clay, channel your inner bunny-whisperer, and go make something that’s impossible not to smile about.


