An easy, super adorable project that turns fuzzy pom-poms into fluffy Easter bunny joy. Grab a few supplies, relax, and let’s craft something that’ll have kids and adults grinning. FYI, it’s one of those projects you can finish before a snack break feels like a lifetime.
What You’ll Need for This Bunny Pom-Pom Craft
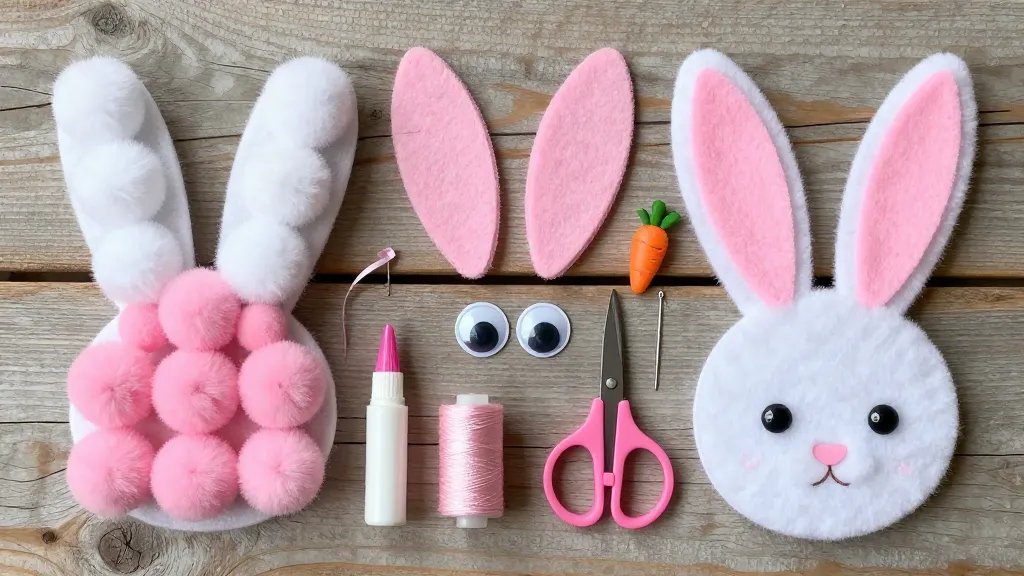
– Materials:
- Colored wool or fluffy yarn (white, pink, and a pop color for the ears or nose)
- Pom-pom maker or two cardboard circles
- Googly eyes or small black beads
- Craft glue or hot glue gun (adult supervision recommended for kids)
- Pink felt or felt tip for the inner ears
- Optional: ribbon, small bells, or mini carrot embellishments
– Tools:
- Scissors
- Tape or glue stick for securing yarn tails
- Needle and thread (optional, for securing parts)
Choosing the Right Pom-Pom Style
Pom-poms aren’t created equal—how fluffy you want your bunny to be depends on your technique. Do you prefer tight, compact poms or big, fluffy cloud poms? If you’re making a lot for a party, go with the pom-pom maker for consistent shapes. If you want a quick weekend project, cardboard circles work just fine and are almost free.
Compact vs Fluffy
– Compact poms stay neat in a bowl or on a garland.
– Fluffy poms look instantly adorable but can shed a bit more.
Step-by-Step: Crafting Your Bunny Pom-Pom
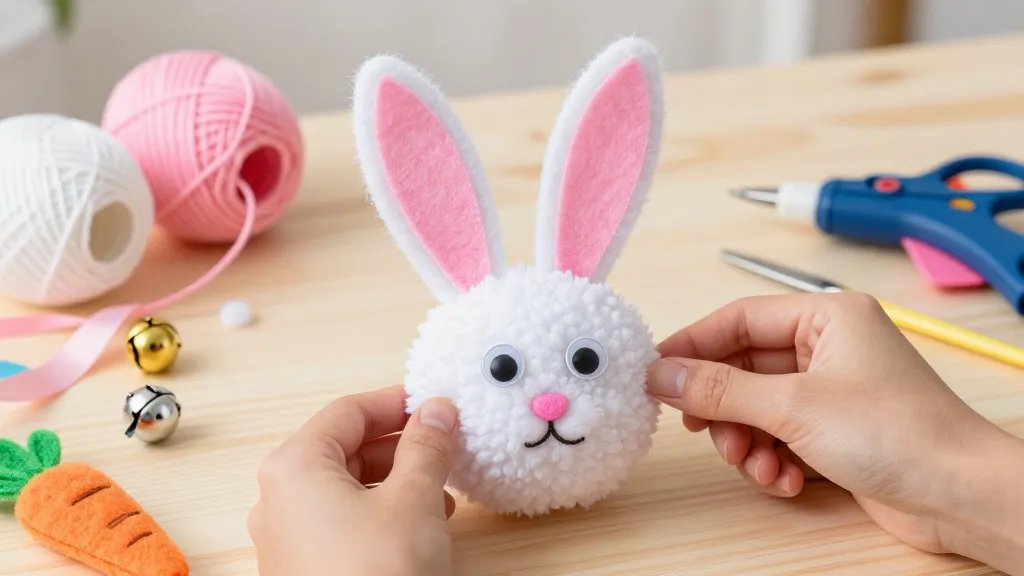
- Wrap the yarn around the pom-pom maker or cardboard circles until you hit the fluff level you want.
- Close and secure the pom-pom, then cut and tie if you’re using cardboard.
- Nip and shape the pom-pom into a rounded bunny head. Don’t sweat perfection—quirks add charm.
- Attach googly eyes or beads with a dab of glue. If you’re using felt, add a small pink nose and inner ear shapes.
- Create ears from extra felt or felt scraps. Cut two ear shapes, glue them to the back of the pom-pom, and prop them up for character.
- Secure a tiny tail with more yarn or a cotton puff on the backside. Optional: add a little bow or ribbon for flair.
Building the Ears: A Quick How-To
- Cut two identical ear shapes from white felt for base and pink felt for the inner ear.
- Glue the pink inner pieces onto the white ears, then attach the ears to the pom-pom using glue or a dab of elastic thread.
- Let the glue dry for a few minutes before you handle the bunny too much. Patience pays off here.
Face and Front Details: Tiny Features, Big Impact
- Place googly eyes or sew on tiny black beads just above the center of the pom-pom. Space them evenly for a friendly look.
- Glue a small pink nose beneath the eyes. A little triangle shape reads as a cute nose instantly.
- Draw or glue on a small mouth. You can make a simple curved line or a tiny “v” for a more cartoonish vibe.
Adding Personality with Accessories
– Tie a ribbon around the neck or glue on a miniature bell for a festive touch.
– Create a mini carrot patch or a springy backdrop to place the bunny on.
– Turn multiple bunnies into a garland by tying each pom-pom to a string at regular intervals.
Creative Variations to Try
– Rainbow Bunnies: Use multi-color yarn for a tail and add pastel inner ears for a whimsical effect.
– Mini Garden Bunnies: Make tiny pom-poms and pair with faux grass and tiny flower sticks for a cute centerpiece.
– Statement Bunnies: Use larger pom-poms and bold features like big button eyes and bright noses for a playful look.
Seasonal Twist: Easter Decor on a Budget
– Reuse scraps from other crafts for ears and noses to keep costs down.
– Create a small bunny forest by placing several bunnies on a sunlit shelf with a few decorative eggs.
– Make a wall garland by stringing several bunnies at different heights along a length of twine.
Pro Tips for Perfect Pom-Poms
– Keep tension even while wrapping to avoid lumpy poms. If your yarn is uneven, trim the edges lightly after tying.
– Trim edges evenly for a neat, rounded head. You’ll thank yourself later when you’re not chasing stray yarn threads.
– Dry glue fully before moving the bunny to avoid shift or droop.
– Try different sizes—tiny bunnies make adorable place cards, while big ones are perfect for sofa-side decor.
Frequently Asked Questions
What type of yarn works best for bunny pom-poms?
Puffy, medium-weight yarn tends to hold its shape well, but feel free to experiment with cotton or acrylic blends. If you want extra fluff, double-wrap the strands before tying.
Can kids help with this craft?
Absolutely. Let kids pick colors, place eyes, and glue ears. For younger kids, use washable glue and pre-cut felt pieces to minimize frustration.
How do I make sure the ears stay attached?
Glue the ears to the back or top of the pom-pom and hold for a few seconds. If you want extra security, sew the ears lightly with a needle and thread once glue is dry.
What can I do with multiple bunny pom-poms?
Turn them into a garland, a table centerpiece, or a cute woodland scene. String them at different heights for a dynamic display.
Is there a way to make the bunnies with less mess?
Yes! Use a tray or parchment paper to catch stray yarn strands, work in a shallow box, and wipe glue spills quickly. FYI, a quick damp cloth cleans up gluey fingers fast.
How long does it take to finish a batch?
If you’re crafting solo, plan for 15-25 minutes per bunny depending on detail. If you’re batch-making with friends, you can knock out a dozen in an afternoon without breaking a sweat.
Conclusion: Your New Easter Bunny Pom-Pom Craft
This little project is proof that simple materials can bring big smiles. With just a few steps, you transform yarn into a charming bunny that brightens up shelves, tables, and kids’ imaginations. So go ahead—grab your supplies, pick a color scheme that makes you happy, and start crafting. Then send a photo of your fluffy army; I want to see your bunny squad in action. IMO, nothing says spring like a room full of smiling pom-pom bunnies. Happy crafting, and may your Easter decor be extra adorable this year!


