An egg-cellent guide to turning simple paper into adorable Easter chicks. If you’re hunting for quick, wallet-friendly crafts, you’re in the right coop. Let’s hatch ideas that brightened my kitchen table last year—and will brighten yours this season.
Chickiamatts: Quick Start with Basic Shapes
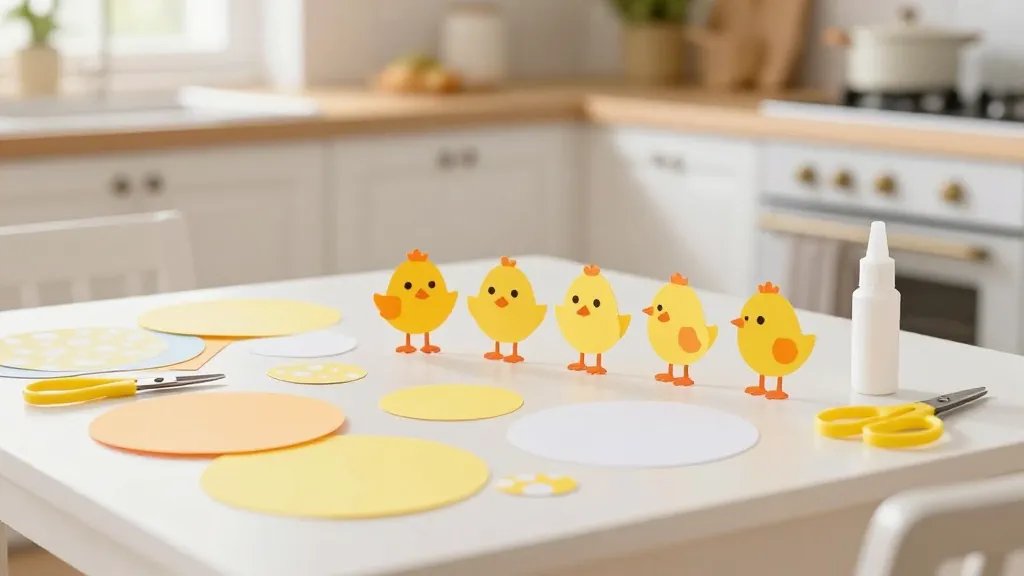
If you’re new to paper crafting, start with the basics. Cute chicks come from a few simple shapes: a circle for the head, a larger oval for the body, triangles for beaks, and little feet. Grab colored paper, scissors, and a dab of glue. FYI, you don’t need fancy tools to nail this.
Find Your Chick Palette
– Yellow bodies with orange beaks are classic.
– White or pastel bodies give a soft, spring vibe.
– Dip into patterned scraps for a quirky look.
Cutting Tips
– Use a circular object as a stencil for perfect head shapes.
– Lightly score fold lines with a dull pencil to keep edges neat.
– Glue only where needed to avoid stiff, glued-on vibes.
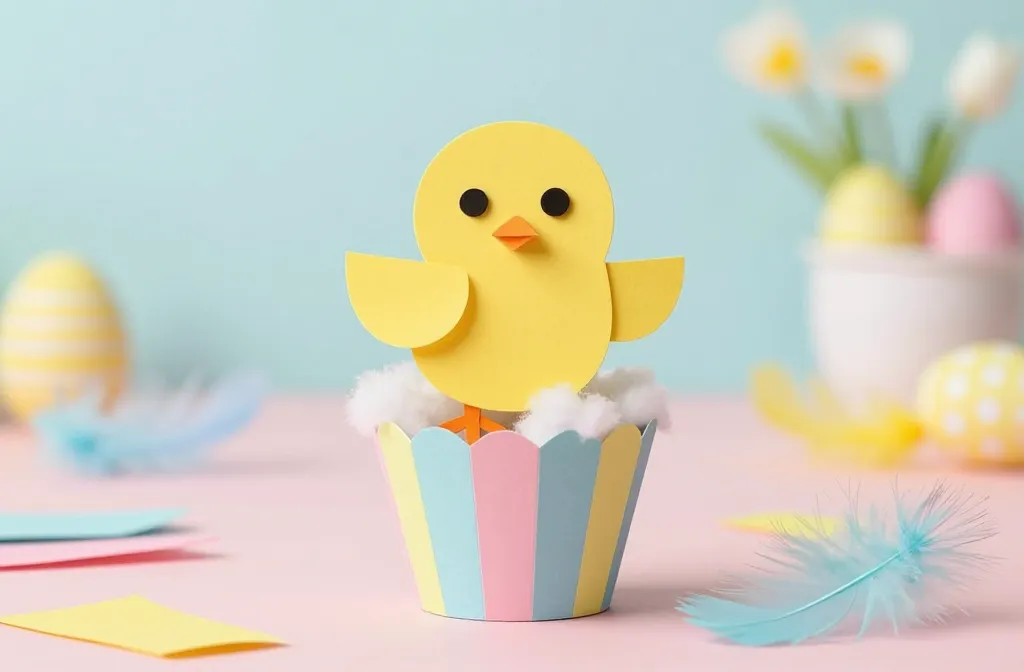
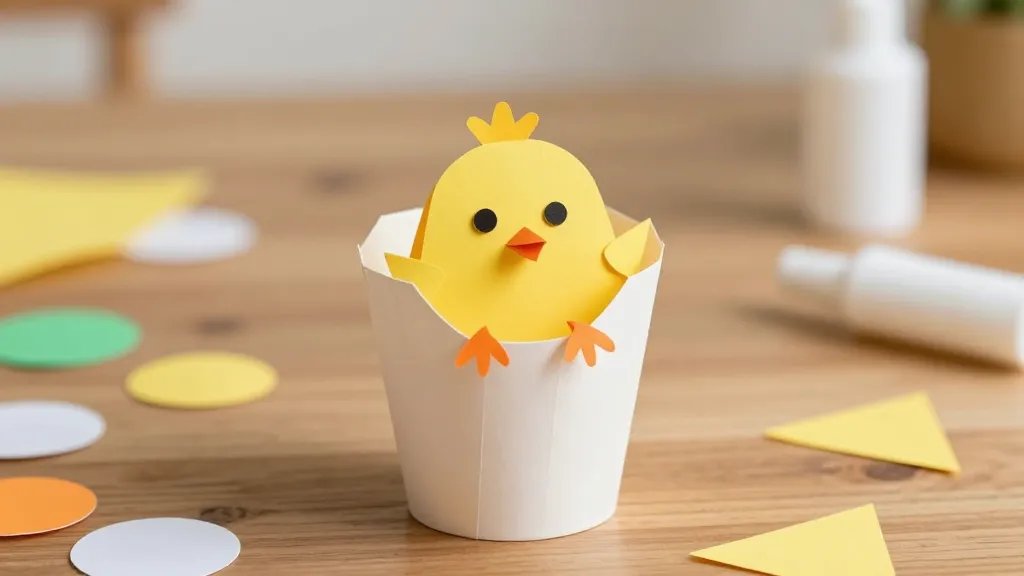
Chick in a Cup: Simple 3D Display Ideas
Take your chick from flat cutout to stand-out with a tiny cup scene. This is where your craft gets some personality and a dash of whimsy.
Materials You’ll Want
– Paper cups or small cardboard tubes
– Colored paper, googly eyes (optional), glue, and scissors
– A few feathers or cotton for fluff
Step-By-Step
1) Create a chick cutout bigger than your cup opening. 2) Attach to the cup so the chick peeks out. 3) Add feet by folding paper strips and gluing them to the bottom. 4) Finish with a tiny banner or a few decorative eggs for flair. Boom, instant Easter centerpiece.
Stubbornly Adorable: Textured Chick Creations
If you want texture without buying fancy stuff, lean into everyday scraps. Crinkled paper, tissue, and even coffee filters transform your chick into a tactile delight.
How to Add Texture
– Layer tissue behind the chick body for a fluffy effect.
– Fray tissue edges for a feathery look.
– Use crinkles from gift wrap to simulate tiny chick fuzz.
Texture Pairings
– Yellow chick with orange beak and white tissue “fur” around the edges.
– Light pink cheeks using small pink circles from scrap paper.
– A little salt-dough sign saying “Hatch Day” to finish.
Mini Banner Chick Parade
Turn a few chicks into a cheerful banner to hang on a wall, door, or mantel. It’s a crowd-pleaser and surprisingly easy.
Banner Craft Plan
– Cut several chick shapes in varying sizes.
– Thread a string or ribbon through a small slit at the top of each chick.
– Add little letter cutouts beneath each one for a message like “Happy Easter” or “Chick Parade.”
Charming Variations
– Alternate with tiny eggs made from folded paper.
– Create a gradual color shift along the banner for visual interest.
– Attach to a twig garland for a rustic feel.
Grocery-Store-Proof: Reusable Chick Ornaments
If you want something you can pull out year after year, consider durable, reusable chick ornaments. They’re little works of art that won’t mind being tucked away and ressurrected next spring.
Materials That Travel Well
– Cardstock for sturdy bodies
– Lamination sheets or clear contact paper
– Velcro or small magnets if you want fridge-friendly chicks
Longevity Tips
– Seal with a clear spray to reduce tearing.
– Use stronger adhesives for long life.
– Store in a labeled bin so you don’t forget where you hid the chick army.
FAQ
What paper weight works best for beginners?
For beginners, use standard 80-110 gsm printer paper or light card stock. It’s forgiving and easy to cut. If you want sturdier chicks, go with 160-200 gsm cardstock.
Can I involve kids without making a huge mess?
Absolutely. Use kid-safe scissors, washable glue sticks, and a shallow tray for glue. Lay down a disposable table cloth and wipe hands with a damp cloth. More giggles, fewer stains.
What if I don’t have craft supplies?
No problem. Recycle scraps from around the house: cereal boxes for bodies, tissue paper for fluff, and any bright marker colors. The charm is in the idea, not the fancy materials.
How long does a typical chick craft take?
Most projects take 20-45 minutes, depending on complexity and how many you’re making. If you’re speed-running a party craft, aim for 15-20 minutes per chick.
Are these crafts suitable for an Easter classroom activity?
Yes. They’re simple, forgiving, and adjustable for different ages. You can split kids into small groups to assemble a short, sweet chick medal parade afterward.
Conclusion
Easter chick paper crafts are the perfect blend of cute, crafty, and completely doable. You can go simple with a single chick on a cup or level up with a full banner parade. The best part? They’re budget-friendly and endlessly customizable, so you can let your imagination run wild without melting your credit card. FYI, the best projects often come from mixing a couple of ideas—a textured chick with a mini banner is oddly magical. So grab what you have, snap a few photos, and watch your feed light up with all the cute, chirpy vibes.


