An egg hunt isn’t the vibe you’re chasing this year—you want show-stopping eggs and smiles all around. We’re diving into playful, creative, and surprisingly doable ideas that make Easter egg decorating feel like a mini art project. Grab your dye kit, a sense of humor, and let’s get cracking.
Basic, Bold, and Beautiful: Dye with a Twist
Everyone loves the classic dye kit, but you can level it up without turning your kitchen into a science lab.
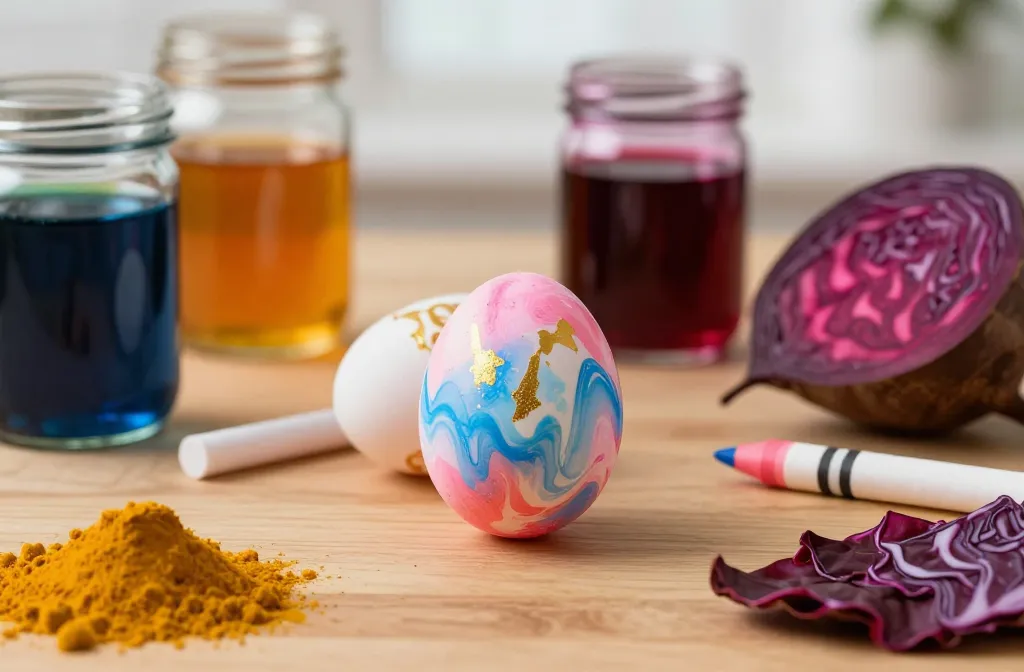
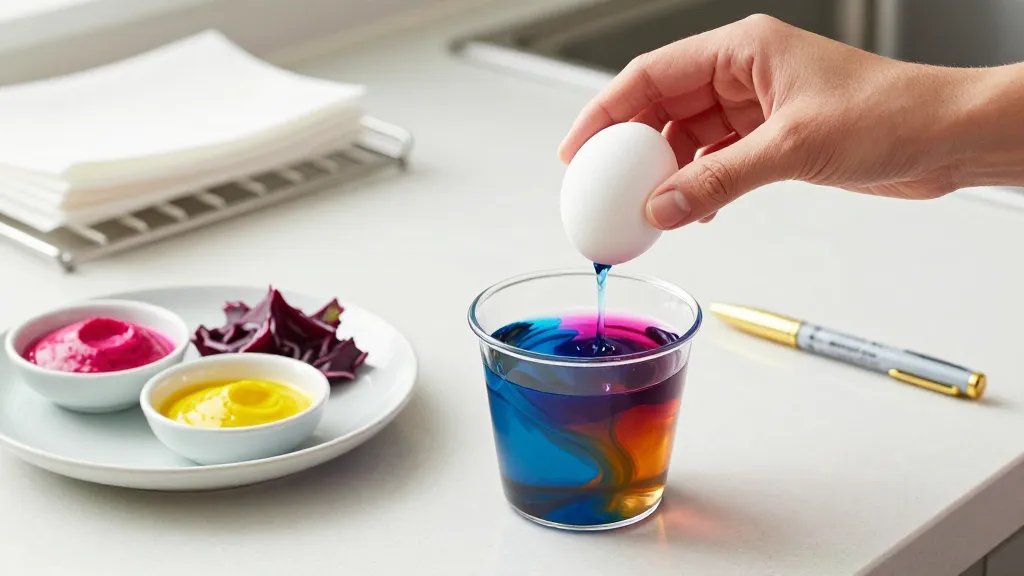
– Try marbled eggs by swirling two or three colors in a cup, then dipping the egg halfway and rotating for a swirled effect.
– Use natural dyes from kitchen staples: beet juice for pink, turmeric for yellow, red cabbage for blue.
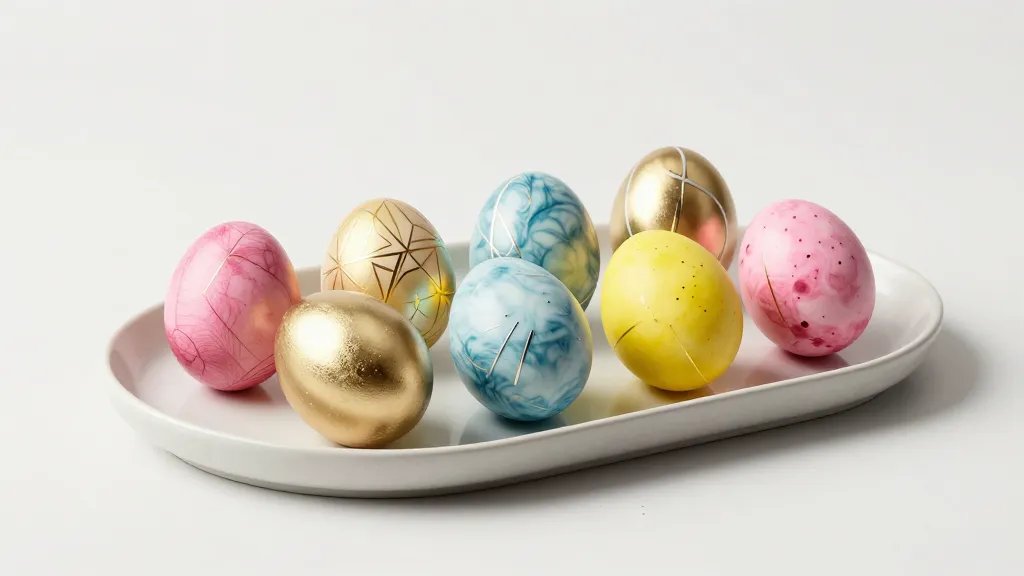
– Add metallic accents with gold or silver Sharpies after drying to create shiny, modern vibes.
Pro Tips for Smooth Dyes
– Drying rackskeep colors from sticking. Lay a paper towel on a rack to catch drips.
– Pat, don’t rub, when removing excess dye to keep colors crisp.
– Set eggs with a quick vinegar bath (optional) to boost color longevity.
Wax, Resist, and Wow: Pysanky-Inspired Patterns
If you’ve ever watched a master create intricate patterns, you know it’s not magic—it’s patience and a steady hand.
– Use a white crayon to draw your design on a white egg, then dip in dye. The crayon resists the color and reveals the design once dried.
– Try multi-color layers: dye a base color, add wax-resist details, then dip again in a contrasting shade.
– Hoop up a simple geometric pattern with masking tape for clean, crisp lines.
Make It Easy: Simple Motifs
– Stripes, chevrons, and polka dots look super chic with just three colors.
– Focus on one dominant color and two accent shades to keep it cohesive.
Modern Elegance: Monochrome Masterpieces
Minimalist yet striking, monochrome eggs are surprisingly chic and easy to pull off.
– Pick two shades of the same color family for a tonal look—think blush pinks or blues.
– Use a fine brush to paint subtle patterns like tiny stars, lines, or broken grids.
– Finish with a matte sealant to keep the elegance intact without gloss that competes with the pattern.
Finishing Touches That Pop
– A tiny splash of metallic paint at the tip or edge adds a whisper of luxe.
– Consider a tiny dot heart or initials in gold for a personal touch.
Texture Play: Yarn, Glitter, and Sanded Surfaces
Texture brings depth and conversation. Don’t worry—these are friendlier than they sound.
– Wrap eggs with yarn or thin ribbon for a cozy, crafty vibe. Secure ends with a dab of glue.
– Glitter eggs? Apply a thin coat of glue, sprinkle glitter, then seal with a clear top coat to avoid shedding.
– Sanded texture eggs get a rustic look: lightly sand a painted egg for a weathered, DIY vibe.
What to Do About Mess?
– Layout a washable mat and use parchment in between steps to keep things tidy.
– Designate a glue-and-glitter station to contain the chaos and save your floors.
Nature-Inspired Eggs: Botanicals and Lua
Bring the outdoors inside with plant-based prints and organic looks.
– Create leaf prints by sandwiching a leaf between two halves of a dyed egg, then apply gentle pressure to transfer the shape.
– Dandelion seeds or tiny flowers can be pressed onto eggs for a delicate, whimsical effect.
– Use a small brush to paint fine silhouettes of birds, trees, or tiny blossoms for a serene nature mood.
Improvise with What You Have
– If you don’t have a press, simply press leaves and flowers between your dyed eggs with a dab of glue to hold them in place.
DIY Stamps and Stencils: Reusable Patterns
Stamps and stencils make it easy to achieve polished designs without being a pro.
– Create stampers from corks, bottle caps, or foam. Dip in paint and press onto eggs for uniform dots and shapes.
– Use painter’s tape or stencil sheets to block off areas for precise geometric patterns.
– Combine repeated motifs with a splash of color to keep things lively.
Cleanup and Coat
– Seal designs with a thin, clear sealant to prevent smudging and keep colors vibrant longer.
Fun with Food-Safe Markers and Chalk
Markers designed for pastry or chalk markers on eggs provide quick, forgiving options for beginners.
– Draw quick doodles, then finish with a soft gloss spray to set the art.
– Use light hand pressure to keep lines crisp and avoid bleeding.
– For a playful look, write tiny messages or year-date on the eggs.
Express Yourself in Short Bursts
– Short phrases like “Hop In” or “Egg-cellent” add personality without overcrowding the design.
Gallery-Ready Display: Presentation Matters
An egg is only as good as its display, right?
– Create a centerpiece with a pastel-dyed nest made from shredded paper or fabric strips.
– Use a cork tray or a vintage egg stand to elevate the presentation.
– Group eggs by color family or pattern to create a gallery-wall vibe on your table.
Interactive Display Ideas
– Set up a “design it yourself” station for guests with a few plain eggs and tiny markers.
– Leave a little card with the name of the technique so friends can try it at home.
FAQ
How long do Easter eggs stay fresh after decorating?
– If you’re using real eggs, keep them refrigerated and consume within 1-2 weeks. Decorated plastic eggs stay fresh much longer and are great for display.
Can I mix natural dyes with store-bought kits?
– Absolutely. Natural dyes add a subtle, earthy tone that can complement the bright hues from kits. Just be mindful of how colors layer and bleed.
What’s the best sealant for longevity without altering color?
– A clear, matte sealant spray works well for most finishes. Test on a scrap egg first to ensure you like the result and avoid yellowing.
Are there kid-friendly ideas that still look impressive?
– Yes! Try wax-resist patterns with a simple crayon, marker doodles, or dot patterns using cotton swabs. Keep it simple, colorful, and mess-contained.
How can I avoid cracked eggs during decorating?
– Use boiled eggs that are at room temperature, handle softly, and avoid over-soaking in dye. Let each layer dry completely before adding the next.
Conclusion
Decorating Easter eggs isn’t just about color—it’s about creativity, play, and a little brag-worthy craft energy. From wax-resist patterns to natural prints and modern monochrome vibes, there’s a method for every mood and skill level. FYI, the best part is seeing everyone’s reaction when they realize the eggs aren’t just dyed, they’re personality in shells. So grab your supplies, pick a vibe, and turn your kitchen into a mini studio. Happy decorating, and may your eggs crack smiles all season.


