An all-ages craft that somehow still feels magical, painting Easter eggs is the perfect excuse to unleash your inner kid without the mess of a full art studio. You don’t need fancy supplies or mad artistic skills—just a dash of curiosity and a willingness to get a little colorful. FYI, beginners are about to become Easter egg legends.
Start with the Basics: Simple Designs That Look Polished
Painting eggs can feel intimidating, but you can get crisp results with minimal tools. Begin with steady hands and a few accessible methods that look impressive without requiring a degree in fine arts.
- Solid color shells with a glossy finish
- Geometric patterns using tape for clean edges
- Dot patterns with a cotton swab or toothpick for even spacing
Choosing Your Tools
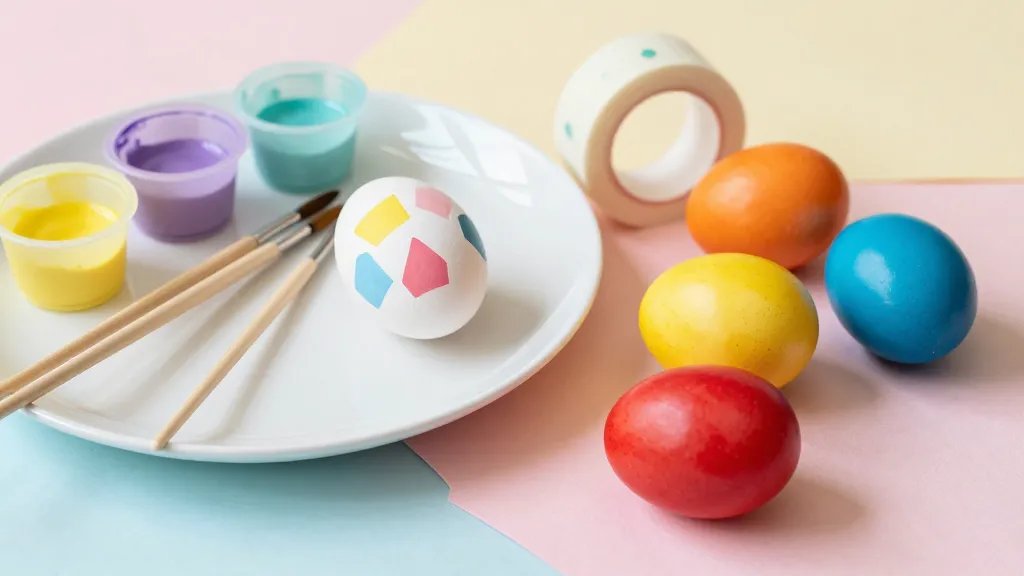
You don’t need a full art supply store to get great results. A few essentials go a long way:
- Acrylic craft paints or dye kits
- Brushes in small, medium, and detail sizes
- Masking tape or washi tape for straight lines
- Q-tips, toothpicks, and a thin Sharpie for outlines
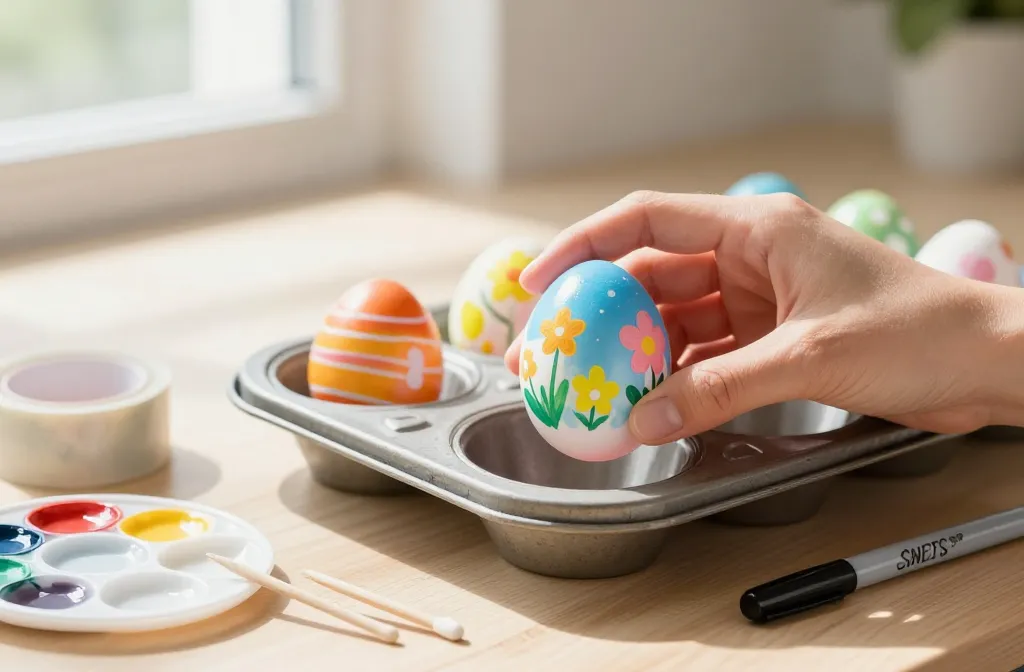
Prep Like a Pro
Prep actually matters more than you’d think. Wash the eggs gently to remove any oils, dry thoroughly, and set up a tiny drying station. FYI, a muffin tin or plastic egg carton makes for perfect drying racks.
Technique Spotlight: From Brush Strokes to Bold Color Blocking
If you want to level up your look without turning into a gradient lord, color blocking is your friend. It’s forgiving, stylish, and incredibly satisfying when you peel off the tape.
- Paint a base color and let it dry completely before adding overlays
- Use tape to section off areas for crisp lines
- Layer lighter shades on top for subtle depth
Overcoming Common Hiccups
Worried about smudging? Let each layer dry fully, then add another layer or detail. If a line bleeds, dab with a clean brush and re-sharp the edge with tape. Practice makes perfect, or at least less chaotic.
Texture and Shine Without the Mess

Texture can add personality to a simple egg design. You don’t need to go wild with tools—just think about contrast and finish.
- Metallic paints for a chic, festive vibe
- Glitter accents in small, controlled areas
- Wax resist for a marbled or crinkly effect
Wax Resist: A Gentle Entry into Marbling
Wax resist keeps promise and adds charm. Draw simple shapes with a wax crayon before painting. The wax repels paint, leaving your designs crisp and weekend-appropriate adorable. It’s low-pressure, high-reward.
DIY Stencils Without the Lounging Money
Stencils save time and reduce anxiety for beginners. You can make your own or repurpose household items for cute shapes.
- Stencil cutouts from sturdy paper or card
- Leaf shapes, hearts, or tiny polka dots
- Place the stencil, dab gently with a sponge, and lift
Masking Tape Magic
Masking tape is cheap, versatile, and endlessly useful. Layer it for stripes, chevrons, or diamonds. Pro tip: press the tape down firmly to avoid paint seepage and create cleaner lines.
Nature-Inspired Looks That Don’t Require a Studio
Take cues from the outdoors—after all, Easter is about springy vibes and fresh colors. You can recreate landscapes, florals, or simple animal motifs with minimal effort.
- Pastel skies and grass silhouettes
- Little flower doodles around a central motif
- Happy little bunnies and chicks with simple shapes
Florals for Absolute Beginners
Go with single-stem bouquets or tiny petals scattered around the egg. Use a fine brush or a toothpick to add dots for blossoms, then outline stems with a thin marker once dry.
Speedy Sets for Quick Results
If you want a pile of decorated eggs for a brunch or a party, fast methods work wonders. These approaches deliver color and charm without demanding hours of meticulous work.
- One color base with contrasting rims
- Bold blocks of color with minimal lines
- Simple character faces or emoji-inspired designs
Emoji and Fun Faces
Little faces bring instant smiles. A couple of dots for eyes and a curved line for a mouth can be enough. Use a white gel pen for crisp features on darker backgrounds.
Maintaining Your Masterpieces: Sealing and Storage
A little protection goes a long way. Protect your colors, keep your eggs looking fresh, and avoid smudges when everyone’s ooh-ing and aah-ing.
- Seal with a clear acrylic spray or a brush-on sealer
- Avoid washing with hot water; gentle rinse only
- Store upright in an egg carton to prevent rubbing
DIY Quick Fixes for Common Issues
– If paint chips, touch up with a fine brush and seal again.
– If colors look dull, a light glaze can brighten the overall look.
– If your lines wander, tape them off and redraw with a steady hand.
FAQ
Are painted eggs safe to eat after decorating?
Most craft paints aren’t food-safe, so it’s best to use decorative eggs for display. If you’re planning to eat them, opt for hard-boiled eggs and use food-safe dyes or natural colorants, and avoid painting directly on the edible surface.
What’s the easiest design for total beginners?
Solid color eggs with a single decorative element (a dot, line, or simple stripe) are easiest and still look stylish. Start simple, then add a second color or a tiny motif once you’re comfy.
Which paints should I avoid?
Avoid styrene-based paints that release strong fumes or wash off easily. Stick to acrylic craft paints or food-safe dyes if you’re decorating edible eggs. Always work in a well-ventilated area.
How do I prevent smudges while drying?
Set eggs on a drying rack or a makeshift stand and let each layer dry completely before adding more. A quick dry with a hairdryer on a cool setting can help in a pinch, but be careful not to blow paint around.
Can I reuse eggshells after decorating?
Yes, but prep properly. If you plan to reuse, wipe gently with a damp cloth, let dry, then store away from direct sunlight. For edible eggs, separate decorative eggs from the ones you’ll eat.
Conclusion
Painting Easter eggs as a beginner is less about perfection and more about play. You’ll surprise yourself with the designs you pull off with minimal tools and a positive vibe. So grab a kit, some tape, and a handful of colors, and start your own little egg-art tradition. FYI, the joy is in the process as much as the pretty final result.


