An Easter party isn’t complete without tiny treasures that shout “you’re loved.” Handmade favours turn a simple table into a memory-making moment. Let’s build adorable, doable keepsakes your friends will actually keep and reuse.
1) Start With a Theme Your Guests Will Love
Choosing a cohesive vibe makes everything feel intentional. Do you want rustic pastel vibes, whimsical woodland, or modern minimal? Pick a theme and run with it across colours, packaging, and goodies.
Why theme matters
– It ties your whole display together, making photos pop.
– It helps you plan materials and avoid random clutter.
– It signals thoughtfulness—people notice that.
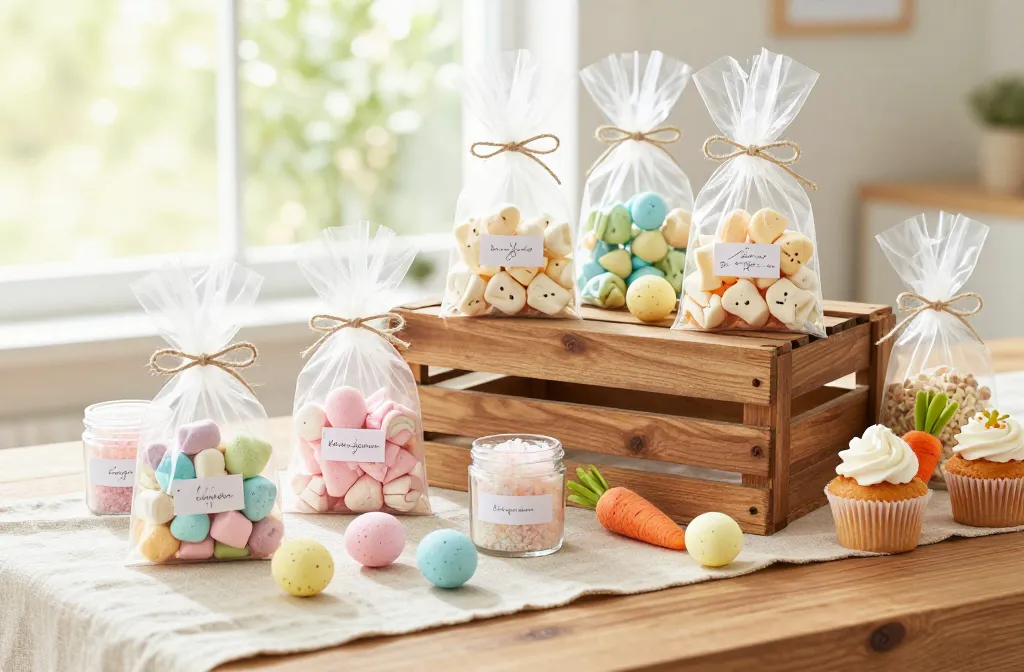
2) DIY Easter Treats: Sweet Tiny Delights
Treats are the obvious star, but they don’t have to be store-bought. Bake or assemble mini goodies that fit your vibe.
- Homemade marshmallow eggs in pastel colours
- Mini carrot cupcakes in paper cups with cute toppers
- Chocolate-dipped almonds with edible glitter
Smart packaging ideas
– Use clear cellophane bags tied with twine to keep things affordable yet fancy.
– Add a tiny label with the guest’s name or a punny Easter joke.
– Include a handwritten note to give it a personal twist.
3) Non-Edible Keepsakes That Shine
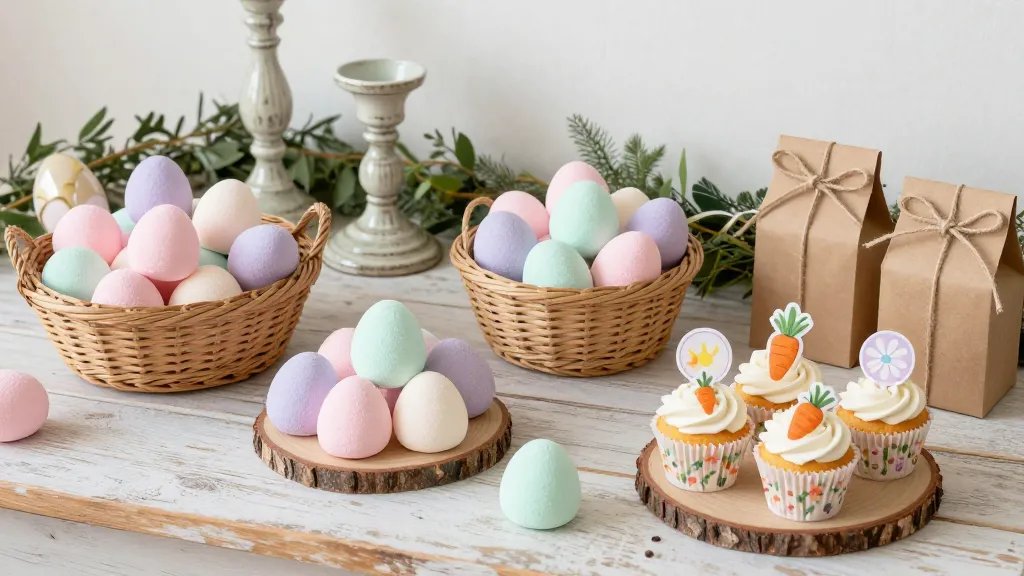
Edible stuff is great, but non-edible favours have serious staying power. Think reusable, sentimental, or just darn cute.
- Mini filled jars with DIY bath salts or sugar scrub
- Mini potted succulents or herbs
- Personalized seed packets with a little thank-you note
Simple jar ideas
– Fill small mason jars with dried lavender or mini sprinkles.
– Seal with a cork lid and decorate with a ribbon that matches your theme.
– Attach a tiny tag: “Grow a little joy”.
4) Personalization: Make It About Your Guests
People love feeling seen. Small customization goes a long way without breaking your budget.
- Name tags on favours for a party-wide display
- Initial stickers on treat bags
- Custom QR codes that link to a cute Easter playlist or photo gallery
Low-effort personalization tricks
– Create a simple printable tag template you can reuse for different events.
– Use a consistent colour scheme so even mismatched items feel intentional.
– Add a funny one-liner that relates to your group’s inside jokes.
5) Eco-Friendly Touches That Won’t Break the Bank
Sustainability is sexy and budget-friendly if you plan smartly. Reuse, recycle, and redesign.
- Wrap favours in fabric scraps or reusable cloth bags
- Choose biodegradable confetti or skip it entirely
- Offer seeds or bulbs instead of plastic trinkets
Material picks that matter
– Look for FSC-certified paper for tags and packaging.
– Opt for glassover plastic jars when possible, and reuse them later.
– Use natural twine instead of plastic ribbons for a rustic vibe.
6) Quick-Fire Assembly Plan: Get It Done in a Weekend
No need to stress—planning beats perfection. Here’s a brisk roadmap so you don’t end up with chaos and last-minute panic.
- Decide your theme and colour palette (Day 1).
- Source materials in one go—craft stores, dollar stores, and online deals (Day 2).
- Assemble favours in batches (Day 3). Enlist a friend to help; teamwork makes the dream work.
- Tag, bag, and label right before the party (Day 0 or morning of).
7) A Quick Look at Budgeting Without Being Scrooge
Yes, you can be chic without overspending. Here’s how to stretch a tight budget.
- Repurpose jars and containers you already own
- Shop seasonal decor and use leftovers from previous holidays
- Prioritize 2-3 standout items and fill with simple filler pieces
Sample budget breakdown
– 6 favour jars with bath salts: around $12-15
– 20 mini treat bags: $8-12
– Tags, twine, and stickers: $6-10
– Overall: under $40-$60 depending on scale
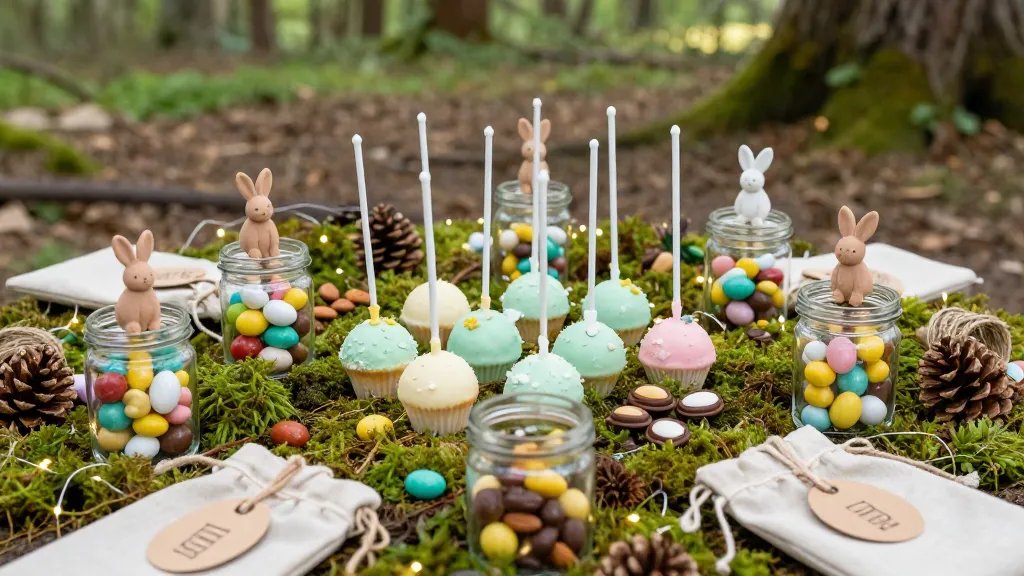
8) Display and Set decorating: Make the Favours Part of the Scene
Favour presentation matters as much as what’s inside. Create a little moment people walk into rather than a random pile.
- A “Welcome Table” with a spring bouquet and pastel runners
- A memory wall where guests can snap quick pics with a Polaroid
- A small dessert backdrop that ties into your theme
DIY backdrop ideas
– Use kraft paper as a chalkboard-friendly surface for cute messages.
– Hang pastel paper lanterns at different heights for depth.
– Add a few faux eggs in a wire basket to anchor the theme.
9) FAQ: Your Burning Questions Answered
What are easy handmade Easter favours for a kids’ party?
Kids love treats and bright colours. Try DIY marble-painted eggs, mini bunny sachets filled with stickers, or little jars of bubble bath fizz. Keep everything small, non-toxic, and snack-friendly.
How can I avoid waste while making favours?
Plan with multi-use items and opt for packaging you can reuse. Choose jars that guests can repurpose, seeds that they can plant, and cloth bags they’ll keep for long-term use.
Where can I find affordable supplies?
Dollar stores, craft stores on sale, and bulk online retailers are your friends. Stock up during craft store sales and use coupons. FYI, planning ahead saves real cash.
Can I involve kids in the making process?
Absolutely. Give kids simple tasks like tying ribbons, decorating tags, or colouring tags. It makes the process fun and doubles as a mini craft activity themselves.
What if I only have a small space or a tiny budget?
Scale down to a few standout favours and a simple display. Even two or three well-made items can create a big impact when presented nicely.
How do I keep everything cohesive?
Stick to a few core colours and consistent packaging styles. Use the same tag font, ribbon width, and a uniform label design across all favours.
Conclusion: Handmade Easter Favours That Feel Personal and Fun
The magic of handmade Easter party favours isn’t about spending a fortune; it’s about thought, touch, and a little elbow grease. When you combine cute packaging, practical gifts, and a cohesive theme, your table becomes a memory-making centerpiece. So grab some supplies, recruit a friend, and start crafting your way to an unforgettable Easter. FYI, your guests will notice—and they’ll talk about it long after the eggs are eaten.


