Getting crafty for Easter is basically a yearly excuse to jam to sunny playlists, sip chocolatey lattes, and sprinkle glitter everywhere without judgment. If you’re short on time but crave something charmingly handmade, you’ve landed in the right spot. These easy ornaments come together fast, look adorable on your mantel, and double as thoughtful gifts.
Quick Picks: What You’ll Need to Start
– Simple supplies you probably already own: cardstock, felt, buttons, ribbon, and glue
– A few seasonal accents: pastel paints, cotton balls, seed beads, and twine
– A dash of imagination: tiny stamps, cookie cutters, or even a ketchup-bottle-worthy squeezey bottle for glue fun
If you’re wondering where to begin, pick one material you love (felt, for example) and build from there. FYI, you don’t need a big fancy setup to make something delightful.
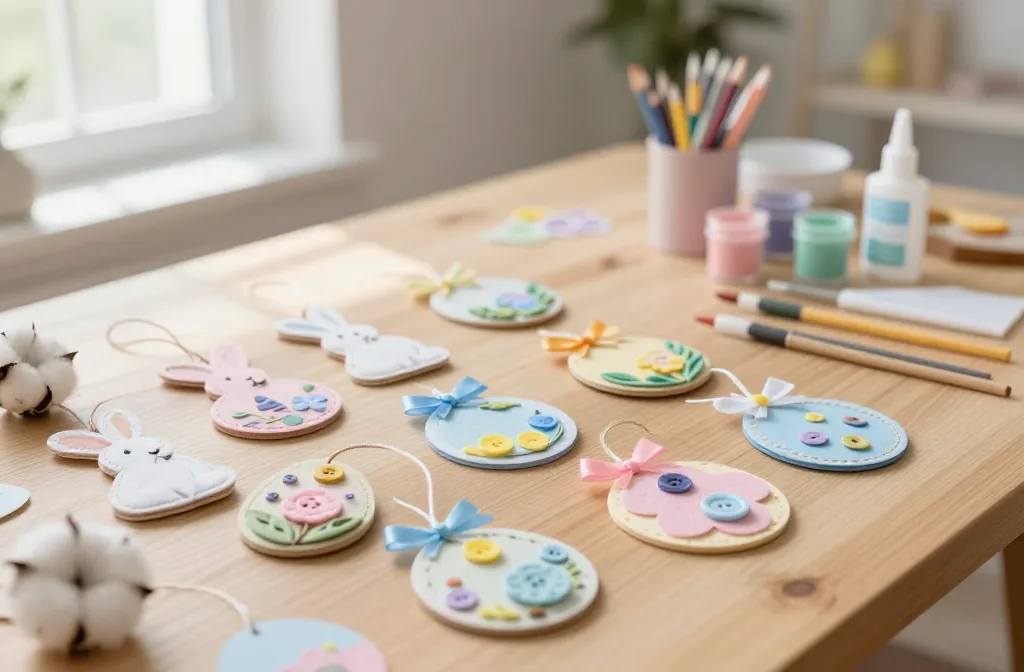
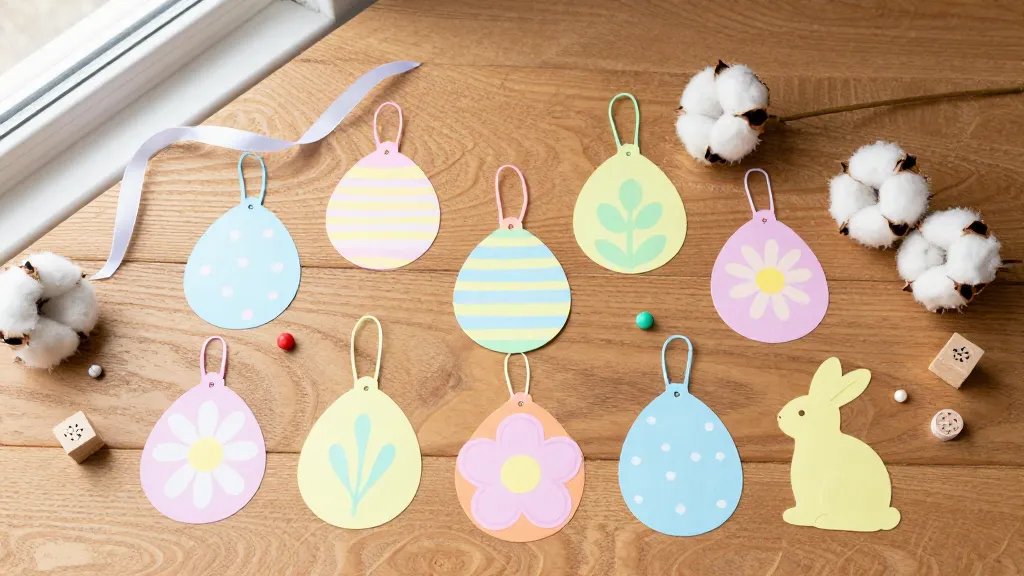
Pastel Paper Ornaments: Easy, Bright, and Lightweight
These are a forgiving entry point for beginners. Think eggs, bunnies, and flowers printed on cardstock or painted with soft hues.
– Cut shapes with a simple template, fold for a dimensional look, and add a little weight with a cardstock backing.
– Decorate with crayons, markers, or watercolors. Let colors mingle for that dreamy Easter vibe.
– Glue on a string for hanging, or poke a hole and thread your favorite ribbon.
Pro Tips for Clean Lines
– Use a light pencil guide before you cut or draw. No more wonky bunny ears.
– If you’re painting, apply a thin base layer and let it dry completely before adding details.
– Seal with a quick spray of clear acrylic to keep colors vibrant and resist smudges.
Felt Ornaments: Soft, Snuggly, and Super Cute
Felt is my go-to when I want something tactile and cozy. It’s forgiving, inexpensive, and you can stitch by hand without special tools.
– Create little egg shapes, chick cutouts, or bunny faces. A single blanket stitch around the edge does the job.
– Embellish with tiny beads, buttons, or a tuft of yarn for tails.
– Attach a loop of embroidery thread or ribbon for hanging.
Stitch Tricks for Beginners
– Start with one simple seam. You’ll nail it in no time.
– Use a running stitch for speed, a backstitch for durability.
– Don’t worry about perfection—wobbly stitches look charming.
Natural Materials: Simple, Eco-Friendly, and Elegant
Riffs on nature make ornaments that feel soft and seasonal without shouting, “I bought this at a store.” Think pressed flowers, twine bows, and wood slices.
– Sand a wooden circle, paint a pale wash, and stamp a tiny Easter motif.
– Use dried leaves, tea-stained paper, or pressed flowers under a clear sealant.
– Add a rustic bow with twine for a countryside Easter vibe.
Preserving Dried Details
– Press flowers between book pages for a day or two before assembly.
– Seal with a clear matte medium to prevent crumbling petals.
– Store finished pieces in a dry box away from direct sunlight to keep colors true.
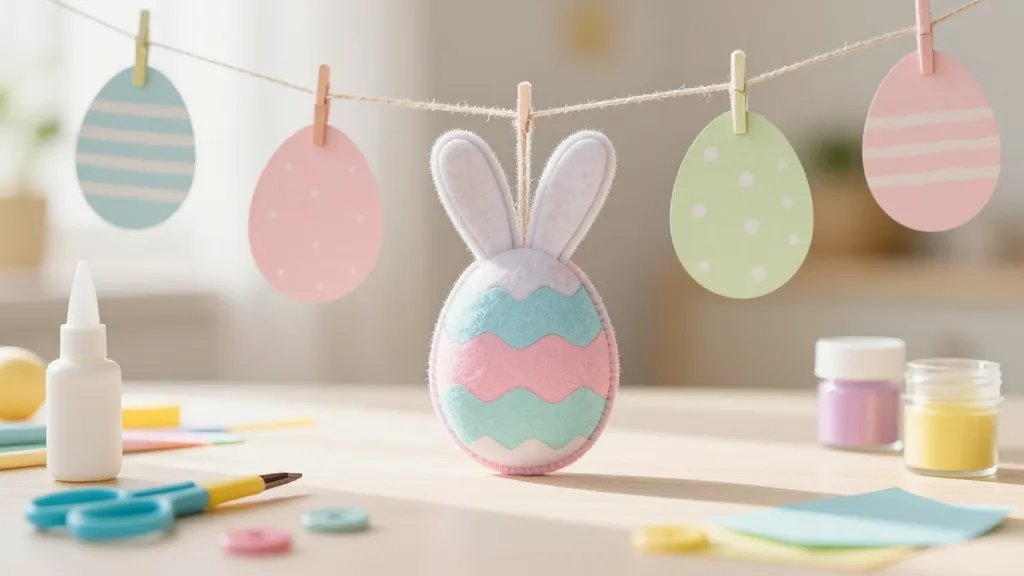
Egg Ornaments with a Modern Twist
Egg shapes are the star of Easter decor. You can go classic or punch them up with a modern palette.
– Dip-dye eggshells into pastel hues and glitter the rims for a tiny sparkle.
– Create fabric-covered eggs by wrapping felt or fabric around foam eggs and securing with a dab of glue.
– Paint minimalist geometric patterns with painters tape to keep edges crisp.
Glue Gotchas
– Use quick-drying glue so you don’t fight with wobbling pieces.
– Apply glue in thin layers to avoid lumps and showy adhesive ridges.
– If you’re not sure, test on a scrap piece first.
Mini Garlands: A Quick Pop of Easter Joy
Garlands are a great way to showcase multiple ornaments without taking up much space.
– Stitch or string together a row of tiny shapes: eggs, bunnies, or chicks.
– Alternate materials for interest—felt, paper, and wooden beads work beautifully together.
– Hang across your mirror, across a doorway, or above a mantel.
Garland Layout Ideas
– Space shapes evenly for a tidy effect, or cluster different shapes for a playful look.
– Add a few metallic beads for a touch of shimmer at dusk when fairy lights come on.
Personal Touch: Customizing Ornaments for Gifting
Handmade gifts feel extra special. A set of small Easter ornaments personalized with initials or a message turns a simple craft into a keepsake.
– Try tiny name tags on each ornament or a short greeting stitched or painted on the back.
– Package with a handwritten note and a small bag of local candy for a perfect little gift bundle.
– Consider a “decor and cuddle” combo: ornament plus a mini scented sachet.
Storage and Longevity: Keeping Your Ornaments Fresh
Your hard work deserves a little aftercare so it stays charming year after year.
– Store in a cool, dry place in a labeled box. Don’t smash them in the first week of March.
– If pieces are lightweight paper or fabric, place a soft layer of tissue between ornaments.
– Re-seal with a quick spray of sealant every season to keep colors bright.
FAQ
How long does it take to make a basic ornament?
Most simple pieces take 20 to 40 minutes, depending on how detailed you go. If you’re aiming for a whole set, plan a couple of sessions so you don’t burn out.
What’s the easiest material to start with?
Felt and paper are the easiest. They’re forgiving, cheap, and you can finish a cute ornament in under an hour.
Can these ornaments be used outdoors?
Keep most of them indoors where they won’t fade or fall apart in weather. If you want an outdoor display, pick water-resistant materials and seal carefully.
How can I make them look more professional?
Use a consistent color palette, clean lines, and a light touch with glue. A simple, neat presentation elevates even the simplest ornament.
Are these suitable for kids?
Absolutely. Adjust the project to your child’s age: older kids can handle cutting and gluing, while younger ones can help with coloring and decorating under supervision.
Conclusion
Crafting easy handmade Easter ornaments is a breeze that pays off in sunshine-y vibes and a sprinkle of holiday magic. You don’t need a fancy setup—just a handful of trusty supplies, a dash of patience, and a login-level amount of whimsy. So grab your favorite colors, grab a friend, and start stitching, painting, or knotting your way to a charming Easter display. If you want, drop a photo of your creations in the comments and we’ll gush over every tiny bunny tail together.


