An easygoing guide to Easter crafts that look charming without overthinking. If your kitchen table is begging for a mini workshop, you’re in the right place. Let’s dive into hands-on ideas that feel cozy, rustic, and totally doable.
Create Light-Block Centerpieces With Painted Eggs
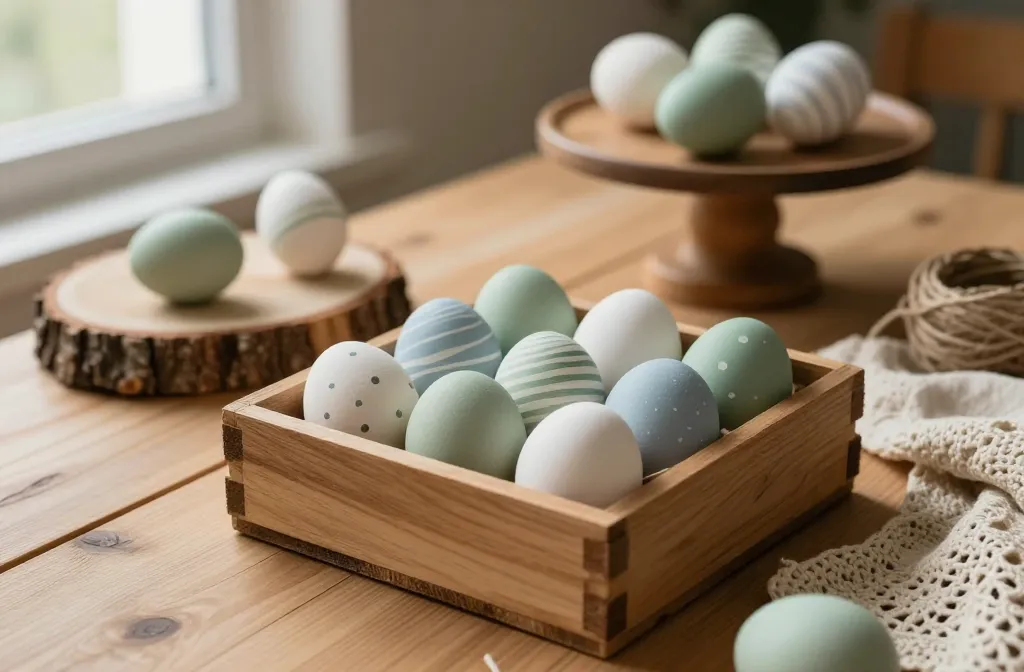
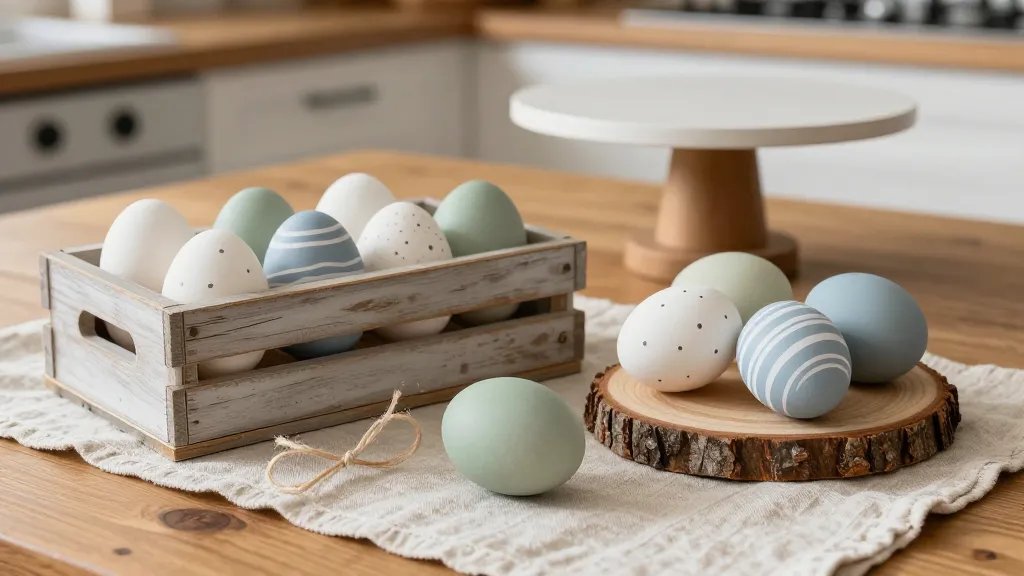
Eggs are the classic Easter anchor, and you can give them a rustic twist in minutes. Paint simple patterns on blown eggs or hard-boiled ones, then set them in a shallow crate or a wooden tray. FYI, you don’t need perfection—quirky brushstrokes add character.
– Supplies: eggs, acrylic paints, tiny brushes, a wooden crate, twine for a rustic touch.
– How-to: paint neutral tones like eggshell white, sage green, or dusty blue. Add tiny dots or stripes for texture.
– Display idea: arrange on a chunky log slice or a thrifted cake stand.
Subsection: Natural Dye Magic
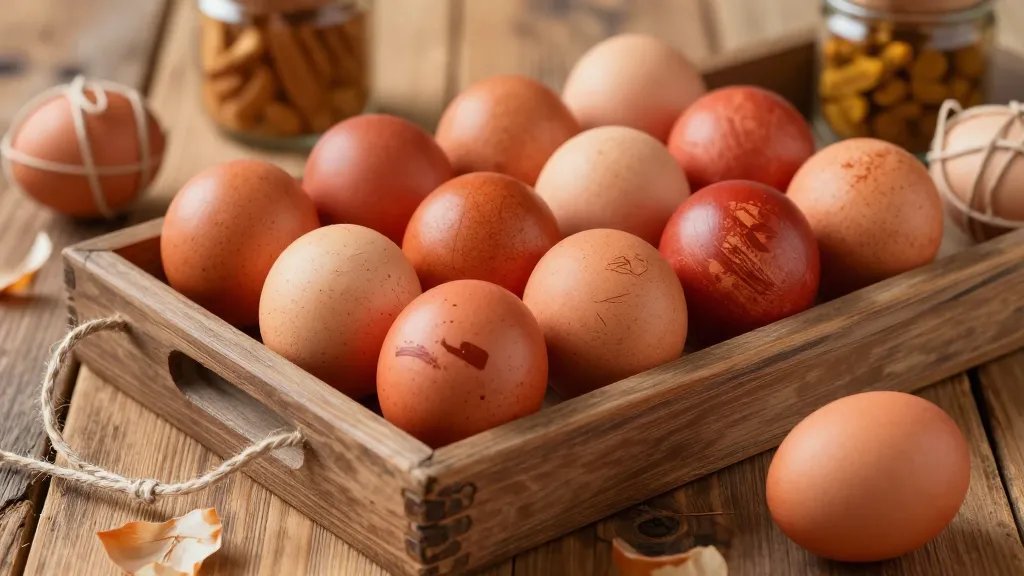
If you want something extra cozy, dye eggs with onion skins, turmeric, or beet juice. Warm tones look timeless on a wooden table. It’s seriously foolproof.
DIY Egg Ornaments: Minimalist Orbs For The Tree
Who says Easter ornaments have to be fragile? Turn wooden orbs into simple, rustic decorations that double as year-round keepsakes.
– Step-by-step: carve or sand a smooth wooden bead, then seal with a light varnish.
– Decor options: wrap with jute twine, add a small sprig of lavender, or paint a tiny paw print if you’re feeling cheeky.
– Storage tip: bundle in a linen bag to keep them dust-free.
Subsection: Quick Crochet Accent
If you crochet, whip up a few tiny cozy covers for wooden eggs. They slip on in minutes and give your centerpiece that warm, handmade vibe.
Natural Wreaths and Garlands
Rustic Easter isn’t all about eggs; it loves greenery and texture. A wreath or garland brings the outdoors inside and looks effortlessly chic on doors or mantels.
– Materials: grapevine wreath, faux greenery, dried flowers, thin ribbon or burlap.
– How to build: start with a base of greens, tuck in a few sprigs of dried lavender or scattered daisies, and finish with a light bow.
– Placement: hang on the front door or drape over a mantel for a seasonal touch.
Subsection: Bud Vases On A Tray
Line a wooden tray with small bud vases filled with spring stems. It’s a subtle, sculptural statement that avoids the “holiday décor overload.”
Pressed-Foil Bunny Art (Low-Tech and High Style)
If you want something artsy but not fussy, press foil into simple bunny silhouettes on kraft paper. It feels vintage without trying too hard.
– What you need: kraft paper, copper or gold foil sheets, a tracing pattern, and a bit of mod podge.
– How to: trace a simple bunny outline, fill with foil, and seal with a thin layer of mod podge.
– Display: frame it in a weathered wooden frame or lean into a diptyque-esque wall pocket for texture.
Egg Cup Centerpieces With Tiny Surprises
Egg cups provide a tiny stage for mini rituals. Add a small surprise that sparks delight—like a sprig of rosemary tucked into a cup or a little folded note.
– Setup: use ceramic or wood egg cups, place a painted egg in each, and scatter a few pinecones or stones around.
– Twist: tuck a dried flower inside a cup under the egg for a peek-through moment.
Subtle Paint Techniques for Aged Look
If you want that heirloom vibe, dry-brush white over mineral tones to give an antique finish. It hides minor slips and adds a soft glow.
DIY Soap-Egg Immersion Dyes
This one’s a snap for bath-time vibes that spill into seasonal decor. Natural dyes make eggs look like tiny treasure chests.
– Materials: eggs, onion skins, tea, water, a tiny pot, and a towel to blot.
– Process: simmer onion skins and tea for a gentle amber and olive palette. Dip eggs and let dry on a clean towel.
– Tip: smooth out blotches with a quick light wipe in a single direction to keep the look cohesive.
FAQ: Rustic Easter Crafts Quick Answers
Are these crafts suitable for kids?
Absolutely. Most projects use simple tools and safe paints. Give kids a chance to pick colors and patterns, and you’ll see creativity spark up fast.
What’s the easiest starter project for beginners?
Try the Light-Block Centerpieces With Painted Eggs first. It requires minimal supplies and offers instant gratification with a polished result.
How can I make the look feel cohesive across the room?
Stick to a tight palette—neutral whites, soft greens, and warm browns. Use a single material (like burlap or twine) as a unifying accent, and keep the surfaces uncluttered.
Can I reuse materials from last year?
Yes. Salvage wooden elements, dried flowers, and even the wreath frame. A quick refresh with new greens can make old pieces feel fresh again.
Any tips for wrapping it all up after Easter?
Store in labeled containers or bins. Protect fragile pieces with tissue or small bags. The more organized you stay, the faster you can pull this off next year.
Is it okay to mix modern and rustic styles?
Totally. A rustic centerpiece with a sleek vase or a metal tray creates a balanced, contemporary vibe. It’s your space—play with contrast.
Conclusion
Rustic Easter crafts prove you don’t need a big budget to make your home feel warm and inviting. With simple materials, a handful of ideas, and a dash of DIY attitude, you can craft a scene that’s charming, personal, and a little bit cheeky. So gather your supplies, pick a project, and let the spring vibes roll. If you’re feeling overwhelmed, start with one small idea and let it grow—IMHO, that’s how the magic starts.


