An easy, goofy project you can finish in an afternoon without special skills. We’ll keep it breezy, practical, and yes—totally cute. Grab a handful of clay, a few tools, and your best goofy smile; let’s make a duck that deserves a tiny pond of compliments.
Gather Your Stuff: What You’ll Need
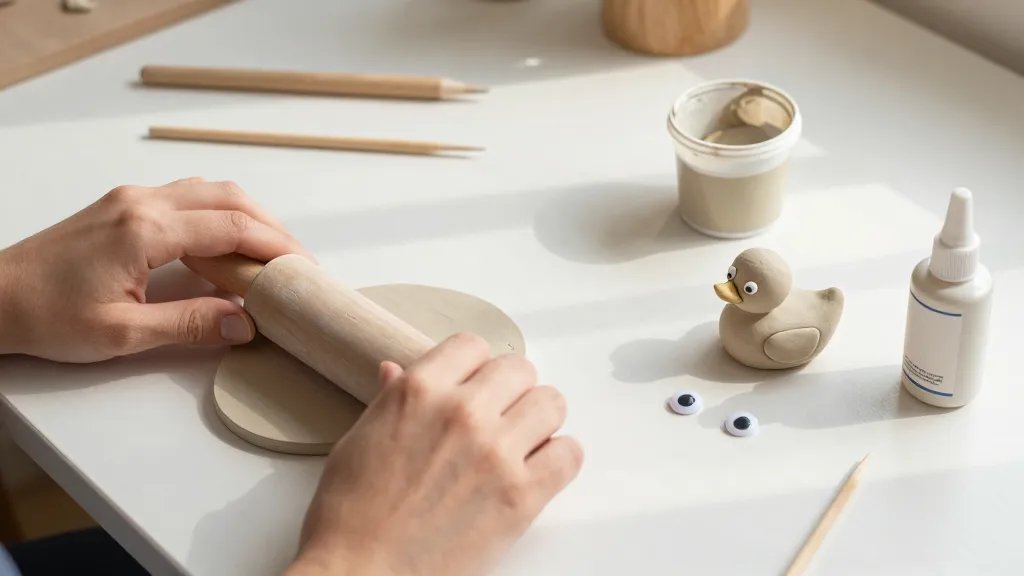
– Air-dry clay or polymer clay (your choice, but air-dry is forgiving for beginners)
– A small rolling pin or a clean bottle to flatten the clay
– Clay tools or household things like a toothpick, a toothpick with a blunt end, and a spare needle
– Paints (acrylic works fine) and a fine-tipped brush
– A glue or slip if you’re binding pieces
– A protective glaze or sealant to finish
– Optional: googly eyes or tiny beads for extra personality
– A clean, dry work surface and a bit of patience
Why these basics? Because simplicity rules here. If you don’t have every item, improvise. FYI, you’ll learn fast which tools actually matter once you start shaping.
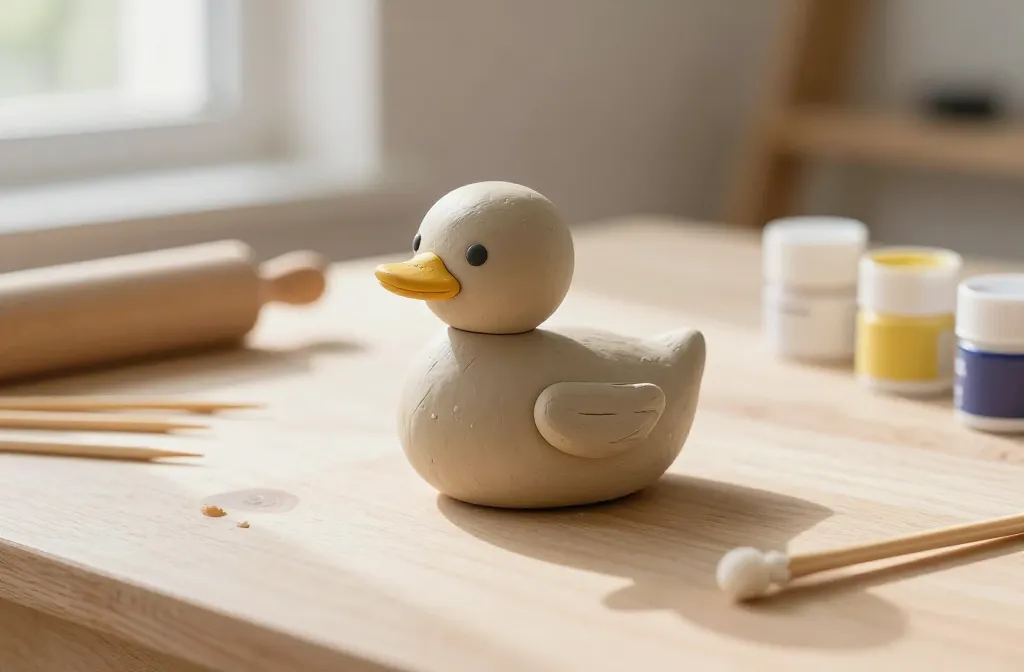
Shape the Body: The Foundation Duck
1. Start with a small ball for the head and a larger oval for the body. Don’t stress about perfect spheres; ducks look charming when a little imperfect.
2. Roll each piece to smooth out fingerprints, then gently press the head onto the front of the body. You want a subtle neck, not a neck-breaking joint.
3. Attach a small tail piece at the back. Round and tuck a bit under the body for stability.
If the pieces don’t stick right away, dampen slightly with water or a dab of clay slip. Let the two pieces set for a moment so they hold their shape. This is a good moment to take a breather; art is all about tiny wins.
Waddle, Waddle: Beak, Eyes, and Expressive Face
– Beak: Roll a small orange (or yellow) cone or rounded rectangle. Flatten the base and press onto the head, angled slightly downward for that curious duck vibe.
– Eyes: Place two small dots or beads. If you’re using paint, dot with white first, then a tiny black pupil. Pro tip: place eyes a little to the outside to give the duck instant personality.
– Expression: If you want a surprised duck, tilt the beak a smidge upward. For a shy duck, angle it down. It’s all in the tilt, my friend.
Remember: tiny details create big character. Don’t overthink it—humor comes from personality, not perfection.
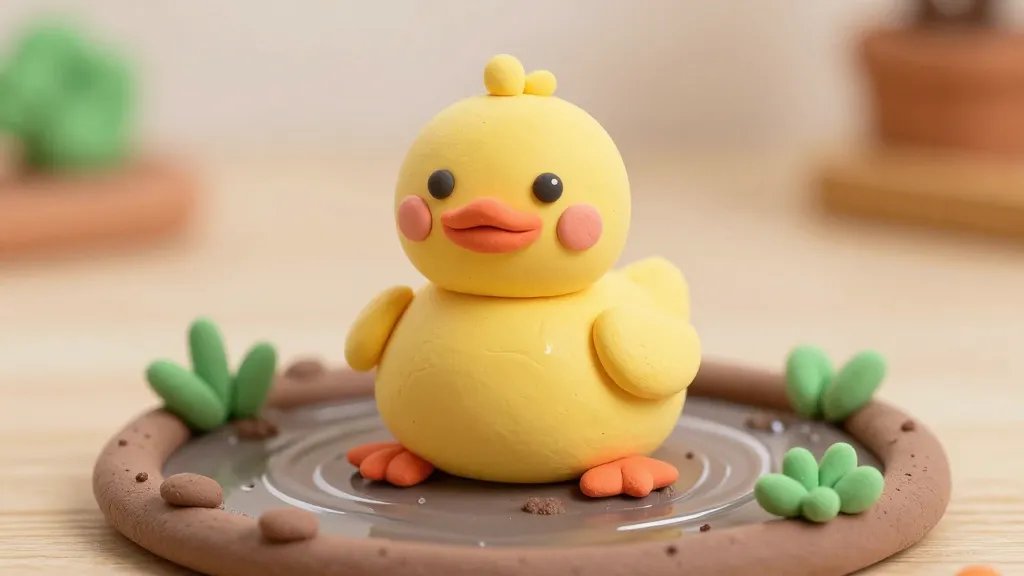
Wings and Feet: The Finishing Touches
– Wings: Flatten two small teardrop shapes and attach them to each side of the body. A gentle curve makes them look like they’re ready to flap at any moment.
– Feet: Roll out two tiny flat ovals, then press them onto the bottom front of the body. Splayed toes add whimsy; rounded stumps scream “I’m new to the pond,” and that’s adorable.
– Smoothing: Lightly blend the edges where limbs meet the body. You want clean joins but not cookie-cutter precision.
Optional: carve a few feather lines along the wings with a toothpick for texture. Subtle is better than loud here.
Color and Personality: Painting Your Duck
– Base coat: Pick a classic yellow or a fun pastel. Paint all over, then let dry completely.
– Shading: Use a slightly darker shade along the belly and under the wings for depth.
– Details: Add a hint of orange on the beak and feet. A tiny blush on the cheeks can be adorable if you’re into kawaii vibes.
– Sealing: Once everything is dry, apply a clear sealant. This protects your sculpture and keeps colors popping.
FYI, you can keep it monochrome for a minimalist look or go bold with polka dots and stripes. Your duck, your rules.
Stability and Display: Making It Last
– Allow proper drying: If you used air-dry clay, give it at least 24 hours in a warm, dry spot. Polymer clay needs baking according to the package—follow the directions to avoid crispy catastrophes.
– Assembly tips: If a part seems loose, attach with a dab of slip or glue and hold for a minute. Don’t rush the dry time—quick fixes pop off when you least want them to.
– Display ideas: A small perch made from a cork or twig, a tiny bowl of “pond water” clear resin, or even a little stand can elevate your duck from cute to gallery-worthy.
Pro move: line up a couple of these ducks with different poses for a charming display. Your future self will thank you for the photo-worthy setup.
Troubleshooting Quick Fixes
– Piece won’t stick: Try dampening the surface a touch and scrubbing it with a soft brush. Clean, dry joints hold best.
– Beak or feet cracking: Soften with a tiny amount of clay slip and reshape. If you’re near the end of your clay roll, consider remolding a fresh piece to avoid cracks.
– Paint peeling after sealing: Lightly sand the surface a bit, wipe clean, and re-seal. A double glaze can save your masterpiece.
Everyone hits a snag. The key is to stay flexible and laugh at the wobble. This is clay, not fine china—though the ducks look pretty fancy regardless.
Creative Variations: Make It Your Own
– Seasonal ducks: Add a little scarf for winter, a tiny flower for spring, or sunglasses for a surfer vibe.
– Little companions: Create a family of ducks with matching colors or alternating hues. It’s a cute group project and instantly shareable on social.
– Accessorize: Tiny hats, bow ties, or a mini pond. Accessories aren’t just cute; they’re conversation starters.
Optional mini-challenge: design a duck that resembles a real-world character you love. It’s a playful way to practice shaping and color mixing.
FAQ
How long does it take to finish a cute clay duck?
It varies, but plan about 60 to 90 minutes of hands-on work plus drying time. If you’re slow and methodical, you’ll be rewarded with a steadier finish and fewer missteps.
Can I bake polymer clay without an oven?
Yes, if your polymer clay packaging says so. Use a dedicated toaster oven or a craft-safe oven and follow the temperature and time guidelines exactly. Never bake with food in the same oven.
What if my duck falls apart after drying?
Don’t panic. Reattach with a dab of slip or glue, smooth the seam, and let it cure again. Consider making the joints a touch thicker next time to improve stability.
Is air-dry clay as durable as polymer clay?
Air-dry clay is great for quick projects and beginners, but it’s generally less durable than polymer clay. Sealants help, though, and a well-supported display makes a big difference.
How do I clean dust off a finished clay duck?
Gently brush with a soft, dry brush or use a microfiber cloth. If you’ve used varnish, avoid rubbing too hard to prevent scratches.
Conclusion
You just walked through crafting a cute clay duck that’s equal parts goofy and endearing. It’s a project that pays off with quick wins and a tangible sense of accomplishment. So grab your clay, embrace the imperfections, and let your inner sculptor waddle free. FYI, the best part is showing off your tiny feathery friend to friends and family—watch the smiles appear. Now go ahead—make one duck, and then maybe a whole flock.


