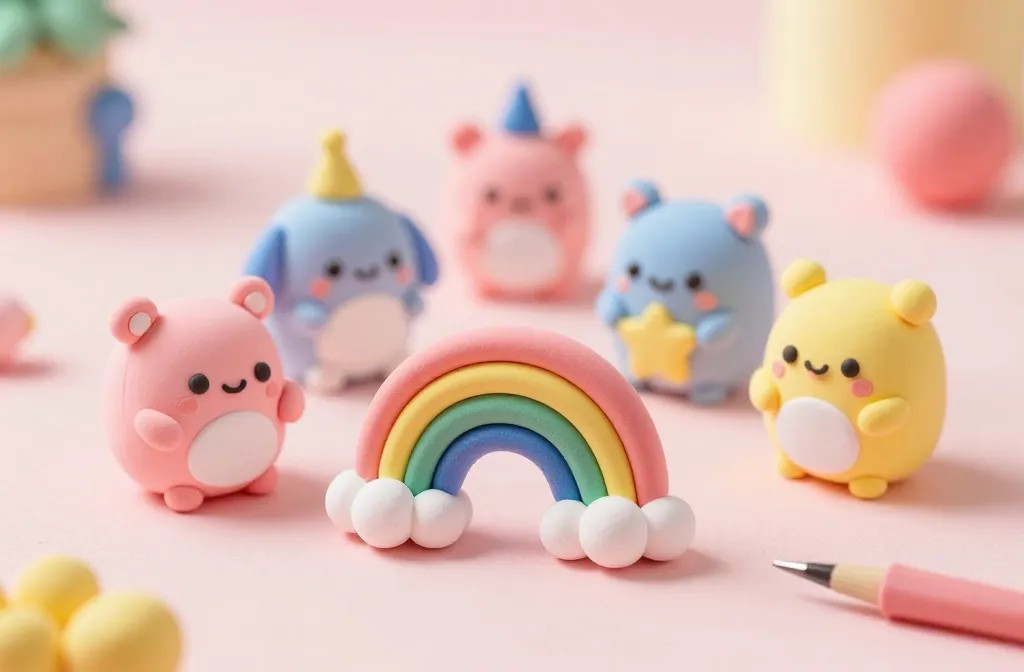
An introduction that actually grabs you at first glance: painting cute clay figures is equal parts fun and therapy. You’ll get to bring tiny characters to life, one dab of color at a time. FYI, the trick isn’t perfection—it’s playful charm and a little know-how.
Start with the Right Clay and Prep
– Choose the good stuff: air-dry clay for quick projects, polymer clay for bake-to-set pieces. Do your homework and pick what suits your routine.
– Smooths and grits: sand between layers lightly once it dries to keep edges tidy.
– Prime time: a light coat of acrylic gesso or white primer helps colors pop and reduces staining from pigments.
Subtle prep steps you might be skipping
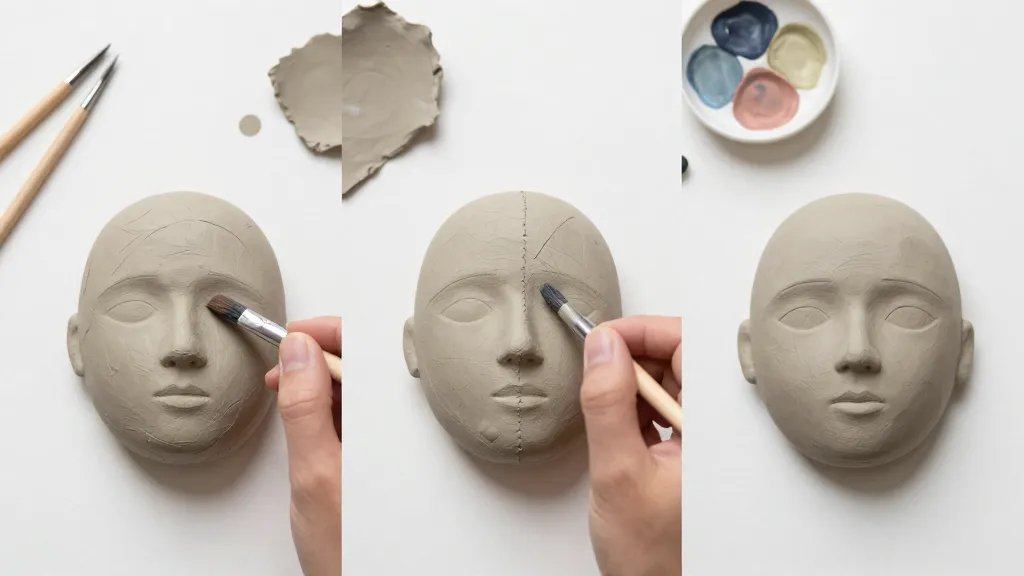
– Wipe clay with a damp sponge before painting to remove fingerprints and dust.
– Test mix a tiny dot of color on a scrap piece to see how it will actually look after drying.
– Use a sculpting tool to carve gentle seams or lines before painting—less scraping later, more precise shading.
Pick a Palette That Feels Cute, Not Cluttered
– Start with a limited palette: 4–6 colors plus a few neutrals. Too many colors can overwhelm small figures.
– Favor soft, pastel tones for a kawaii vibe, or go bold but with balance.
– Decide on a primary color and use lighter or darker tints to shade.
How to test color quickly
– Paint a tiny swatch on a scrap clay piece and bake or dry it. Compare under different lights to avoid “what I saw on screen” tragedy.
– Create a tiny color chart for reference as you work.
Layering and Shading: Make Your Figures Pop
– Start light: apply a base coat, let it dry, then add details. Layering keeps colors from muddying.
– Build shadows with a slightly darker shade along edges and under curves.
– Highlight with a touch of white or a lighter tint on raised surfaces.
– Use dry brushing for soft fur or hair texture—shake off excess paint and lightly skim the surface.
Mastering tiny details without losing your mind
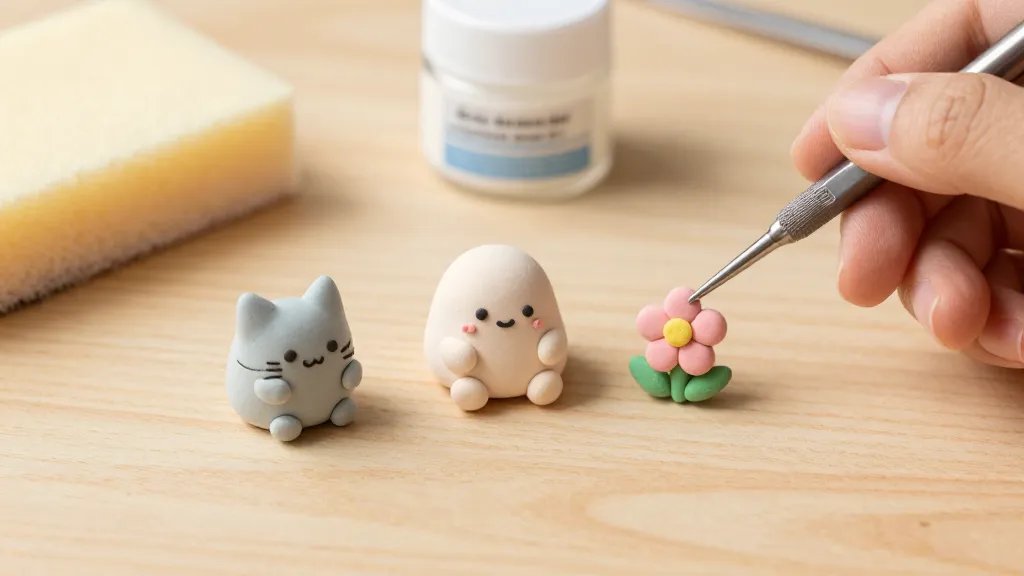
– Use a fine-tipped brush or a sewing-needle fine point for tiny eyes and mouths.
– Work in small sections; don’t try to paint everything at once.
– If you mess up, let it dry and repaint. It’s clay, not a Mona Lisa.
Eyes, Faces, and Expressive Features
– Eyes are everything: two small dots or tiny ovals with a highlight can bring a character to life.
– Mouths convey mood: a simple curved line reads happy, while a tiny upward dash is cheeky.
– Add blush or freckles with a small, diluted pink or peach.
Quick tip for cuteness overload
– Add a tiny white dot in the eye’s upper corner for a bright, lively look.
– Use a thin brush to create tiny whiskers or freckles; keep them delicate.
Textures That Make It Adorable (without the chaos)
– Fur texture: quick flicks of a dry brush or stippling with a tiny brush.
– Plush softness: apply a thin wash of a light color and dry-brush with white to simulate fur or fabric.
– Shoes, hats, and accessories: paint these separately, then glue onto the figure after they dry.
Clothes and fabric vibes
– Use subtle seams with a slightly darker shade to imply stitching.
– For stripes or patterns, paint thin lines with a steady hand or use masking to keep clean edges.
– Don’t over-layer textures; keep outfits simple for a playful look.
Sealing and Finishing: Protect Your Tiny Masterpiece
– Choose a sealant that matches your clay type: matte for a soft look, gloss for a doll-like shine.
– Apply in thin, even coats; multiple light coats beat a single heavy one.
– Allow full curing time between coats to avoid smudging.
Common finish mistakes to avoid
– Don’t seal while clay is still tacky; it traps moisture and blurs details.
– Avoid coastal or hot environments during curing; humidity can ruin the finish.
– If your sealant yellows over time, swap to a non-yellowing variant.
Creative Projects You Can Try Next
– Miniature animals in tiny outfits: a bunny in a sweater, a panda with sunglasses.
– Food charms with cute faces: donuts, cupcakes, or rainbow macaroons.
– Seasonal figures: a sleepy pumpkin or a jack-o’-lantern with a goofy grin.
Troubleshooting Common Painting Woes
– Colors look dull after drying: add a glaze or recoat with a transparent layer, then seal.
– Paint chips at edges: apply a very thin base coat first, then topcoat again.
– Smudges on eyes or mouths: clean brush, let paint dry fully, then touch up.
Fixes that save projects
– If you accidentally smear a line, dab with a cotton swab dipped in a tiny amount of water or solvent, then repaint the line once it dries.
– For rough surfaces, a quick light sand and recoat can make everything look crisp again.
FAQ: Quick Answers for Busy Creators
What kind of clay is best for painting cute figures?
Air-dry clay is forgiving for beginners and easy for quick projects, while polymer clay gives you durability and precise detail after baking. Pick based on how long you want to work before you cure and how sturdy you need the piece to be.
Do I really need to seal clay figures?
Yes, sealing helps protect the paint and makes colors pop longer. Choose matte or gloss depending on the look you want. FYI, some paints cure differently under sealant, so test first on a scrap piece.
How do I make tiny eyes look consistent?
Practice makes perfect. Use a fine-tipped brush or a very small tool to dot two symmetrical eyes, leave a white highlight, and let each eye dry before adding the other features. IMO, patience pays off here.
Can I repaint a figure after sealing?
Resealing is possible, but you’ll want to carefully sand any cracked paint, repaint the areas, and reseal. If you can, avoid repainting after sealing—it’s easier to fix mistakes before the final coat.
What glaze level should I aim for on cute clay figures?
Start with a semi-gloss or satin finish for a soft, friendly vibe. If you want a toy-like gloss, a high-gloss sealant works, but it can look slick. Adjust according to the character and the setting.
Conclusion: Have Fun and Flaunt Your Cute Creations
Painting cute clay figures is exactly the kind of hobby that pays off with a smile and a little pride. Start simple, keep layers light, and let your characters express personality through eyes, mouths, and tiny props. FYI, don’t stress the tiny stuff—the charm is in the quirks, not perfection. So grab your brushes, pick a color story, and start painting figures that feel like little friends you can carry around in your hands.


