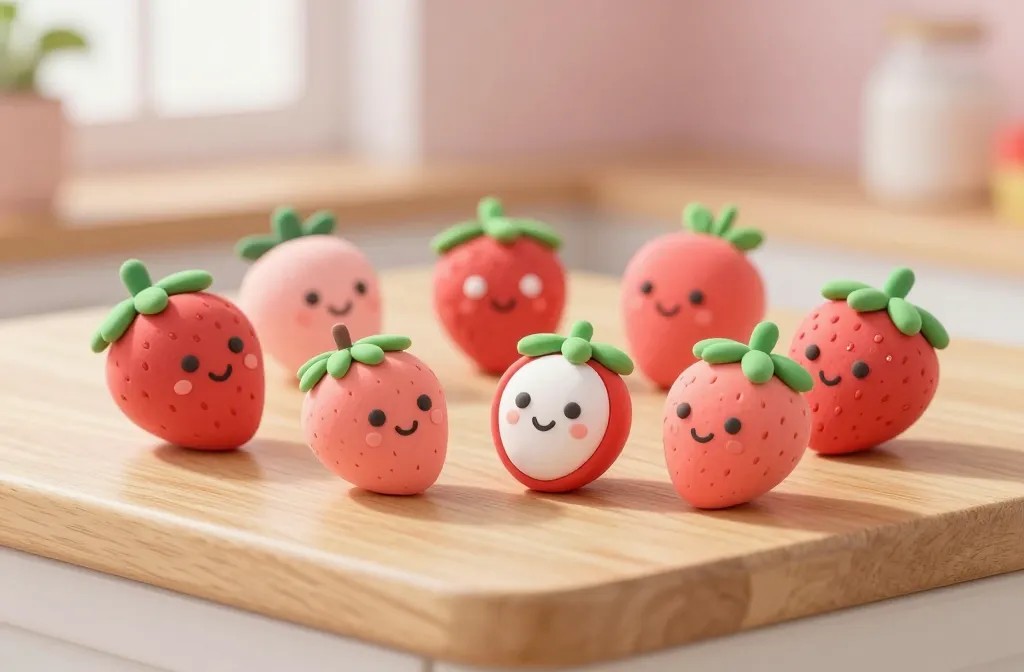
An act of clay, a pinch of whimsy, and suddenly your kitchen counter becomes a giggle factory. These cute smiling strawberries are not just adorable; they’re a tiny reminder that handmade joy is endlessly repeatable. Ready to get your hands sticky with charm? Let’s dive in.
Why Clay Smiles Beat Plastic Smiles Every Time
Clay has personality. Plastic eyes can feel lifeless, but clay smiles bounce with little quirks that feel uniquely you. Do you want a strawberry that looks ready for a summer picnic or one that winks at you from the mug rack? With clay, you control every curve, every grin, and every playful freckle.
Texture That Tells a Story
– The seed texture on the surface adds realism without looking robotic.
– Slight gloss on the berries catches light like real fruit, but you’re in total control of the shine.
– A soft matte finish can read as “handmade, not store-bought.”
Supplies That Won’t Break the Bank
FYI, you don’t need a full art-studio worth of gear to make these cuties. Start simple, then level up as the mood strikes you.
- Air-dry clay in red, green, and a touch of brown
- Acrylic paints for tiny freckles and stems
- Fine sandpaper or sanding sponge for smoothing
- Small sculpting tools or even household items like toothpicks
- Sealant spray or mod podge to protect your smile
Choosing Clay Styles
– Air-dry clay is forgiving and quick for beginners.
– Polymer clay gives you durability and sharper details but requires baking.
– Experiment with different brands to find what feels best in your hands.
Step-by-Step: How To Shape A Smiling Strawberry
This is where the magic starts to feel real. Follow along, and you’ll see your first cheerful berry take shape in no time.
- Shape the berry: Roll a teardrop or rounded cone, then taper to a point that will be the stem end.
- Indent the face: Lightly press two tiny dots for eyes and a curved line for a smile. No frowns allowed here!
- Add depth: Create a shallow groove near the top to simulate the calyx and place a little green crown for the leafy cap.
- Texture: Lightly score the surface with a toothpick to mimic seeds, but don’t overdo it—subtlety wins.
- Dry time: Let it set as per your clay’s instructions. If you’re in a hurry, a hairdryer on a cool setting can help with air-dry clays.
- Seal the deal: Paint the seeds brown and seal with a protective coat for durability.
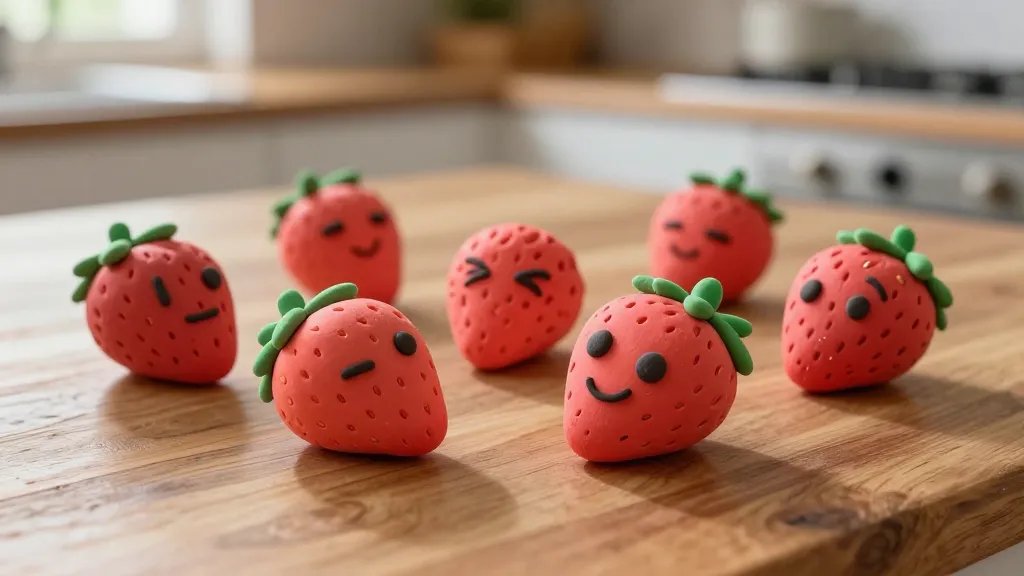
Little Expressions, Big Impact
– A wider smile can read as extra friendly or comedic.
– Off-center eyes create mischief; straight-on can feel sweet and innocent.
– A tiny blush dot adds personality—go for it if you’re feeling bold.
Creative Variations: Turn One Smile Into A Smile Party
If you’re hooked, you’ll want to branch out. Here are quick ideas to expand your clay-berry family.
- Mini berry friends in a row: A little strawberry squad perched on a shelf.
- Seasonal outfits: Add tiny hats for holidays or scarves for chilly vibes.
- Neon night lights: Attach a small LED inside and glow after dark.
- Keychains and magnets: Give your smiles a functional twist.
Two-Tone Cheer Parade
Try painting a couple of spots redder than the rest or swapping to a striped calyx. The contrast makes each berry feel like a unique character in your tiny fruit cast.
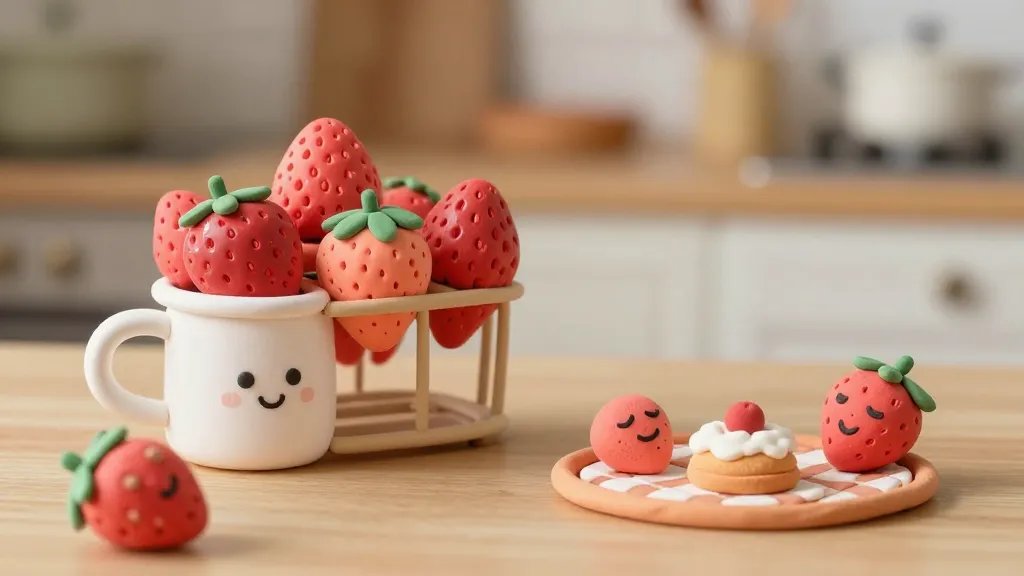
Display It Right: Show Off Without Shouting
Presentation matters when you want the charm to land. Here are easy display ideas that feel intentionally cute.
- On a wooden spice rack: A tiny berry brigade looks perfect with an earthy backdrop.
- In a glass jar: Layer them with dried flowers for a rustic terrarium vibe.
- Mini baskets: A cute picnic scene doubles as a practical desk organizer.
- Photo corners: Clip them near your desk to spark joy during long work sessions.
Care and Longevity: Keeping The Smiles Fresh
Clay crafts deserve a little love too. Here’s how to keep your smiling strawberries looking fresh longer.
- Dust lightly with a soft brush every so often to avoid buildup.
- Avoid direct, prolonged sunlight to prevent color fading.
- Re-seal if you notice surface wear after a long time.
What If They Crack?
Cracks happen when things dry too quickly or clay is overworked. If a crack appears, gently dampen the area and smooth it with a fingertip. A tiny dab of paint can disguise the seam, and you’re back to grinning in minutes.
FAQ
Can I use polymer clay instead of air-dry clay?
Yes. Polymer clay bakes hard, which makes your strawberries durable and perfect for getting bumped around on shelves or worn as keychains. Just follow the packaging heat instructions and let them cool completely before handling.
Do these need a glaze or sealant?
Not strictly, but a sealant protects color and adds a subtle sheen. If you want a natural, matte look, skip it. FYI, a light spray sealant goes a long way for longevity.
How long do they take to dry?
Air-dry clays usually dry within 24-72 hours depending on thickness and humidity. Polymer clays bake in 15-30 minutes per your oven’s instructions. Plan a little patience into your crafting session.
What other fruits could I try with similar smiles?
You can absolutely branch out. Tiny orange slices, grapes, cherries, or even little lemon wedges can be converted into smiling miniatures with the same technique.
Any quick tips for beginners?
– Start with small, simple pieces to build confidence.
– Keep your workspace clean and organized so you don’t lose small parts.
– Don’t overwork the clay; it can become stiff and hard to shape.
– Let your imagination lead—if you want a strawberry with a goofy grin, go for it.
Conclusion
Clay smiles aren’t just cute—they’re a tiny, tactile reminder that creativity can fit in a pocket-sized project. Whether you’re crafting for a gift, a bedside shelf, or a cheeky desk companion, these smiling strawberries bring a bit of sunshine with every pinch, poke, and paint stroke. IMO, the best part is how quickly you can finish a batch and see friends and family light up when they spot them. So grab some clay, a few tools, and get ready to spread a little edible-illusion joy—without any calories.


