Anarchic mornings meet wholesome craft energy in this guide to Cute Toast Character Craft. We’ll turn plain breakfast into adorable art you actually want to share. Ready to toast, jam, and giggle your way through a creative morning routine?
Why Toast Characters Are The Morning Sunshine We Needed
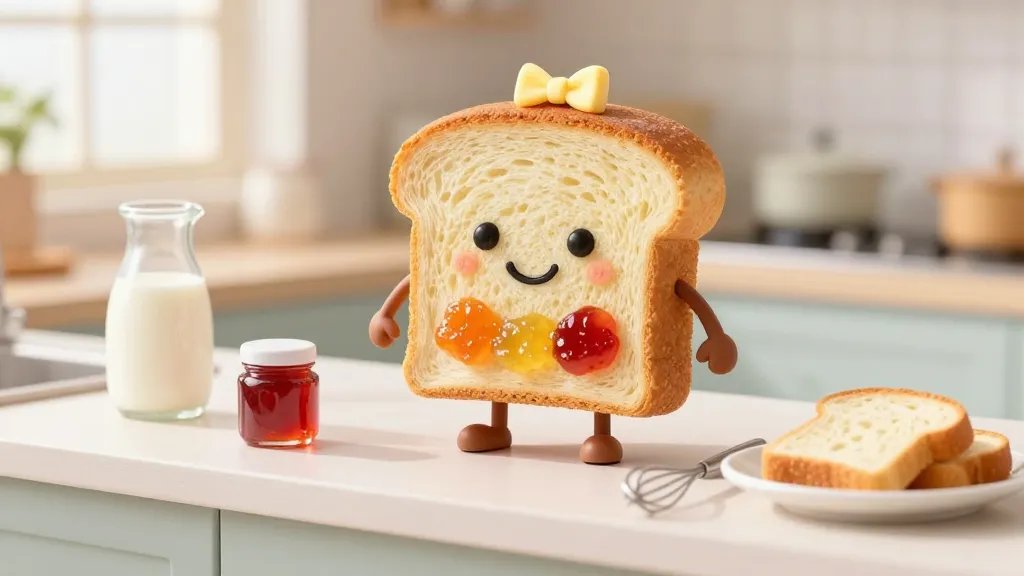
Who doesn’t love a little whimsy with their breakfast? Toast characters turn an ordinary slice into a tiny world you can nibble (or admire) from your desk. FYI, this is the kind of craft that makes you smile before you’ve even had coffee. So yes, we’re diving into bread-bound cuteness and some surprisingly easy methods.
Materials That Won’t Steal Your Soul or Your Bread
- Fresh bread slices—preferably sturdy ones like sourdough or whole wheat.
- Butters and jams in multiple colors for shading.
- Food-safe markers or edible inks for fine details.
- A small, sharp knife or cookie-cutters for sweet shapes.
- Optional: melted chocolate or cocoa powder for outlines.
The goal is to keep things simple. If you don’t have edible markers, you can improvise with a thin brush and colored frosting. Don’t overthink it—imperfect lines give character.
Character Concepts You Can Copy Tonight
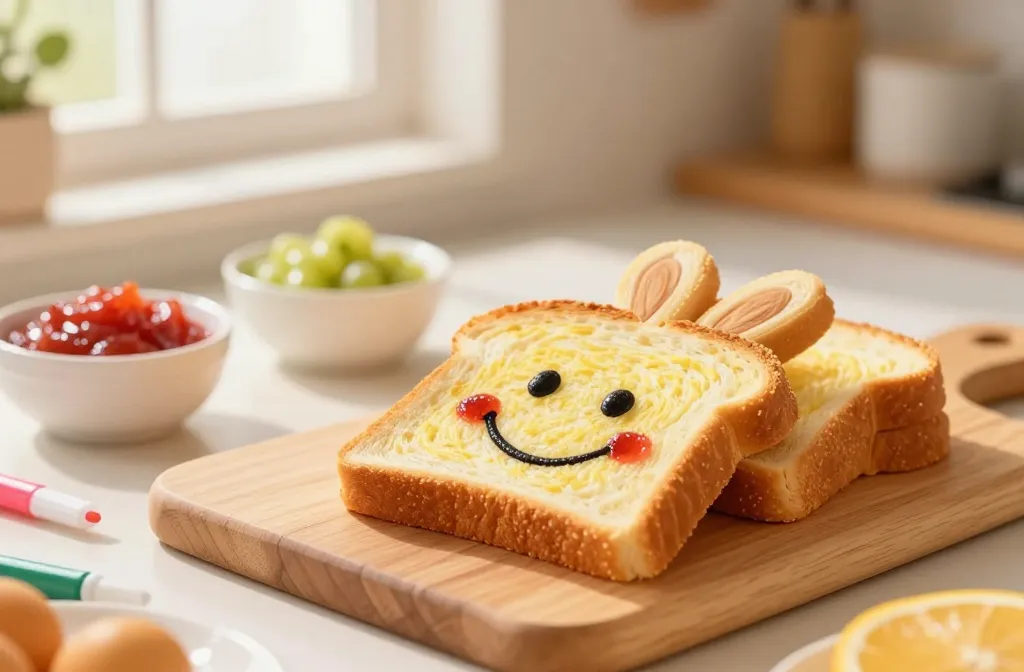
- Smiley Slice: A round face on a toast with eyes and a goofy grin. Add rosy cheeks with a dab of strawberry jam.
- Bunny Buddies: Ears perched on the edge of the toast, using sliced almonds for ears and a tiny peanut butter nose.
- Koala on Toast: A pale, sleepy koala face using banana slices for ears and a drizzle of coconut flakes for fur texture.
- Sunrise Panda: A panda head with powdered sugar highlights and a sunburst made from orange marmalade.
- Robot Toast: A metallic look with silver edible spray or cocoa dusting and tiny candy bolts as eyes.
Want more inspo? Browse social feeds and put your own twist on a favorite animal or emoji. The more playful, the better.
How to Choose Colors Without Losing Your Mind
Start with a base shade, then add accents. FYI, you don’t need every color under the sun. Use three to four tones max. Edible markers work best for fine lines; a tiny brush handles shading. Pro tip: test colors on a spare slice before committing to the real deal.
Step-By-Step: Crafting a Smiling Toast Character
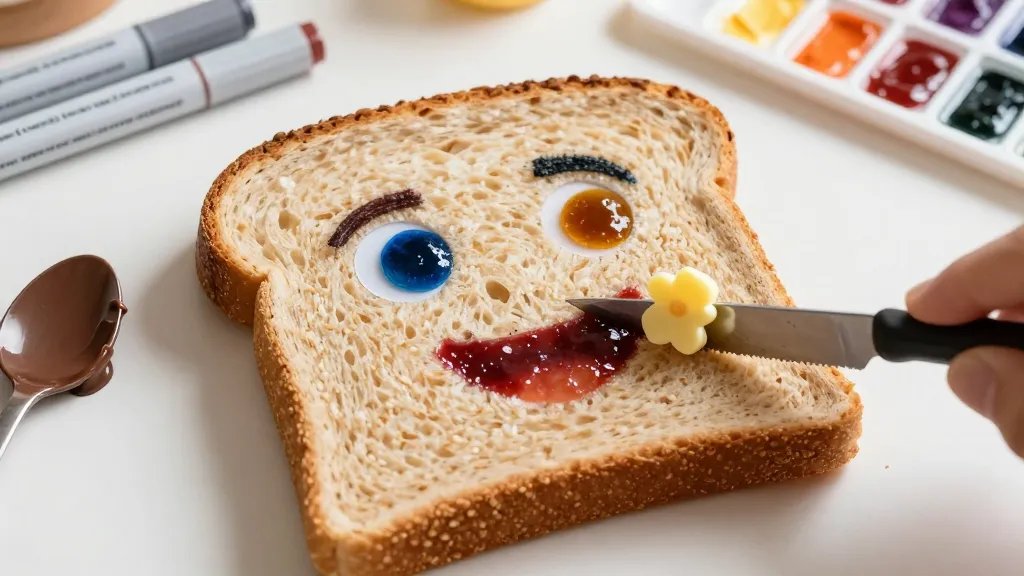
- Toast a slice until it’s golden and sturdy. Let it cool so it won’t smear colors.
- Sketch a light outline with a pencil-thin edible marker. Tiny mistakes? Don’t sweat it; you can thicken lines later.
- Fill in base colors using spreads or melts. Build up layers for depth—think frosting, not watercolor chaos.
- Add features: eyes, mouth, cheeks, and any accessories. Little details make big impact.
- Seal with a light dusting of cocoa or powdered sugar to create a gentle finish.
The beauty here is the process: playful, mess-free, and proudly imperfect. If your lines aren’t perfect, that just adds personality.
Texture Tricks: Shading Without a Paintbrush
– Use a light layer of cream cheese or butter as a base; it helps colors stick and look soft.
– Tap a tiny amount of jam for blush on cheeks.
– Dust with a pinch of cocoa for shadow under the ears or chin.
– Let dry between layers to prevent smearing.
Make It a Mini Challenge: Quick Projects for Busy Mornings
- Five-Minute Smiley: Base color, two eyes, and a grin. Done. Move on.
- Veggie Surprise: Turn a toast slice into a cute frog or penguin using cucumber slices and olives.
- Monochrome Mood: One color, one character, maximum impact.
If your schedule is brutal, embrace the quick hits. The point is joy, not perfection.
Hosting a Toast Character Party: Small-Scale Fun
Invite friends or family to a “Toast Character Brunch.” Provide a few slices, a spread of colors, and a little time to decorate. It becomes a cozy, silly ritual you’ll look forward to. Bonus: you’ll get a bunch of adorable photos to decorate your kitchen with.
Safety and Clean-Up Hacks
– Use a clean, damp cloth to wipe markers or edible inks between slices.
– Store unused colors in airtight containers to keep them fresh.
– If you’re using nuts, be mindful of allergies and offer nut-free alternatives.
– Scatter wipes nearby for a quick, tidy finish after your creative session.
Beyond Breakfast: Where Toast Art Goes Next
Cute toast art doesn’t have to end at dawn. You can:
– Turn characters into fridge magnets with edible paper mats.
– Create seasonal variations for holidays (pumpkins, snowmen, hearts).
– Use leftover designs as tiny dining-table decor for playful meals.
– Photograph your creations and turn them into a tiny social media series.
Documenting Your Progress
Take a quick photo after each design and jot down one thing you’d tweak next time. It helps you improve without getting too serious about it. IMO, a little note keeps you curious rather than critical.
FAQ
Can I use regular markers on bread?
Edible markers are best because they’re designed to be safe on food. Regular markers can seep or taste odd. If you don’t have edible markers, you can use food coloring with a fine brush on a cleared surface and carefully color the food with it, but edible markers are the easiest route.
What if my toast breaks while decorating?
No big deal. You can embrace the doodle with a cute band-aid theme or simply place the broken pieces together and decorate around the seam. It adds character, not chaos.
How long do these designs last before the toast goes stale?
Toast starts losing its snap after about an hour at room temperature. If you want to enjoy fresh, craft and eat right away, or refrigerate the toast with the toppings for a longer shelf life (though flavors change a bit).
Are there kid-friendly ideas for younger bakers?
Absolutely. Cute animal faces, simple shapes, and big, friendly eyes work best. Let kids pick colors and shapes; you’ll both laugh at the adorable results. Just supervise near heat and sharp tools.
Can I scale this up for parties or events?
Yes! Create a “Toast Bar” with a lineup of slices and a few color stations. It becomes a playful station where guests create their own little character masterpieces.
Conclusion
Cute toast character craft is the kind of small joy that lightens your morning and sparks a little imagination. It’s simple, forgiving, and oddly satisfying. Try a few designs this week and see how your breakfast mood shifts. FYI, you might start a tiny social trend in your own kitchen—one slice at a time.


