Air-dry clay and polymer clay are two favorites in the craft world, but they’re not the same animal. If you’re torn between them, you’re not alone. Let’s break down the basics, the vibes, and when to pick each so you can actually finish a project without losing your mind.
What They Are in a Nutshell
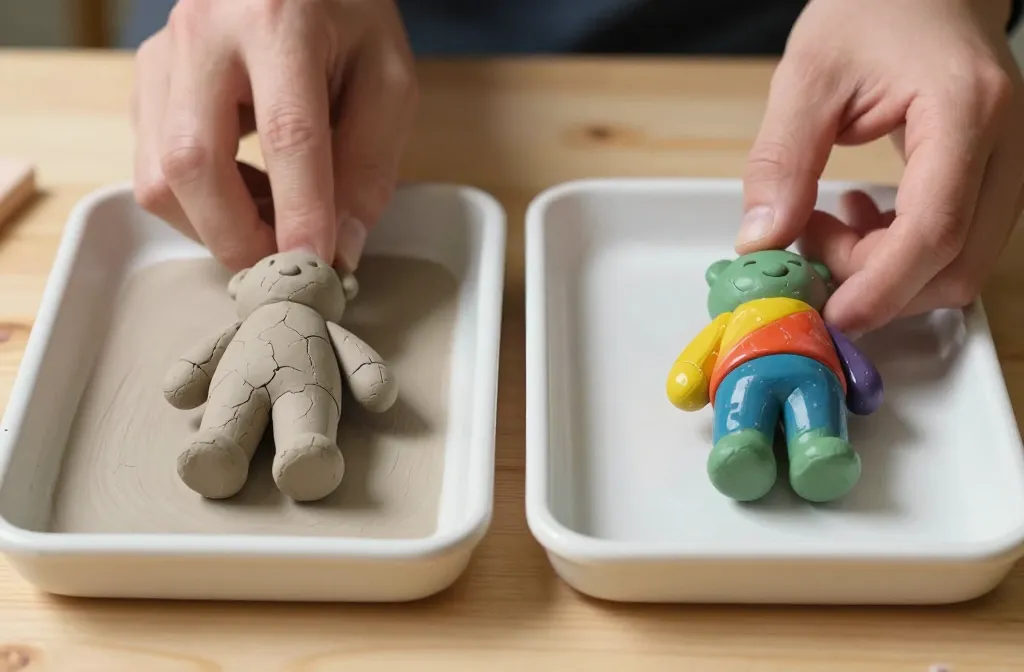
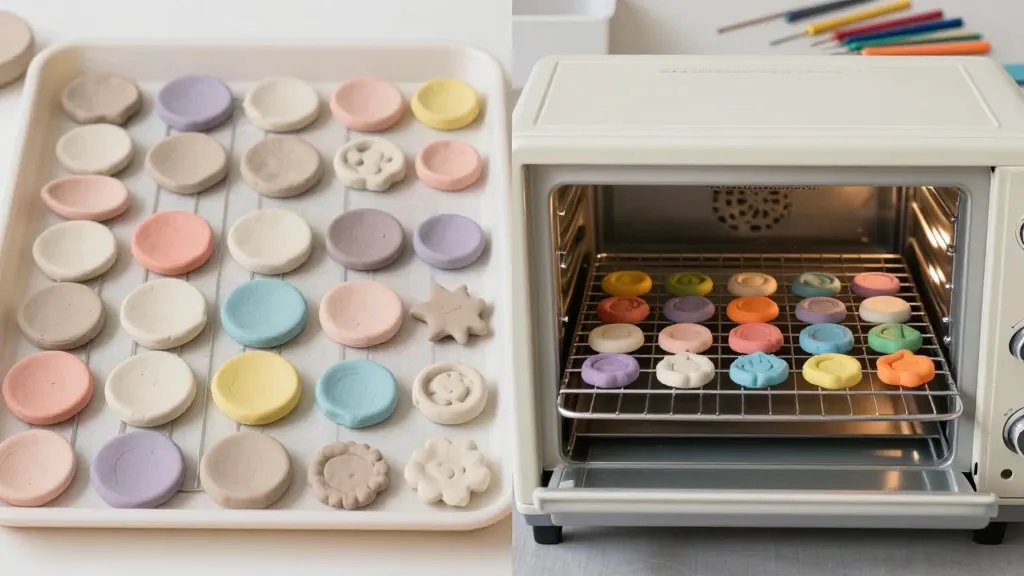
Air-dry clay is what it sounds like: it dries to the touch and hardens over time with air exposure. No oven needed, which is a dream for beginners and impatient crafters alike. Polymer clay, on the other hand, is a synthetic polymer that cures in an oven at a specific temperature. It stays pliable until you bake it, then becomes durable and semi-hard.
FYI, the naming is a little confusing. Some brands call air-dry clays “porous clay” or “oven-free clay.” Polymer clays might be labeled as Sculpey, Fimo, or Plastiline. The names aren’t the point—what they do and how you use them is.
Texture and Workability
Air-dry clay usually feels softer and more forgiving right out of the container. It’s great for kids or beginners who want to see results fast. It tends to dry with a bit of shrinkage and can crack if it dries too quickly or too unevenly. If you like sculpting small details, you’ll want to guard against cracking with a little moisture and steady moisture control.
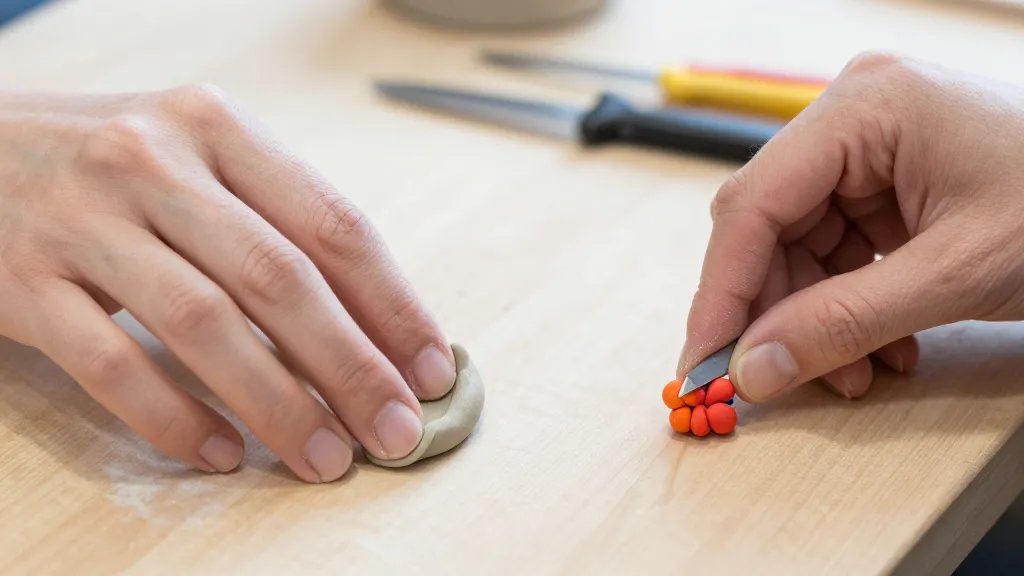
Polymer clay starts out smooth and incredibly pliable. You can knead it, blend colors, and create tiny details that pop. It won’t air-dry on its own; you decide when it’s ready to bake. Once baked, the clay becomes sturdy and holds tiny features like eyelashes or micro-flowers better than most air-dry clays.
Strength, Durability, and Uses
Air-dry clay is perfect for decorative items, papier-mâché-esque projects, and kids’ crafts. It works well for wall hangings, simple figurines, and ornaments that don’t need to survive a ton of handling. It’s lightweight and easy to paint once dry, but can be brittle and prone to chipping if mishandled.
Polymer clay shines when you need durability. It’s ideal for jewelry components, figurines, miniatures, and anything you expect to use regularly or handle often. It tolerates some bending and light impact after baking. If you want a glossy finish, you can glaze or sand and buff after baking.
Color, Texture, and Finishing Touches
Air-dry clays take paint nicely once fully dry, but you’ll want a sealant to reduce crumbling and surface wear. Some clays take pigment well during mixing, so you can color inside the dough itself. Expect some color bleed if you don’t seal properly—especially with darker paints on light clay.
Polymer clay is a color chameleon. You can mix colors before shaping and even do delicate shading by layering. After baking, you can sand, buff, glaze, or add acrylic paints for crisp details. If you crave a glossy finish, a dedicated varnish or glaze does wonders.
Health, Safety, and Cleanup
Air-dry clays are generally non-toxic and kid-friendly, but always double-check the label. They’re great for indoor use since you’re not firing them. Cleanup is usually simple with soap and water, but some types can stain surfaces or skin if you’re not careful—so wear an apron and wash up after you finish.
Polymer clay uses an oven, so you’ll need proper ventilation and a dedicated baking area. Some people worry about fumes, especially with older brands; following the manufacturer’s guidance is key. Cleanup is relatively straightforward, but you might need to wipe your oven racks and ensure the workspace is free of baked bits to avoid smell and residue.
Cost and Accessibility
Air-dry clay tends to be cheaper upfront and doesn’t require heat tools, making it super accessible for quick projects or classroom settings. It’s also easier to stock up on if you’re experimenting with textures and DIY decorations. The trade-off is durability and long-term hardness.
Polymer clay can be pricier per block, but you get more repeatable results and longer-term durability. If you’re into tiny figures, miniatures, or jewelry, the investment often pays off in quality and longevity. You’ll also find a broader color system and more professional-grade tools for shaping and finishing.
Projects: What to Make With Each
Air-dry clay ideas:
– Simple ornaments that dry overnight
– Face coasters or abstract wall art
– Educational kits for kids (hands-on, mess-light)
– Textured beads that you can paint later
Polymer clay ideas:
– Tiny food charms and jewelry components
– Miniature figures with crisp, tiny details
– Polymer delights that you bake and gloss in one go
– Standalone sculptures that you’ll proudly display
A Quick Comparison Snapshot
- Drying: Air-dry air-drys; polymer requires baking
- Durability: Polymer is tougher
- Detail: Polymer wins with fine details
- Cost: Air-dry usually cheaper upfront
- Safety: Air-dry is simpler for households with kids
Subtle Tips to Level Up Your Clay Game
Want to avoid common mishaps? Here are quick tricks you’ll thank yourself for later.
- Water balance: With air-dry clay, a tiny bit of moisture helps you smooth edges, but too much can make it sag.
- Thin is in: For both clays, avoid super-thin pieces that crack or warp. Gentle, even thickness wins.
- Seal the deal: Use a sealant for air-dry pieces to reduce chipping and improve longevity. For polymer clay, sealing after baking keeps colors vibrant.
Color-Building Hacks
Mixing colors in polymer clay is a joy. You can layer colors to create marbling or gradient effects. For air-dry clay, you can pigment the dough itself or paint after it dries. FYI, test a small batch first to see how colors react with your chosen brand.
FAQ: Quick Answers to Common Questions
Can I switch between air-dry and polymer clay in the same project?
Sure, but plan the workflow. Start with air-dry for base textures and details, then finish with polymer elements if you need durability or tiny details. Just bake polymer parts separately from air-dry sections to avoid cross-contamination and awkward texture mismatches.
Is one better for kids?
Air-dry clay is generally friendlier for kids—no heat, quick results, easy cleanup. Polymer clay can be used with supervision, especially for older kids who want more precise shapes and longer-lasting projects. Choose according to age and patience levels.
Which lasts longer—air-dry or polymer clay pieces?
Polymer clay pieces tend to last longer and resist wear better because they’re baked and have a harder surface. Air-dry pieces can still be gorgeous, but they’re more prone to chipping and moisture-related issues over time.
Do I need special tools for each clay?
Air-dry clay benefits from basic sculpting tools and textured surfaces. Polymer clay shines with cutting blades, little smoothing tools, and sometimes a pasta machine for conditioning. You’ll find a big difference in how you shape tiny features when you have the right tools.
What about finishing touches?
Air-dry pieces look great with acrylic paint and a sealant. Polymer pieces respond well to paints, varnishes, and even glossy resins. If you crave a shine, polymer is usually the cleaner route, but you can get gorgeous results with a good sealant on air-dry clay too.
Conclusion: Pick Your Vibe, Then Go Create
Short answer: choose air-dry clay when you want quick, easy, kid-friendly projects or cost-friendly experiments. Pick polymer clay when you crave durability, tiny details, and long-lasting results. You don’t have to pick one forever; many crafters use both depending on the project. So grab a tub, get your hands dirty, and see which clay vibe sticks with you.


