An introduction that gets to the point fast: you can nail adorable clay earrings even if you’ve never touched a bead or a glue gun. This guide keeps it simple, playful, and totally doable. FYI, you’ll walk away with earrings you’re proud to wear and maybe even flaunt on socials.
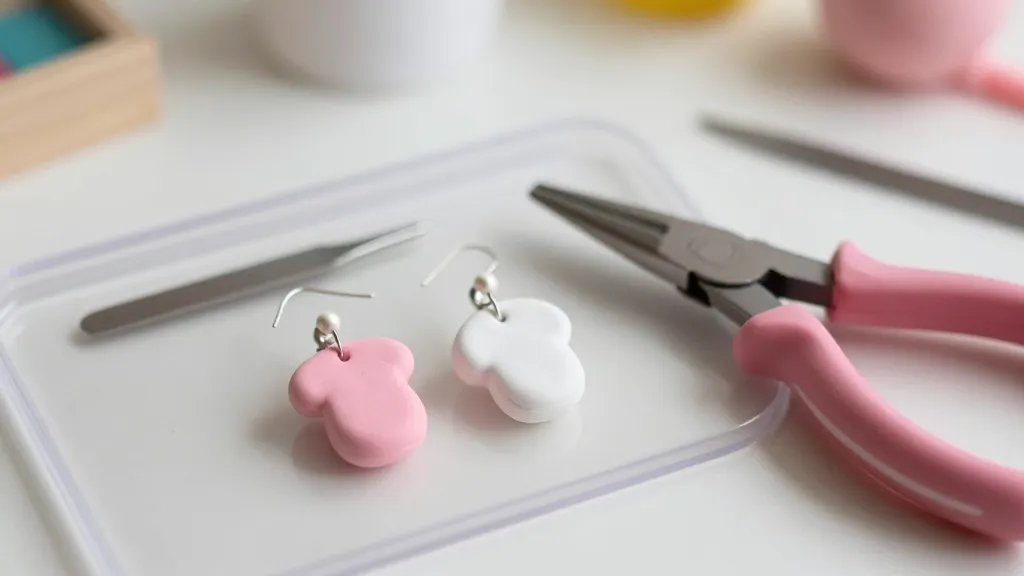
Start with the Right Tools (Without Overthinking It)
– Plastic or silicone to protect your workspace is clutch. A little cleanup goes a long way.
– Basic clay (polymer clay works great) and a few colors. No need to go full rainbow right away.
– Needle tool, mini roller, and a small blade help you shape without tears.
– Jump rings, earring posts, and pliers for quick assembly. You’ll thank me later.
– Do you really need fancy tools to begin? Nope. Start with a basic setup and upgrade as you go.
Choosing Clay Colors That Don’t Fight Each Other
Your color combo can make or break cute. Start with:
– Primary pairings: pink + white, mint + peach, sky blue + sun yellow.
– Neutrals that pop: dusty rose with charcoal, sage green with cream.
– Accent pops like gold flecks or tiny black dots for personality.
– Blend variations by kneading two colors together for marbled vibes.
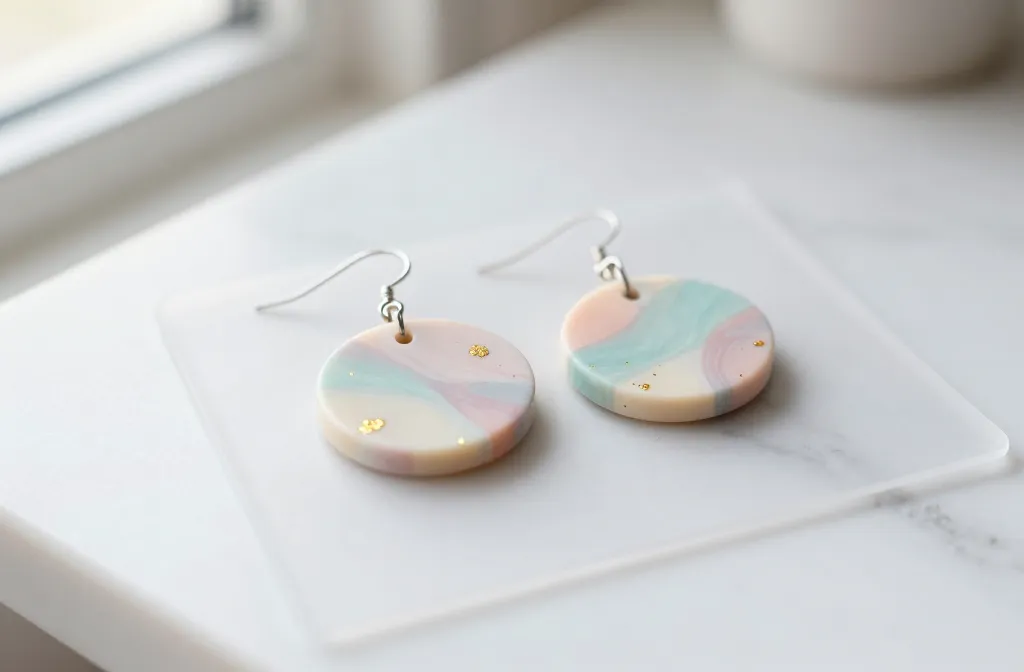
Simple Shapes That Look Like You Worked Hard
– Circular discs with a tiny dot or line for personality.
– Teardrops or leaves for a nature-y feel.
– Little geometric shapes: squares, triangles, or pentagons—fun, easy, and stylish.
– Remember: crisp edges are nicer than perfect curves. Psychology: imperfect is adorable.
Step-by-Step: A Cute Leaf Earring (Beginner Friendly)

- Roll a small ball of clay, then flatten into an oval or leaf shape.
- Use a needle to etch a midrib and veins or add tiny dots for texture.
- Softly bake per clay’s instructions, then let cool completely.
- Attach a jump ring, then add an earring post. Boom, you’ve got a leaf pair.
Pro Tips for This Shape
– Don’t overwork the clay; a gentle touch keeps edges neat.
– If edges crumble, you can trim with a blade after baking for a crisper look.
– Use a tiny brush with metallic paint to highlight the veins after cooling.
Making Mini Scenes: Tiny Anklet-Inspired Details
Add character with tiny accents:
– Sprinkle tiny stars, dots, or tiny clay beads before baking.
– Use a dotting tool to create equal spacing around the edge.
– Keep it balanced: one focal point plus a couple of supporting accents.
Finishing Touches That Don’t Freak You Out
- Sand down rough edges lightly with a fine-grit sandpaper.
- Seal with a clear glaze or Mod Podge for shine and durability.
- Check the backs: add a dab of glue to secure the post insert.
Why a Sealant Matters
– It protects color and prevents chipping. FYI, glossy looks pop on camera.
– Sealed pieces feel more premium, which is great for gifting or selling.
DIY Jewelry Hacks: Save Time, Increase Cuteness
- Prep a “paint kit” by lining up colors you plan to use for a batch.
- Work in batches: bake several pieces at once to stay efficient.
- Keep a tiny notebook. Jot quick color combos and shapes you liked.
Finding Your Signature Style (Without Losing Your Sanity)
– Try 3 simple shapes for a week and compare how they feel in photos and real life.
– Ask friends which pair feels “you” and which look vibe-less.
– Don’t chase trends; you’ll burn out. Instead, build a vibe you can repeat.
How to Photograph Your Earrings Like a Pro (Even if You’re Not)
– Use natural light and a neutral background to make colors pop.
– Shoot a close-up of texture, then a full shot on an ear.
– Include a tiny scene: a white cup of coffee, a plant, a notebook—cute context sells.
Maintenance and Longevity: Keeping Earrings Fresh
- Avoid direct sunlight for long stretches; colors can fade.
- Store in a small box or pouch to prevent scratches.
- Clean gently with a soft cloth after wearing. No harsh chemicals allowed.
Customization Ideas If You Want to Elevate Quick
- Metallic accents: a pinch of gold or copper paint adds luxe shine.
- Texture with tiny rolled beads or clay slices for added depth.
- Monograms or initials on tiny discs for personalized gifts.
Subsection: Budget-Friendly Substitutes
– Use grocery-store clay brands for starter projects; upgrade later if you fall in love.
– Look for discounted earring posts in craft stores or online bundles.
FAQ
Are polymer clay earrings durable enough for daily wear?
Polymer clay is surprisingly sturdy when baked correctly and sealed. Avoid getting them soaked or bending the posts. If you treat them gently, they’ll hold up for everyday wear.
What’s the easiest shape for absolute beginners?
The simplest shape is a circular disk or a teardrop. Both are forgiving, quick to bake, and photograph well.
Do I need a kiln to bake polymer clay?
Not at all. All you need is a conventional home oven. Follow the clay’s baking guidance for temperature and time, and you’ll be fine.
How can I personalize earrings without overcomplicating a first project?
Add a tiny accent like a dot, line, or a small metallic fleck. It keeps things cute without turning into a craft attachment chart.
Is sealing required to make colors last?
Sealing is highly recommended. It protects color from oils and helps prevent chipping, especially if you wear them daily.
Any tips for selling these handmade earrings?
Take clean, bright photos, list materials used, and offer a few size/color combos. You can also bundle two pairs as a “starter kit” to encourage a try.
Conclusion: You’ve Got This—Cute Clay Earrings Are Your New Fun Thing
You don’t need a studio or a magic wand to make adorable clay earrings. Start with a few simple shapes, whip up a batch, and you’ll have a tiny collection ready for gifting, selling, or flaunting online. IMO, the best part is the creativity it unlocks—your own little world of color and texture. So grab some clay, pick a shape, and get crafting. You’ll be surprised how quickly you go from “I can’t” to “I totally did that.”


