An excited hello to all the ornament rebels. These clay cuties are easy to make, ridiculously adorable, and perfect for gifting or decking your tree. FYI, you don’t need a fancy studio to pull this off—just a little patience and a lot of flair.
Why Clay Ornaments Win the Holidays
Clay ornaments feel personal, tactile, and totally instagrammable when you add your own quirks. They’re forgiving for beginners but can look pro with the right zhuzh. Plus, they double as tiny conversation starters: “Did you bake these or sculpt them by hand?” Your guests will actually pay attention to your tree this year.
Materials You Gotta Have (And Maybe Some You Don’t)
– Oven-bake polymer clay in a few colors
– Clay tools for shaping and texturing
– A rolling pin or a sturdy bottle for flattening
– Jump rings or satin cords for hanging
– Acrylic paint and fine brushes for details
– Clear sealant spray to keep them pristine
– A small baking sheet and parchment paper
Optional but awesome:
– Glitter, confetti, or tiny beads for extra sparkle
– Mini googly eyes for silly characters
– Mod podge for a shiny finish
If you’re overwhelmed by options, start simple: a few basic shapes, a couple of holiday characters, and a color palette you actually like. You’ll get hooked, I promise.
5 Cute Clay Ornament Ideas You Can Start Today
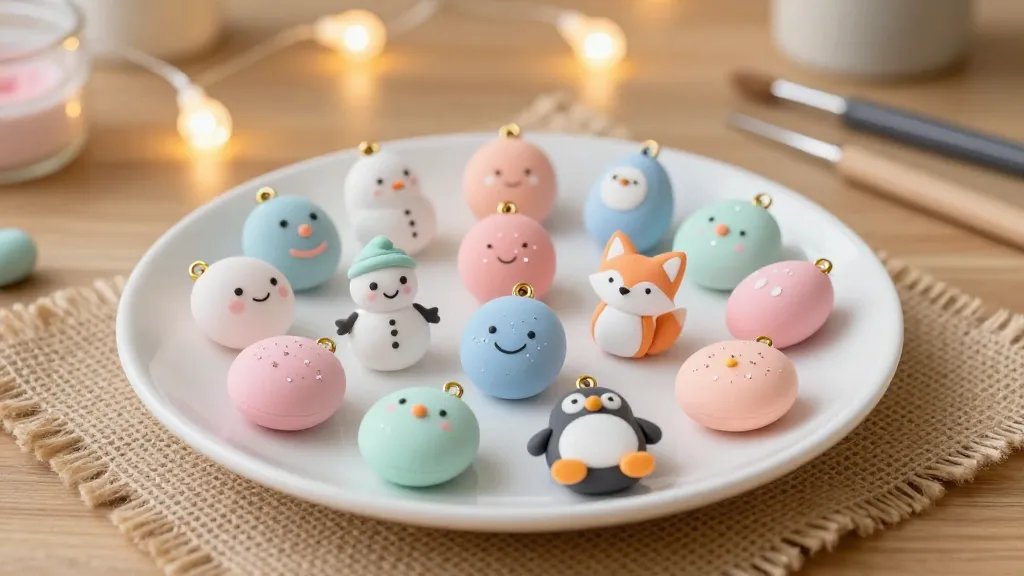
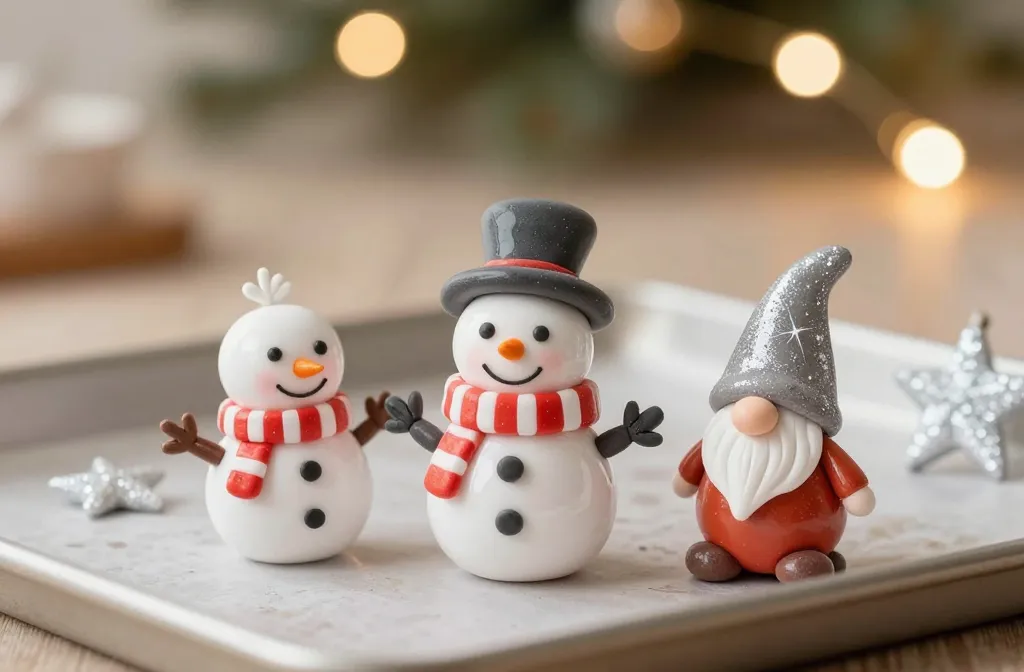
1) Mini Snowmen With personality
Form three rounds, stack them, and jazz up with a carrot nose and coal eyes. A tiny scarf or hat adds warmth and whimsy. Pro tip: let the body dry a bit before adding facial features so you don’t mash them while painting.
2) Tiny Gingerbread Friends
Roll out your clay, cut with a cookie-cutter vibe, and bake. Add icing details with a thin paint brush and white clay for sparkly mouths and buttons. They smell like cinnamon in your living room, which is basically holiday magic.
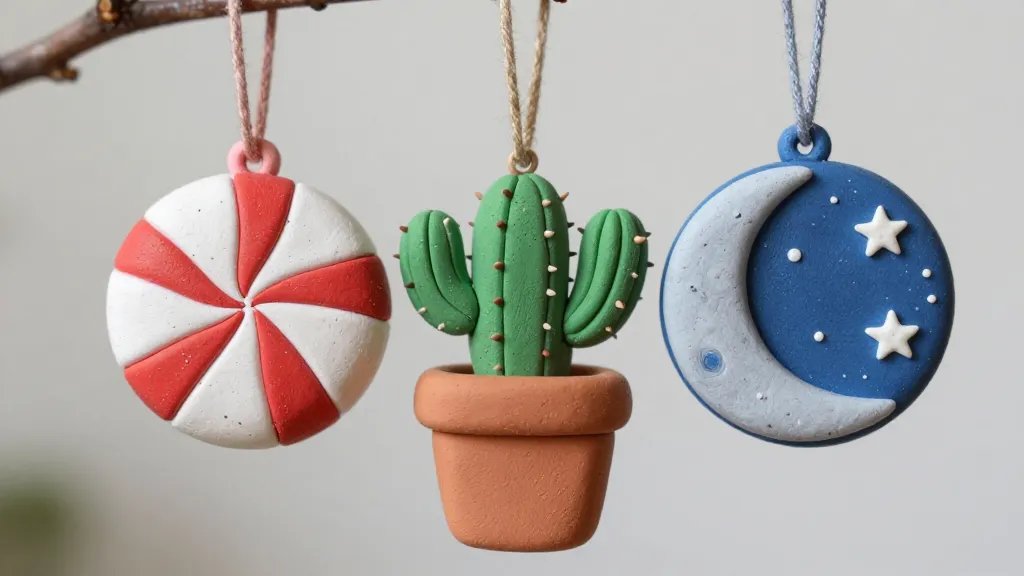
3) Functional Festive Ornaments
Turn a couple of shapes into bottle-cap or tag-style ornaments. Use a hole punch or a sharp tool to create hanging holes before baking. Then paint faces, add ribbons, and you’ve got decor that doubles as gift tags.
4) Whimsical North Pole Creatures
Poles and penguins, elves and reindeer—let your imagination run wild. A little metallic paint for antlers or boots can elevate the whole look. These are the kind you pull out every year and say, “I forgot I made this and love it again.”
5) Alphabet Ornaments for a Personal Touch
Spell a name, a message, or a favorite holiday word. Each letter gets a tiny personality—curves, dots, and a splash of color. It’s a great way to customize your tree or present as a thoughtful gift.
Techniques to Make Them Last (Without Turning You Into a Sculptor God)
– Bake at the recommended temperature and time. Don’t rush; patience is the secret ingredient.
– Let pieces cool completely before painting or sealing. Hairline cracks are drama you don’t want.
– Seal with a matte or glossy spray to lock in color and prevent chipping.
– Store them in a dry space between seasons so they don’t crumble or soften.
Texture and detail tricks
– Imprint textures with kitchen items (forktastic for fur, leaf shapes for a cozy vibe).
– Use a fine-tip brush for tiny details—dots, stitches, or facial expressions.
– Layer paints for depth, then seal to keep everything in place.
Color Palettes That Make Your Tree Pop
– Classic cozy: forest greens, warm reds, creamy whites
– Pastel whimsy: blush pink, baby blue, soft lemon
– Modern metallic: champagne, cranberry, sage + gold accents
– Playful contrast: bright aqua, coral, sunny yellow
If you’re unsure, start with a three-color palette and add one accent shade. Too many colors can look busy on small ornaments.
Storage and Care: Keep Your Clay Gems Shiny Year After Year
– Use a cardboard box with tissue paper to separate pieces.
– Avoid humidity and heat; store in a cool, dry place.
– If a piece chips, you can fix it with a tiny dab of clay and some glue after sealing.
DIY Gift Ideas: Sharing the Love
– Create a small set of 3–5 ornaments in a matching color family and package them in a cute bag.
– Add a handwritten tag with the year and a little note.
– Offer a mini workshop: teach a friend how to make a couple of ornaments during a holiday gathering.
Safety First: Kids and Clay Projects
– Use child-friendly clays and non-toxic paints.
– Supervise young crafters around sharp tools or tiny pieces.
– Keep clay pieces away from mouths; snacks and crafts don’t mix well.
FAQ
Can I bake polymer clay successfully in a regular oven?
Yes, just follow the clay’s instructions for temperature and time. Preheat the oven, place pieces on a parchment-lined tray, and bake away. Don’t overbake or you’ll risk shrinking or cracking.
What’s the best way to attach a ribbon without ruining the clay?
Poke a small hole before baking if possible. If you forget, you can glue a jump ring or eye pin after baking. Allow ample time for the glue to cure before hanging.
How long do these ornaments last?
With proper sealing and storage, they can last for many holidays. I’ve kept favorites for years that still look charming.
Can I personalize my ornaments for gifts?
Absolutely. Letters, initials, or tiny faces add a personal touch. It’s the handmade gift that says, “I thought about you while crafting this.”
What if I don’t have fancy tools?
No problem. Your hands, a toothpick, and a simple rolling pin substitute work just fine. Get creative with texture using combs, sponges, or leaves you press into clay.
Conclusion
Clay ornaments combine charm, kid-friendly craftiness, and a dash of holiday magic. They’re quick to pick up, slower to forget, and perfect for personalizing your tree or gifting with a wink. So roll out the clay, pick a palette, and sculpt your way into a cozy, crafty holiday season. If you’re still doubting, FYI: the joy of hanging something you molded with your own hands is unbeatable. Happy sculpting, and may your ornaments be as cute as your favorite holiday memory.


