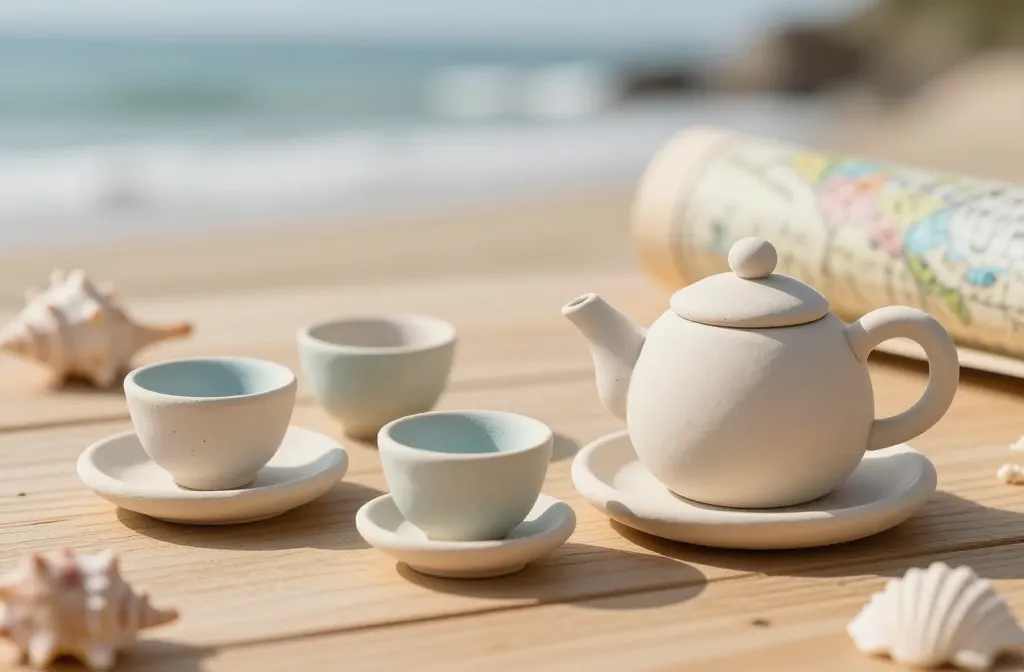
An adorable mini tea set is the perfect excuse to dust off your sculpting tote and pretend you’re hosting a seaside tea party. This guide keeps things simple, fun, and totally doable for beginners. Grab some clay, a few tools, and your favorite playlist—let’s roll.
Why a mini clay tea set? Let’s get cozy with tiny vibes
Tiny clay projects feel like a pep talk for your creativity. They’re quick, satisfying, and brag-worthy in a low-stakes way. Plus, a mini tea set doubles as cute decor, fun gift wrap, or a quirky desk accessory. FYI, you don’t need fancy studio space—just a table, good lighting, and a splash of patience.
What you’ll need (no secret sauce required)
- Air-dry clay or polymer clay (your call—air-dry is forgiving for beginners)
- Basic sculpting tools: a needle, a toothpick, a rolling pin, and a soft clay knife
- Clay conditioner or water for smoothing
- Acrylic paints and fine brushes for color
- Gloss varnish or sealant for a shiny finish
- Optional: tiny cups, a saucer mold, or pre-made molds to speed up shaping
Pro tip: start with light colors. White, cream, and pastel blues or pinks look dreamy for a tea set aesthetic. If you’re using polymer clay, remember to bake according to the package instructions.
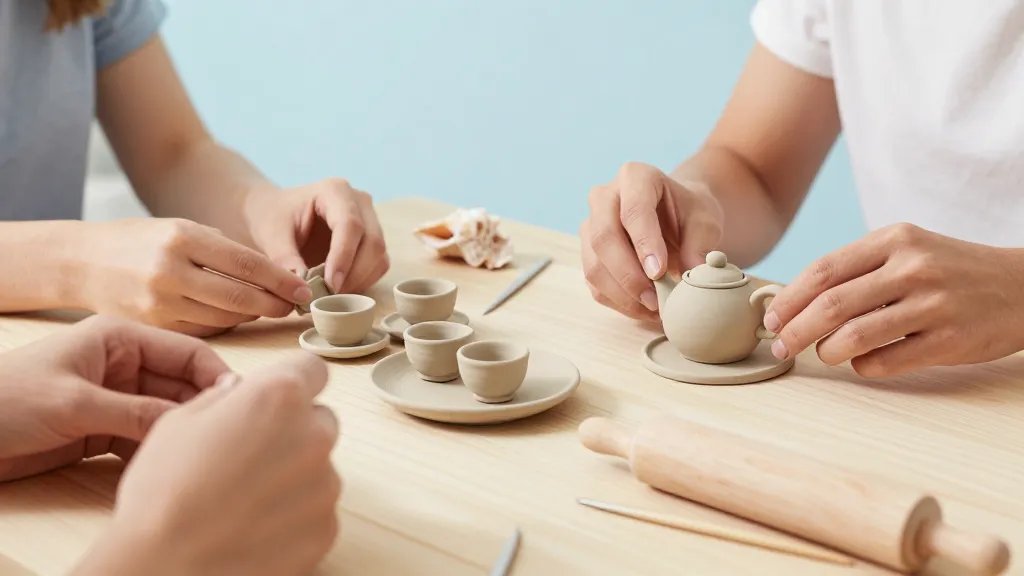
Step-by-step: shaping the teapot, cups, and saucers
- Teapot base: Roll a small ball, flatten into a dome, and pinch a narrow spout. Attach a tiny lid with a small knob on top. Smooth joins with a damp finger or clay juice.
- Teacups: Roll a ball, press into a shallow bowl, and pinch the rim to thin it out. Add a tiny handle by looping a thin coil and attaching it at the top and bottom.
- Saucers: Flatten a larger ball into a shallow disk. Slightly thicken the rim and smooth the edge for a clean look.
- Tea set accents: Create a tiny sugar bowl, a couple of spoons, and maybe a tiny plate or two. Keep everything proportional for that charming dollhouse vibe.
Would you believe you can finish most of this in one cozy session? Yes, but take breaks if your hands start to cramp. Patience makes the glaze-free finish shine later.
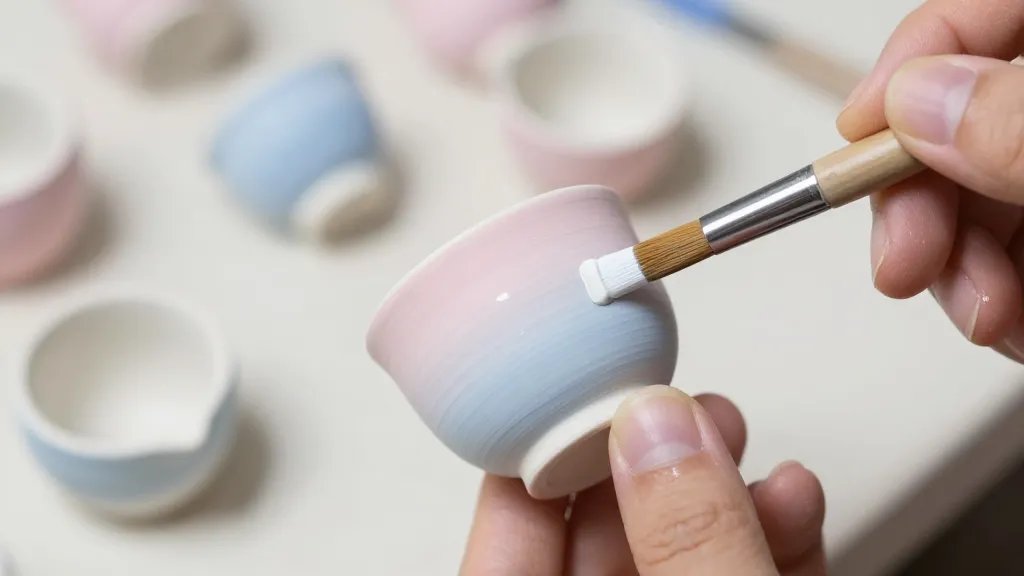
Color and detail: how to keep it cute, not chaotic
Choose a cohesive color story—three colors max keeps things harmonious. Use subtle shading with a dry brush to simulate depth without overworking the clay. For tiny teapots, tiny details like a tiny lid knob or a delicate handle can feel surprisingly luxe.
Shading and highlights: quick tricks
- Dry brush a touch of a lighter hue on the raised edges to suggest light catching the rim.
- Paint the interior of cups a slightly different shade for dimension.
- Finish with a thin coat of gloss on the teapot and cups to mimic ceramic shine.
Fixing wobbly bits without tears
If a handle or lid joints don’t stick, score the surface a bit and apply fresh clay juice where you’re attaching. Hold for 30 seconds and let it rest. Simple, right?
Tips for smooth assembly and sturdy pieces
- Let pieces dry slightly before final assembly so they don’t slump.
- Test fit pieces before painting to avoid ruining a finished look.
- Use a tiny amount of clay glue or slip for extra hold on stubborn joints.
- Keep humidity in mind—dry air speeds up curing, damp air slows it down.
Hesitant glue moment? Try this workaround
If you prefer not to glue, bake or dry parts separately and assemble with a tiny dab of brand-new clay to bind endings. It’s a neat, clean trick that still looks cohesive.
Finishing touches: sealing and display ideas
- Seal with a matte or gloss varnish to protect color and give that finished ceramic feel.
- Consider a tiny display tray or a miniature wooden shelf to showcase your set.
- Pair the tea set with a few clay pastries or cookies to create a scene.
FYI, a gloss finish will pop colors more; a matte finish looks softer and more vintage. Decide based on the vibe you want for your tiny teacup tribe.
Creative twists: make it yours
Want to trend-worthy ideas? Try these:
- Seasonal sets: pastel spring colors, autumn terracotta hues, or winter white with silver rims.
- Character flavors: add tiny clay teabags or a teacup with a cute face for whimsy.
- Functional miniatures: craft a tiny teapot stand or a mini teacup saucer stack as decor.
Storage and display: keep your mini world neat
Store pieces in a breathable box to avoid dust buildup. For display, create a mini tray or a tiny shelf unit—something that makes you smile every time you see it.
Common mistakes and how to avoid them
- Overworking the clay: it dries out faster and becomes brittle. Stop when it looks smooth and plush.
- Ignoring scale: keep everything proportional. A giant teacup next to a tiny sugar bowl steals the show in a bad way.
- Skipping dry time: rushing to paint or glaze can ruin the finish. Let pieces set according to your clay’s guidelines.
FAQ
How long does it take to make a complete mini tea set?
Most people finish a basic set in a couple of sessions, especially if you’re balancing other life stuff. You’ll likely want a single afternoon for the main pieces, then a quick day for finishing touches and sealing.
Can I use polymer clay for this project?
Absolutely. Polymer clay is forgiving and easy to bake at home. Just follow the manufacturer’s instructions for baking time and temperature. FYI, let pieces cool completely before handling to avoid warping.
What colors look best for a cohesive mini set?
Soft pastels or creamy neutrals work beautifully for a classic look. If you want bold, choose two coordinating hues and one accent color to keep it looking intentional rather than chaotic.
Do I need special tools, or can I DIY with household items?
You can start with simple tools: a fork for texture, a needle for scoring, a thin knife for trimming. A rolling pin or even a smooth bottle works fine for flattening. The trick is steady hands and a light touch.
How durable is air-dry clay for little accessories?
Air-dry clay is sturdy enough for display pieces that aren’t handled roughly. If you plan to move or gift it, consider a light varnish to protect the surface and keep colors vibrant.
Can I gift a mini tea set I made?
Yes! It makes a thoughtful, charmy gift. Include a tiny note and a few clay cookies for a complete mini tea party. The recipient will love the personal touch and the handcrafted vibe.
Conclusion
Ready to brew up some tiny magic? Your mini clay tea set is more than a craft project—it’s a tiny story you tell with hands, clay, and color. Start simple, embrace the imperfections, and let the character of your pieces shine through. The best part? You can always add more pieces later and make a whole tea-party village. So grab your clay, cue your favorite playlist, and get rolling—your mini tea set dreams are about to come true.


