An intro you can actually sigh about in relief: this is the friendly guide you wanted, not a jargon-filled lecture. We’re diving into shrink plastic charms, the tiny accessories that punch above their weight. Grab a sharpie, some gloss, and your inner crafter — let’s turn plain plastic into personality.
What You Need to Get Started
– Shrink plastic sheets (the kind that goes flat when you bake them)
– Permanent markers or colored pencils
– A pair of scissors (sharp edges, please)
– An oven or heat gun (and a baking tray)
– Optional: glaze or clear nail polish for shine
– Ink-safe spray bottle or a damp cloth for smudges
Think of this as the tiny world inside your craft drawer. You don’t need fancy tools to start, just patience and a little imagination. FYI, practice sketches on scrap before you commit to the good plastic.
Designing Your Charm: Ideas That Spark Joy
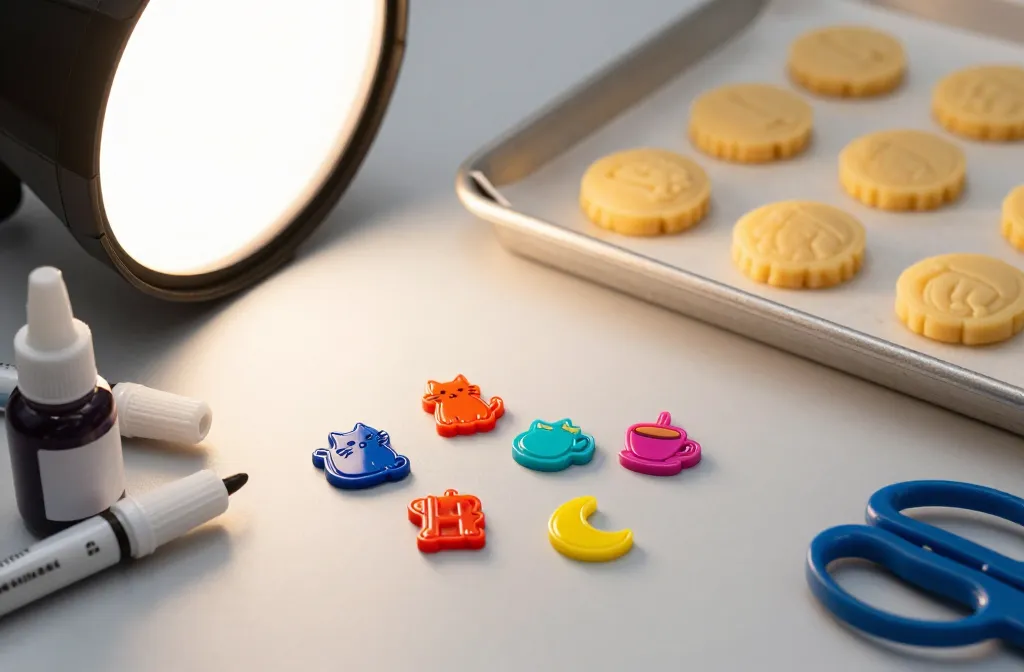
- Turn doodles into tiny icons — cats, coffee cups, moons, or retro tech.
- Monograms and initials for a personalized touch.
- Miniature emojis or quote symbols that crack you up.
- Seasonal charms: snowflakes for winter, suns for summer vibes.
Tip: keep designs simple. Shrink plastic multiplies every line, so bold shapes read better. If a line looks wobbly on a big sheet, it’ll still wobble when it’s tiny. IMO, tracing a bold outline helps a ton.
Transferring Your Idea: Sketch, Trace, Then Cut
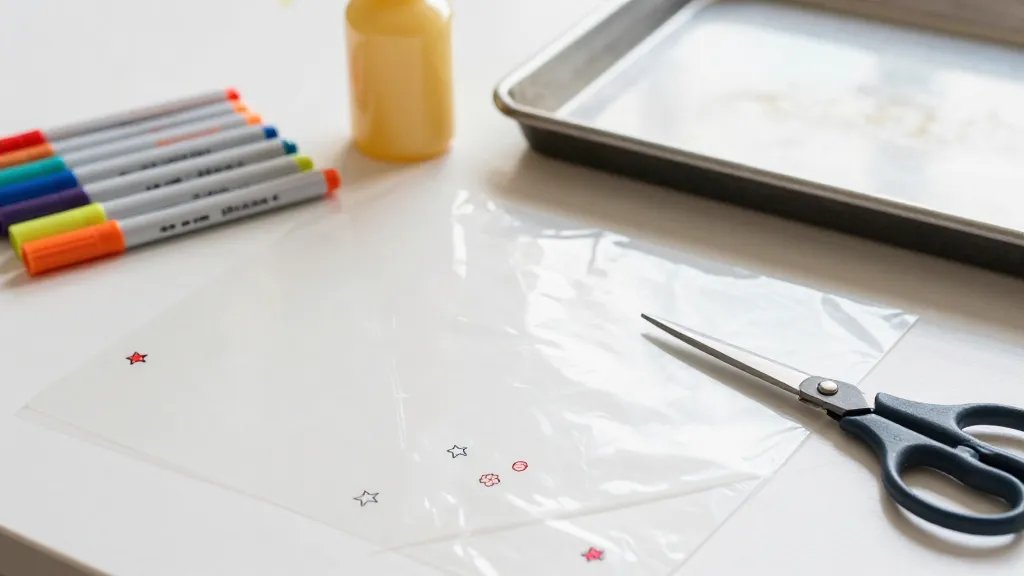
– Sketch your design on regular paper first. This is your rough draft, not the final boss.
– Place the shrink sheet over the drawing and trace with a dark marker. The marker will bleed a little, so be intentional with lines.
– Add details: dot eyes, stripes, or little jewelry-y elements.
– Cut carefully around the outline with scissors. Leave a tiny border so the piece doesn’t crumble during baking.
Pro tip: cut two identical shapes if you want a double-sided charm. One side can be a cute face; the other a witty quote. FYI, bake time is fast, so don’t walk away.
Baking Like a Pro (Without Burning Your Fingers)
– Preheat your oven to the temperature listed on the shrink plastic package (usually around 325–350°F / 165–175°C).
– Place charms on a parchment-lined sheet. Permanent markers can smudge if you flip them too early.
– Bake for 1–3 minutes. They’ll curl and then flatten as they shrink. Don’t panic if they bubble a bit; the bubbles usually settle.
– Remove with tongs when flat and fully shrunk. Let them cool completely.
If you’re using a heat gun, keep it moving and hover at a safe distance. It dries paint in a jiffy and gives you more control. IMO, practice on a test piece first to gauge timing.
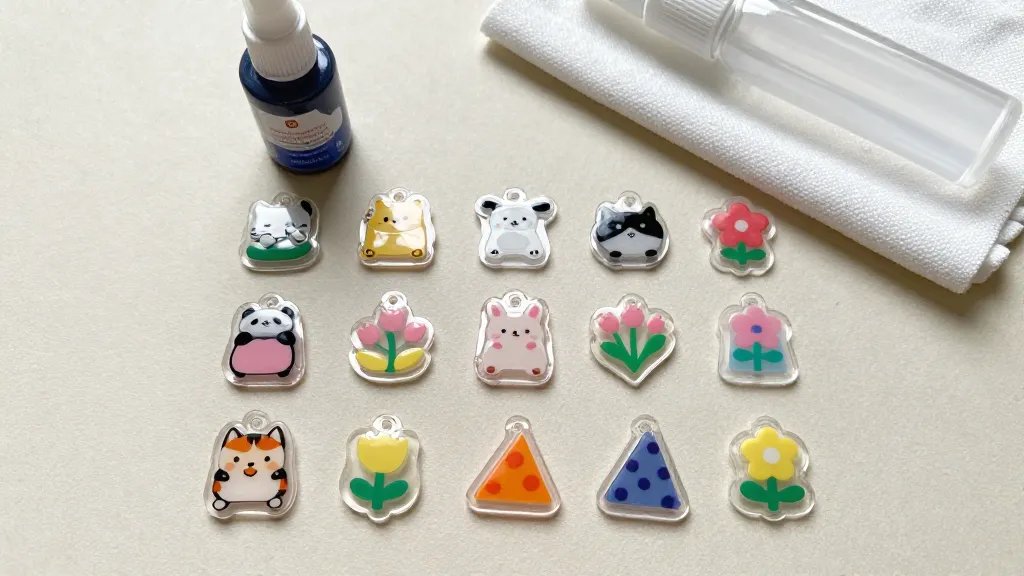
Finishing Touches: Making Your Charms Shine
– Seal with a clear glaze or a coat of clear nail polish to protect colors. Let dry fully.
– Add a jump ring or bead cap for attaching to bracelets, necklaces, or keychains.
– Consider a tiny layer of resin for depth, but only if you’ve done resin crafts before. DIY wins when it’s safe and solid.
Here’s a neat trick: a drop of white paint can create a tiny highlight in an eye or a sparkle on a star. It reads as “polished” even on a tiny scale. FYI, don’t overdo the glaze; you want a smooth, not goopy, finish.
Ways to Use Your Shrink Plastic Charms
– Create a custom charm bracelet with a mix of shapes and colors.
– Adorn a backpack or tote with a quirky set of charms.
– Add a personalized keychain for yourself or as a gift.
– Turn charms into zipper pulls for jackets or hoodies.
If someone asks, “Where’d you get that charm?” you can proudly say you DIY’d it. It’s not just a statement piece—it’s a conversation starter.
Common Mistakes and How to Avoid Them
– Too much detail: Tiny lines disappear after shrinking. Simplify.
– Ignoring burn times: Overbaking makes plastic brittle. Set a timer.
– Skipping sealant: Colors fade with handling. Seal to protect.
– Cutting too close to the design: Fractures happen. Leave a small margin.
Countertip: keep a spare sheet for trial runs. You’ll thank yourself when a design goes wrong the first time but shines the second.
Advanced Tips: Personalization Hacks
Double-Sided Charms
– Bake two identical shapes, add different designs on each side, and glue them back-to-back or connect with a jump ring in the middle.
Layered Colors
– Use colored pencils or markers in stages. Light base colors first, then darker accents. Bake in between if needed to seal layers.
Color Bleed Prevention
– Test colorfastness on a scrap piece. Some markers bleed more than others when heated, so pick brands with strong heat resistance.
FAQ
Do I need special clay or paint for shrink plastic?
Yes, use markers, colored pencils, or paints designed for shrink plastic. Avoid regular acrylics in heavy coats; they can crack or peel.
Can I bake multiple charms at once?
Absolutely. Lay them out flat on a sheet with space between each piece so they don’t fuse together. Keep them evenly spaced, and don’t overcrowd the tray.
How thin should my designs be?
Keep lines bold and avoid ultra-thin details. Shrink plastic can’t hold delicate lines well after shrinking, so aim for clear, chunky designs.
What if my charms curl instead of flattening?
That usually means they started curling before they fully flattened. Try pressing them gently with a clean spatula or a heavy book after they’ve cooled a bit. If they’re stubborn, trim a tiny bit around the edges and start over with a new cut.
Are resin coats worth it for durability?
Resin adds durability and depth, but it’s optional and can be tricky. If you’re new, sealant spray or gloss is a simpler, safer route.
Conclusion
You just unlocked a pile of tiny, wearable art. Shrink plastic charms are playful, affordable, and oddly satisfying to create. FYI, the only limit is your imagination—and maybe your patience on the tiny details. So go on, sketch something bold, bake it, seal it, and slap it on a bracelet, bag, or keychain. Your future self will thank you for the next-level personality you’re about to carry around.


