Ready to spin up some spooky cuteness? Halloween clay ghost decorations are the playful, easy DIY project you didn’t know you needed. Grab your clay, a sharpie, and a vibe that says “I’m festive, not Frankenstein.” FYI, this guide helps you whip up charming ghosts without turning your living room into a craft chaos zone.
Why Clay Ghosts Are The Sweet Spot For Halloween Décor
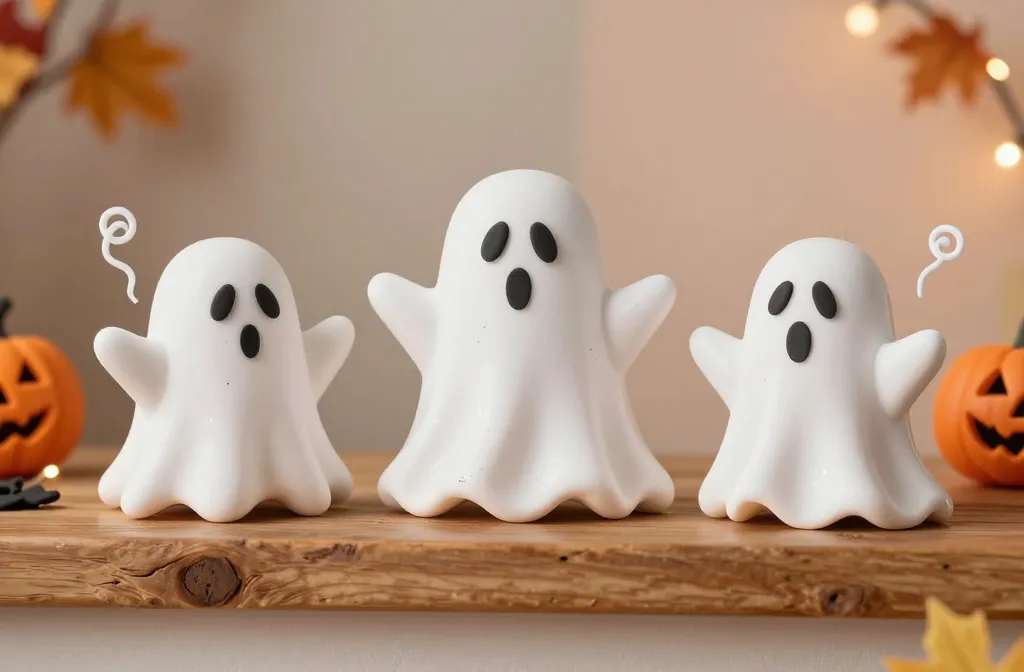
Plastic, paper, or super expensive store-bought decor can feel meh. Clay ghosts bring personality, texture, and a little ghostly whimsy. They’re sturdy, reusable, and surprisingly forgiving for beginners. Do you want decor that travels well from shelf to mantle to windowsill? Clay ghosts are your OG best friend.
Materials They Actually Use (No Mystery Box Required)
- Air-dry clay or polymer clay (depending on whether you want quick air-dry or bake-time sturdiness)
- White wedges or plain white clay as the base
- Black and red markers for faces, or tiny clay eyes
- Curling ribbon or twine for spooky floaters
- Optional: gloss varnish for a ghostly shine
- Optional: glitter or tiny fabric scraps for personality accents
Step-By-Step: How To Mold The Classic Ghost Look
- Roll a compact ball for the head and a slightly elongated body beneath it.
- Pinch in a mouth and dot small indentations for cheeks to give friendly character.
- Attach a simple, flat base so your ghost can stand or hang. If you’re hanging, smooth a loop of string into the top.
- Let them dry (air-dry) or bake according to your clay’s instructions. FYI, patience pays off here—no comically collapsed ghosts, please.
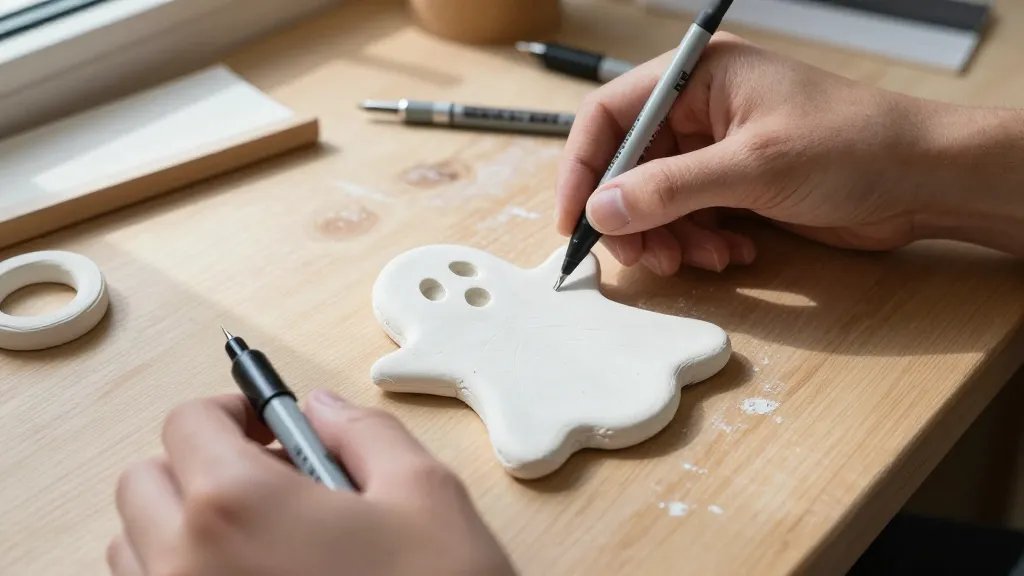
Faces That Speak Volume Without Saying Much
The face makes or breaks the ghost vibe. Do you want cute or spooky? Try these quick ideas:
- Classic sleepy eyes: two tiny oval cutouts with a dot of black in each.
- Playful: one eye winking, a little curved mouth line.
- Spooky: black hollow eyes with a crooked mouth, maybe a tiny red dot for a surprise.
If you hate drawing, you can paint on simple dots or use tiny clay eyes for texture. Either way, keep it bold enough to read from a few feet away—ghosts don’t whisper at Halloween.
Subtle Expressions That Help Them Pop
Sometimes the smallest change makes the biggest impact:
- Angle of the head: tilt a bit for personality.
- Body shape: a wavy, blobbed edge looks more “floaty” than a straight cut.
- Depth: add a tiny second layer for raised cheeks or a floating aura effect.
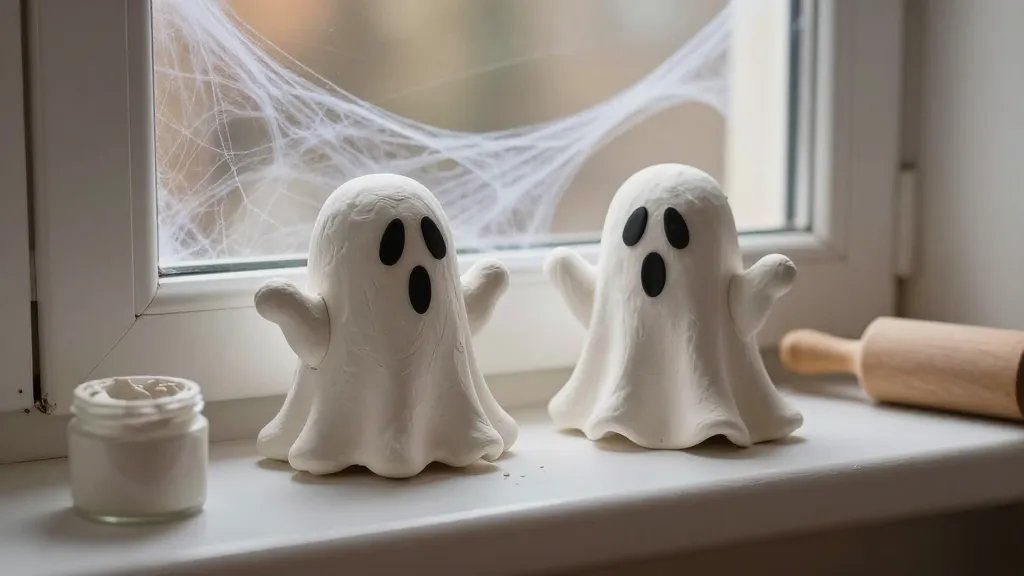
Display Ideas: Where To Put Your Ghosts For Maximum Spark
Ghosts deserve stage time. Here are ideas that maximize their charm:
- Shelf squad: line them up at varying heights with a soft glow nearby.
- Window floaters: thread a loop through the top and hang at eye level from the window frame.
- Doorway welcome: place one per side of the entry with a friendly grin to greet trick-or-treaters.
- Table centerpiece: mix in a few mini pumpkins and leaves for autumn vibes.
Color Twists And Textures: Leveling Up The Cute
White is classic, but you can push the look without losing the ghostly charm. Try:
- Pastel ghosts for a whimsical vibe—think pale lavender or pale mint bodies with black eyes.
- Translucent accents: a thin clear glaze to mimic fog around the edges.
- Texture plays: press a sponge or fabric onto the clay before it dries to create subtle patterns.
Sprinkle In Décor With Minimal Effort
Not every ghost needs full-on face. You can add tiny accessories that still feel Halloween-ish:
- Mini hats or spooky bows
- Tiny capes made from scraps of fabric
- Sequins for a shimmering, spectral effect
Maintenance And Longevity: Keeping Your Ghosts Gorgeous
Want these ghosts to haunt your home for years? Here’s how to keep them crisp:
- Keep them away from direct heat if you’re using air-dry clay to prevent cracking.
- Seal with a light varnish to guard against humidity and smudges.
- Dust gently with a soft brush; avoid damp cloths that could warp the clay.
Traveling Ghosts: Packing For Moves Or Storage
If you upgrade your Halloween display yearly, pack ghosts in individual tissue-lined boxes. Label them by size and design so you don’t end up burying the peppery ghost in a pile of mini pumpkins.
Common Mistakes And How To Avoid Them
We all mess up sometimes, but here are quick fixes so you don’t repeat rookie mistakes:
- Drying too fast: slower is better to prevent cracking. Let nature do its thing.
- Over-glossing: a little shine goes a long way. Too much, and they look plastic.
- Sticky fingers during painting: wear a light glove or use a steady hand—tiny mistakes become character.
Icebreaker Projects If You’re Hosting A Craft Night
Turn this into a mini-party. Ready-made kits can be a hit, but if you’re feeling ambitious, mix in:
- Paint-your-own ghost templates for kids and adults
- Pair ghosts with simple felt halos or capes for cute setups
- A “ghost runway” where guests decorate a ghost and we vote on the eeriest, cutest, or most creative
FAQ
What clay is best for beginners?
Air-dry clay is the easiest entry point—no ovens, no fuss. It dries naturally and is forgiving if you’re still finding your grip on sculpting. If you want a more durable option, polymer clay is great, just follow bake-time instructions carefully.
How long do these ghosts last?
Air-dry ghosts can last several months with proper sealant and storage. Polymer clay ghosts, once baked, can last for years if stored away from direct sunlight and humidity. FYI, they age like fine pumpkin spice latte: slowly and gloriously.
Can I add color or patterns without breaking the ghost vibe?
Absolutely. Subtle color accents, like a blush of gray at the edges or a light shimmer, can add depth. Just keep the overall look soft and ghostly—nobody wants a neon specter in the living room.
Is painting the faces harder than drawing them?
Not really. Markers work well for quick, crisp lines. For paint, use a fine brush and let the layers dry between details. If you mess up, a tiny dab of white clay can reset a feature without starting over.
Can I use these ghosts outdoors?
Yes, but only if you’re using weatherproof materials. Opt for polymer clay or sealed air-dry clay and keep them in a sheltered spot to prevent cracking from temperature swings.
What’s the fastest way to make a bunch of ghosts?
Cut a batch of white clay into uniform chunks, shape heads and bodies together, then batch-assemble faces. A simple line of eyes and a small smile on each ghost saves time while keeping the vibe strong.
Conclusion
Halloween clay ghost decorations bring charm without the chaos. They’re affordable, customizable, and surprisingly forgiving. So grab a few clays, unleash your inner ghost-whisperer, and watch your space light up with playful spookiness. IMO, these little guys are the perfect balance of cute and eerie—and they’re way more shareable than your average plastic pumpkin.


