An honestly playful guide to turning ordinary clay into adorable donut vibes. You’ll laugh, you’ll poke tiny sprinkles, and you’ll end up with a tray full of edible-looking masterpieces—minus the calories. Let’s dive in and bake up some kawaii cuteness.
Getting Your Clay Squad Ready
You don’t start a donut party without the right crew. Gather air-dry or polymer clay in donut colors: blush pink, vanilla, chocolate, and a sprinkle-friendly white. Grab a few sculpting tools, a clean work surface, and a splash of patience. FYI, thin is in for details, but you’ll want a sturdy base so your donuts don’t flop like a science experiment.
Materials That Make a Difference
- Clay in multiple colors
- Clay rollers or a clean Y-shaped glass bottle to flatten
- Fine-tipped brushes for paint and glaze
- Soft blades or dental tools for tiny details
- Gloss glaze or clear resin for a shiny finish
Stock up a bit more than you think you’ll need—tiny toppers love stealing the show, and you don’t want color clashes ruining your vibe.
Shaping the Donut Bases
Shape basics first; round, ring-shaped bases are your canvas. You’ll roll a rope of clay, form a circle, and connect the ends. Then pinch or carve a hole in the middle. The trick is keeping the center hole proportionate so the sprinkles don’t look like a wonky halo.
Technique Tips for Flawless Circles
- Keep clay evenly thick—about 3-4 millimeters works well for air-dry.
- Squash the center slightly to mimic real donuts’ depth.
- Tip: If your ring looks flat, push a tiny donut inside as a support while it dries.
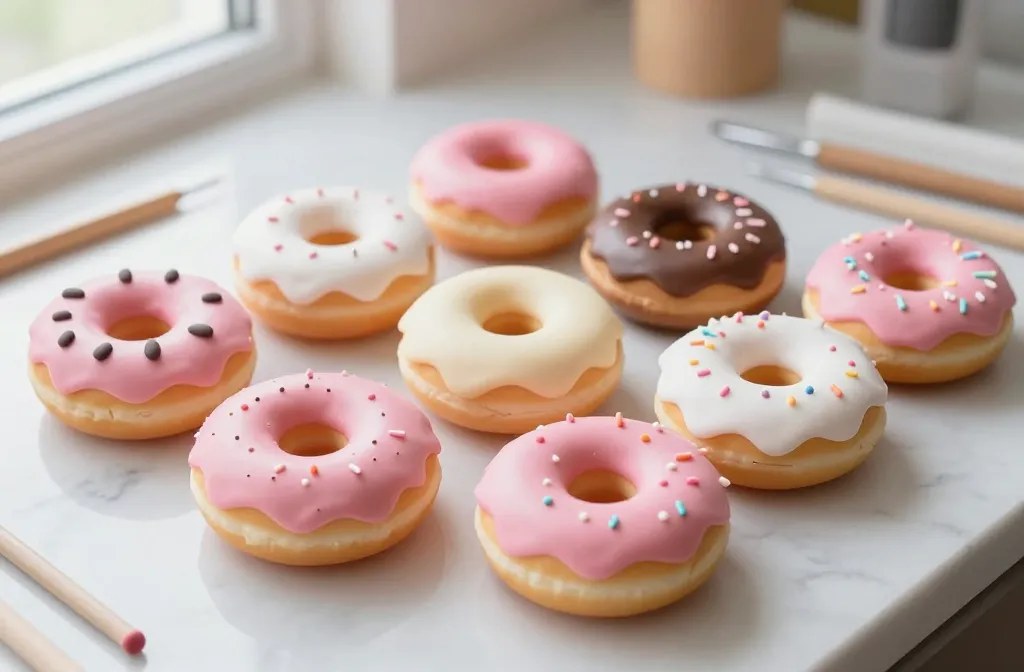
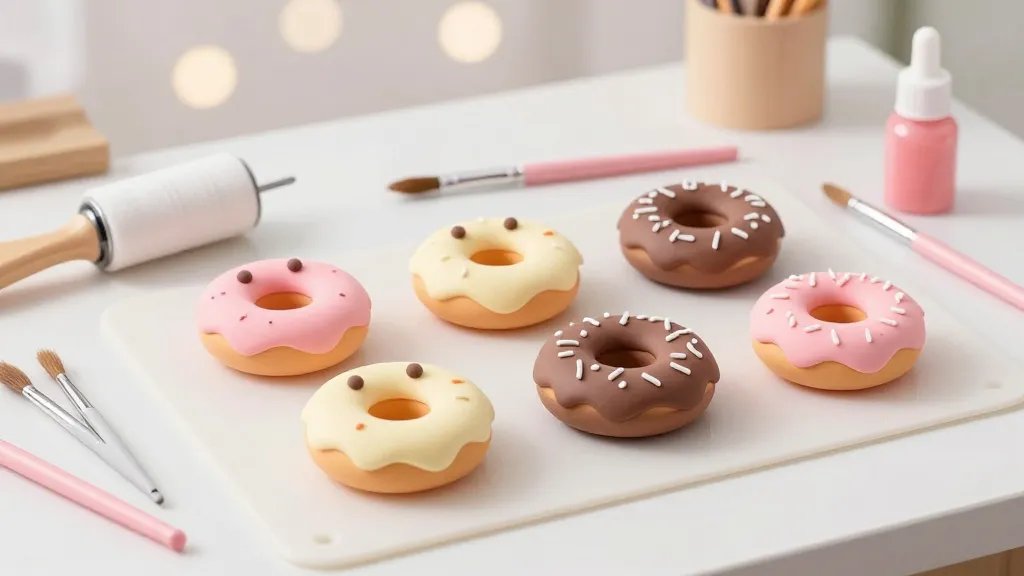
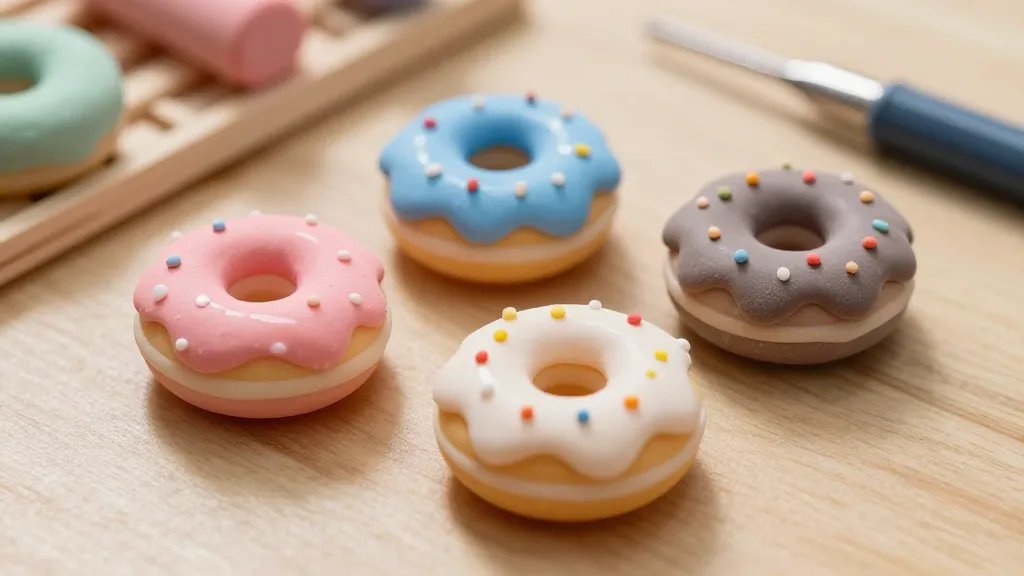
Adding Kawaii Character: Icing, Faces, and Sprinkles
This is where your donuts start talking. Bright icing, tiny faces, and pretend sprinkles turn plain circles into personality-packed treats. Use pastel icing colors or bold contrasts. Don’t be shy with eyes—tiny dots and a small mouth can convey big feelings.
Faces That Melt Hearts
- Two tiny black dots for eyes
- A mini curved line for a smile
- Blush: a dab of pink on cheeks adds instant charm
Remember: keep expressions simple. Too much detail can look crowded on a tiny surface. IMO, less is adorably more here.
Topping the Cuties
- Sprinkles: use small polymer specks or paint tiny dots with a brush
- Chocolate drizzle: dab a thin line and let it crinkle slightly for realism
- Fruit toppings: tiny clay berries or slices add color pop
FYI, glaze finishes are your best friend for that glossy, crave-worthy look—even in clay form.
Drying, Curing, and Finishing Touches
After sculpting, you need patience. Air-dry donuts take a few hours to days, depending on thickness. Polymer clay requires baking in the oven to cure. Follow your clay’s exact instructions—burned masterpieces are not the vibe.
From Clay to Shine: Glaze and Seal
- Let paints dry fully before glazing
- Use a clear gloss glaze or resin for a shiny donut finish
- Apply thin coats; multiple light layers beat one thick goop
Sealants not only give shine but also protect your tiny masterpieces from smudges during handling. FYI, test a small piece first to ensure the glaze doesn’t react oddly with your clay.
Creative Ways to Display Your Donuts
Holding a gallery of kawaii donuts sounds adorable, and it is. Consider display options that showcase texture, color, and personality.
Display Ideas That Elevate Your Craft
- Mini stand platter: stack a few on a tiered stand
- Shadow box: arrange as a tiny bakery scene
- Neat line-up: create a string of donuts using a thin thread
These display ideas are not just cute—they’re practical for photos, social posts, and gifts. IMO, the best part is how easy it is to rearrange for new vibes.
Common Mistakes (And How to Avoid Them)
We’ve all baked, er, crafted mistakes. Here are the top pitfalls and quick fixes so you skip the cringe.
Overworking the Dough, Uh, Clay
Stretching and rerolling can make the clay tough or crumbly. Stop when the shape feels smooth and even. If it starts to crumble, try wrapping it in plastic and letting it rest for a bit, then come back with fresh momentum.
Uneven Drying and Warping
Airflow matters. Keep models on a flat surface and away from drafts. Rotate them occasionally so they dry evenly. If a donut sinks in the middle, a tiny support underneath can do wonders.
FAQ: Your Quick Donut-Clay Qs
Can I bake air-dry clay in an oven?
Nope. Air-dry clay cures at room temperature. If you see a recipe that says bake air-dry clay, it’s a red flag: it will crack or burn. Use polymer clay for oven-baking projects, but strictly follow the manufacturer’s temperature and time guidelines.
What’s the best glue for attaching toppings?
For glue-on toppings, use a tiny dab of craft glue or tacky glue. Some people use super glue for hard shells, but be cautious with hot glue on delicate features. Let the glue cure fully before glazing.
How do I fix a cracked donut?
Don’t panic. Lightly sand the surface and smooth with a bit of fresh clay in the same color. Re-dampen your fingers and blend the seam. Let it dry again and apply an extra glaze layer once fixed.
What finishes give the most realistic shine?
Gloss glaze or clear resin top coats give the candy-bright shine. Apply in thin layers and let each coat cure. For polymer clay, don’t skip the sealing step—unsealed pieces pick up oils and fingerprints fast.
How long do these donuts last?
Air-dry donuts last quite a while if kept in a dry, dust-free area. Polymer clay donuts cure permanently and won’t degrade, but the finish can yellow slightly over many years if exposed to direct sunlight. IMO, keep them out of sun-drenched shelves for longevity.
Conclusion: Your Kawaii Donut Adventure Starts Now
If you’ve read this far, you’re clearly ready to curl your fingers into a batch of sugary-looking clay cuties. Start small: an easy pink glaze with a tiny smile, then level up with sprinkles and fruit toppings. The more you practice, the more whimsical your donuts become. So what are you waiting for—grab your clay, roll out a ring, and start crafting adorable little treats that look good enough to eat (even though you know they’re not). Happy sculpting, friend—your desk just found its cutest new crew.


