An easy, adorable project you can whip up in a rainy afternoon. Cute, crave-worthy, and totally Instagrammable, these DIY kawaii clay phone charms are the kind of craft that makes you feel like a tiny sorcerer of whimsy. Let’s dive in and make you the envy of every desk drawer and group chat.
What You Need to Get Started
The basics are simple, and you probably already have most of them. Clay, tools, and a dash of patience are all you need to kick off this kawaii journey. FYI, quality really matters here—soft, oil-based clay is forgiving, while polymer clay sets with decent color payoff give you crisp details after baking.
- Clay: polymer or air-dry work great. Choose bright pastel tones for max cuteness.
- Tools: a basic clay cutter, a needle tool, and a rolling pin. You don’t need a fancy setup; a chopstick works in a pinch.
- Sealer: a clear gloss to protect your charms from coffee spills and pocket chaos.
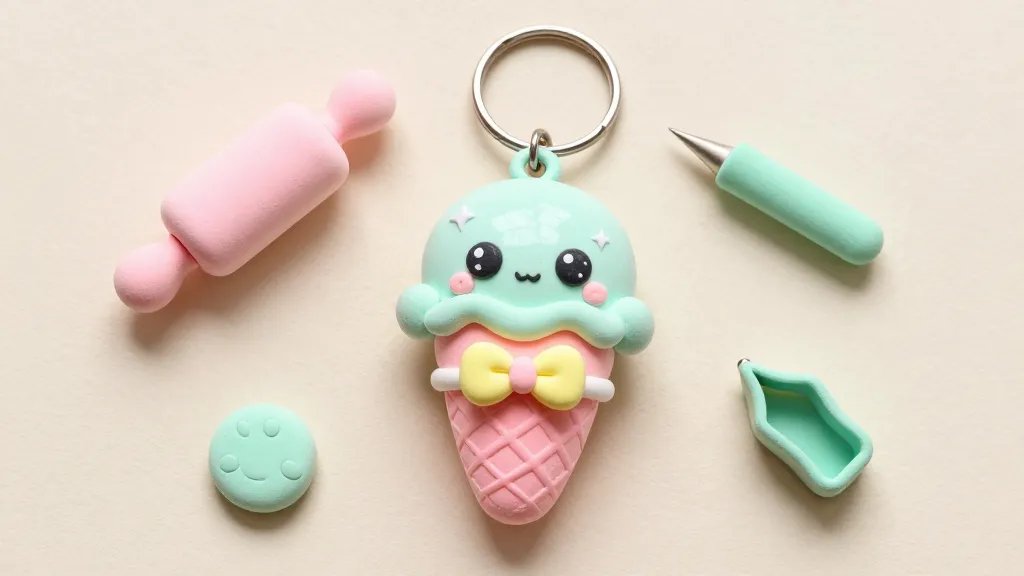
- Jump rings and a small clasp or keyring for attachment. Bonus points for dainty hardware.
- Paints or gels: white for highlights, black for eyes, and tiny accents.
Design Ideas That Spark Joy
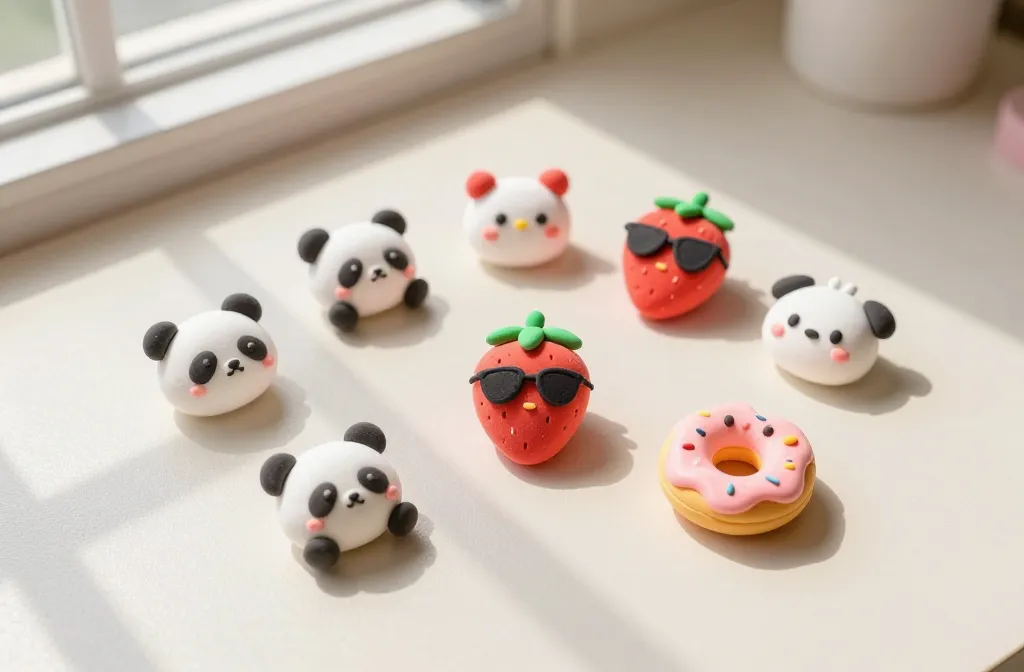
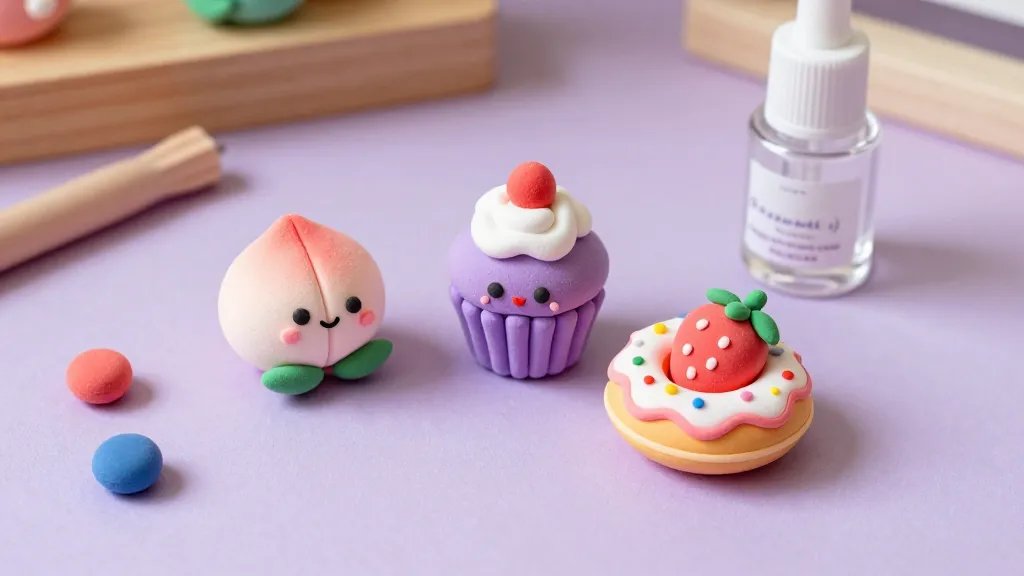
What separates a cute charm from a legendary one? A killer design with personality. Think tiny foods, cute animals, or mini everyday objects with big smiles. Brainstorm quick concepts: a smiling panda eraser, a dreamy strawberry with sunglasses, or a donut with a bite taken out and a sympathetic face.
Character Your Charms
– Give each charm a tiny story. A donut with a secret love for coffee, a cat who refuses to blink, or a sushi roll that’s surprisingly dramatic. The backstory makes them memorable.
– Try a “glance” motif. A tiny face with big eyes and a small mouth instantly reads kawaii from across the room.
Color Palettes That Pop
– Pastel rainbow: cotton candy pinks, baby blues, mint greens, and lavender.
– Strawberry lemonade: pinks, yellows, and a splash of lime for zing.
– Classic cake slice: light beige, pink icing, and chocolate sprinkles.
Step-By-Step: The Quick-and-Easy Method
Here’s a no-stress method that yields adorable results in under an afternoon.
- Shape your base charm. Roll, flatten, and cut into cute shapes—stars, hearts, fruits, animals. Don’t stress about perfection; imperfections read charming.
- Detail with tiny features. Use a pointed tool to add eyes, a mouth, blush, or tiny accessories. Small = adorable; big = dramatic, so keep it sweet.
- Bake or air-dry. Follow your clay’s instructions. If you’re baking, monitor closely to avoid scorching the edges.
- Seal your masterpiece. A light coat of gloss sealer protects color and keeps smudges at bay.
- Attach hardware. Glue on a jump ring and tassel or keyring. Let the glue cure fully before you yank your phone away from danger.
Detail Tricks For Pro-Level Finish
Little tweaks can elevate your charms from cute to wow. Try these.
Eyes, Noses, and Expressions
– Use a fine-point tool or toothpick to place a tiny white dot for eyes and a black dot for pupils. A tiny curved line for a smile instantly breathes personality.
– Add cheek blush with a dab of pink paint or pastel pigment. It softens the look and adds dimension.
Texture Plays
– Add tiny textures by pressing a comb edge lightly for lines on a leaf or fur texture on a cat. Don’t overdo it; subtle is cute.
– Sprinkle a smidge of glitter or tiny seed beads for extra sparkle. Just be careful not to mess with durability.
Keeping Your Kawaii Charms Durable
Quality finish matters when your buddy is shoved into a pocket every day. Here’s how to keep them looking fresh.
- Seal thoroughly. A couple of light coats of gloss sealant survive daily wear.
- Test before you commit. Bake and seal one prototype to gauge durability.
- Avoid overhandling when wet. Let the charm dry completely before attaching hardware.
Creative Variations: What If You’re Not a Pro?
If you’re feeling stuck or short on time, these quick twists keep the vibe.
Mini Spheres and Beads
Turn small beads into a charm by layering translucent clay over a bead core. Add tiny faces and pin them to simple loops.
Flat vs. 3D
Flat charms look polished and are forgiving for beginners. 3D shapes add depth but require a steadier hand and more curing time.
Storage, Display, and Sharing Your Creations
So you’ve got a handful of cuties. Now what?
- Store clay scraps in labeled bags to keep colors from bleeding into one another.
- Display your favorites on a pegboard or a cute dish. Treats for the eyes can be decorative too.
- Share receipts and tutorials. FYI, you’ll get DMs from friends asking for tips, so be ready to shine.
FAQ
Can I use air-dry clay instead of polymer clay?
Air-dry clay is friendlier for beginners and cleanup is easier. It doesn’t need baking, but it can be less durable over time. If you’re making items for daily use, polymer clay with proper baking and sealing tends to last longer.
How long do these charms take from start to finish?
A basic charm can be done in 1–2 hours, including drying and sealing. More intricate designs with multiple colors and textures might take 3–4 hours spread over a day or two.
What’s the best glue for attaching the hardware?
Two-part epoxy or super glue rated for plastics and metal usually works best. Apply a tiny amount and let it cure fully before you handle the piece.
How do I prevent color colors from bleeding?
Work in small batches, keep a clean workspace, and seal colors after you’re done painting. If you’re layering translucent colors, let each layer dry completely before adding the next.
Any quick tips for beginners?
– Start with simple shapes like hearts, stars, or fruit slices.
– Keep tools clean to avoid smudging colors.
– Don’t overthink facial features; cute = imperfect sometimes.
Conclusion
DIY kawaii clay phone charms are the perfect cozy-project side quest: satisfying, portable, and endlessly customizable. They’re your chance to flex a little creativity without turning your space into a mud pit of supplies. So grab some clay, channel your inner snack-loving animal, and start crafting. FYI, you’ll probably want to make more than you can fit on your phone—and that’s totally the point. Happy shaping, friend!


